OpenID Connect authorization code flow mechanism for protecting web applications
To protect your web applications, you can use the industry-standard OpenID Connect (OIDC) Authorization Code Flow mechanism provided by the Quarkus OIDC extension.
Overview of the OIDC authorization code flow mechanism
The Quarkus OpenID Connect (OIDC) extension can protect application HTTP endpoints by using the OIDC Authorization Code Flow mechanism supported by OIDC-compliant authorization servers, such as Keycloak.
The Authorization Code Flow mechanism authenticates users of your web application by redirecting them to an OIDC provider, such as Keycloak, to log in. After authentication, the OIDC provider redirects the user back to the application with an authorization code that confirms that authentication was successful. Then, the application exchanges this code with the OIDC provider for an ID token (which represents the authenticated user), an access token, and a refresh token to authorize the user’s access to the application.
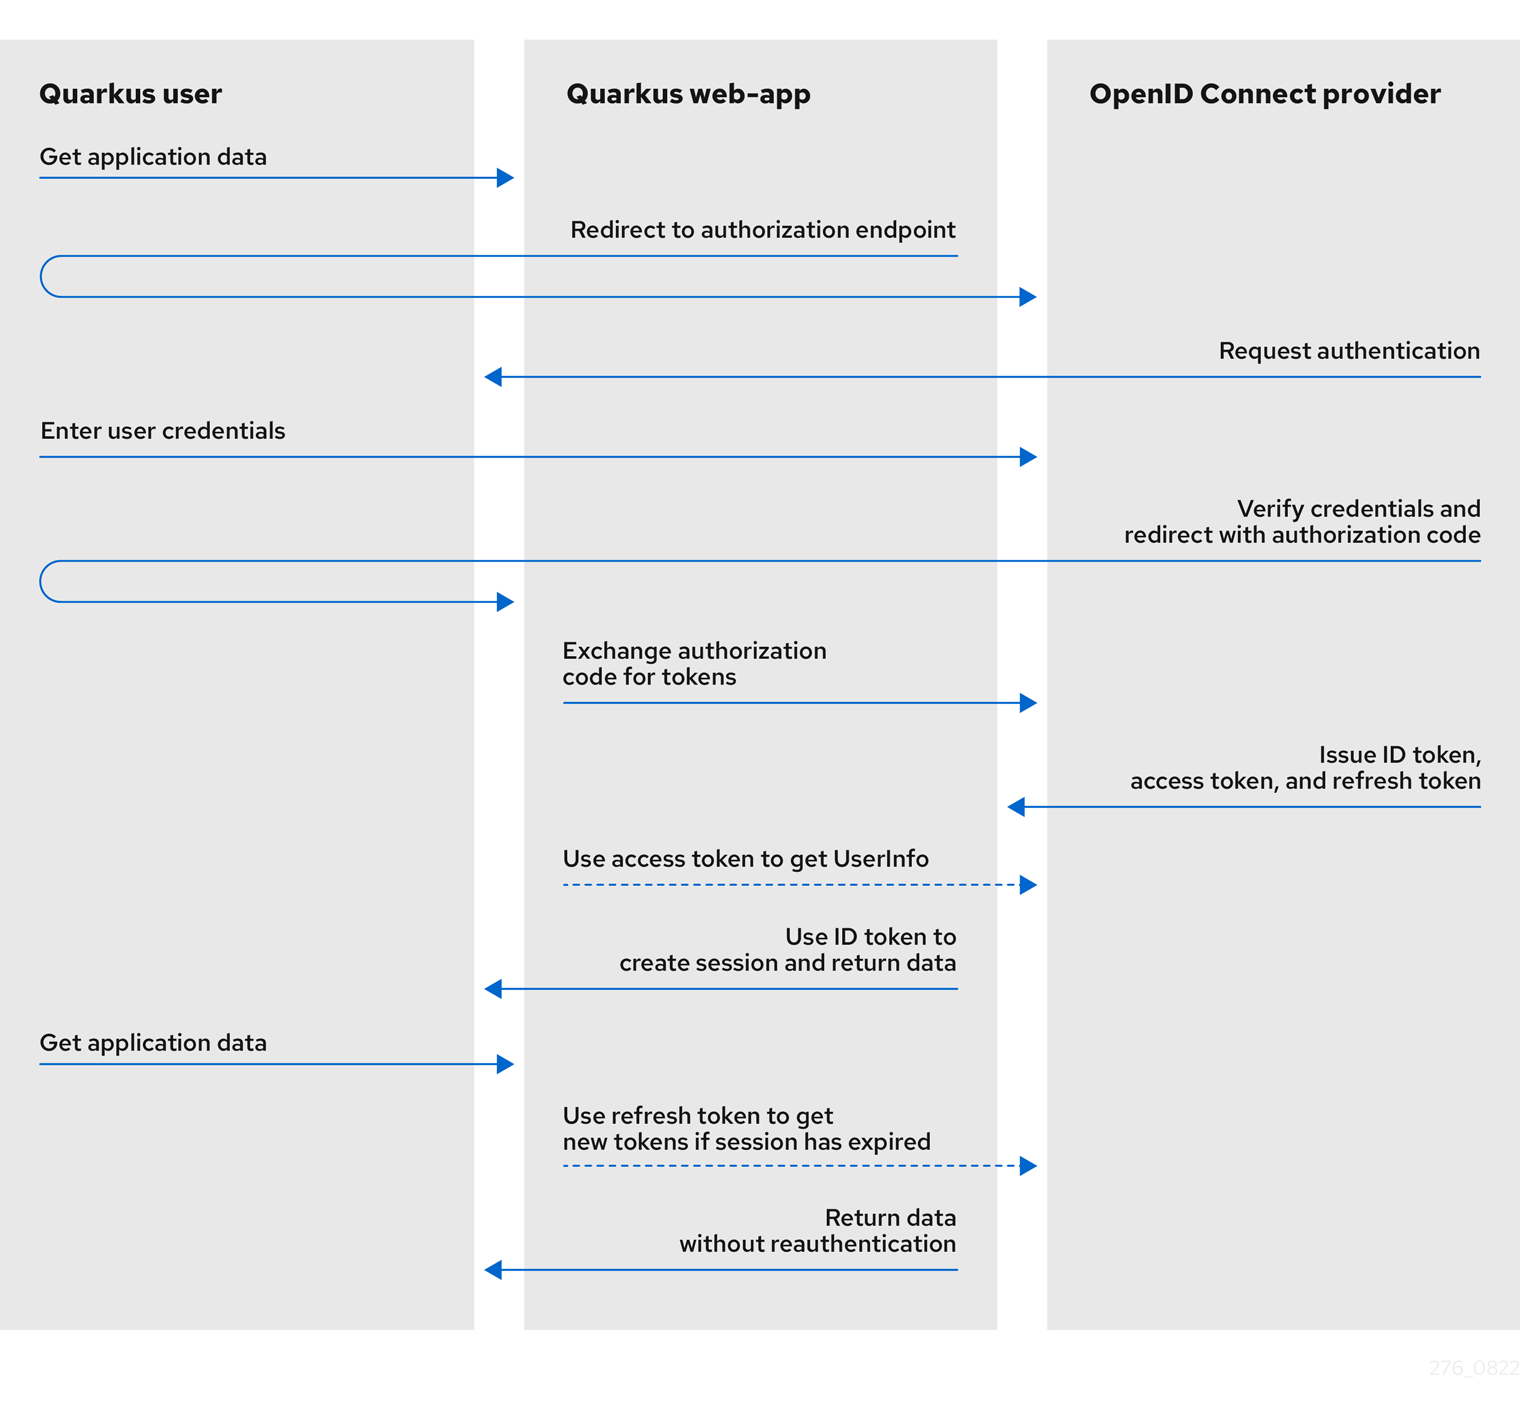
The following diagram outlines the Authorization Code Flow mechanism in Quarkus.
-
The Quarkus user requests access to a Quarkus
web-appapplication. -
The Quarkus web-app redirects the user to the authorization endpoint, that is, the OIDC provider for authentication.
-
The OIDC provider redirects the user to a login and authentication prompt.
-
At the prompt, the user enters their user credentials.
-
The OIDC provider authenticates the user credentials entered and, if successful, issues an authorization code and redirects the user back to the Quarkus web-app with the code included as a query parameter.
-
The Quarkus web-app exchanges this authorization code with the OIDC provider for ID, access, and refresh tokens.
The authorization code flow is complete, and the Quarkus web-app uses the tokens issued to access user information and to grant the relevant role-based authorization. The following tokens are issued:
-
ID token: The Quarkus
web-appapplication uses the user information in the ID token to enable the authenticated user to log in securely and to provide role-based access to the web application. -
Access token: The Quarkus web-app might use the access token to access the UserInfo API to get additional information about the authenticated user or to propagate it to another endpoint.
-
Refresh token: (Optional) If the ID and access tokens expire, the Quarkus web-app can use the refresh token to get new ID and access tokens.
See also the OIDC configuration properties reference guide.
To learn about how you can protect web applications by using the OIDC Authorization Code Flow mechanism, see Protect a web application by using OIDC authorization code flow.
If you want to protect service applications by using OIDC Bearer token authentication, see OIDC Bearer token authentication.
For information about supporting multiple tenants, see Using OpenID Connect Multi-Tenancy.
If you are a Vert.x OIDC user, learn about migration options in the Migrate from Vert.x OIDC to Quarkus OIDC guide.
Using the authorization code flow mechanism
Configuring Quarkus to support authorization code flow
To enable an authorization code flow authentication, the quarkus.oidc.application-type property must be set to web-app.
Usually, the Quarkus OIDC web-app application type must be set when your Quarkus application is a frontend application that serves HTML pages and requires an OIDC single sign-on login.
For the Quarkus OIDC web-app application, the authorization code flow is the preferred method for user authentication.
When your application serves HTML pages and provides REST API at the same time, and requires both the authorization code flow authentication and the bearer access token authentication, the quarkus.oidc.application-type property can be set to hybrid instead.
In this case, the authorization code flow is triggered only when the HTTP Authorization request header with the Bearer scheme and a bearer access token is not available.
Configuring access to the OIDC provider endpoint
The OIDC web-app application requires URLs of the OIDC provider’s authorization, token, JsonWebKey (JWK) set, and possibly the UserInfo, introspection, and end-session (RP-initiated logout) endpoints.
By convention, they are discovered by adding a /.well-known/openid-configuration path to the configured quarkus.oidc.auth-server-url.
Alternatively, if the discovery endpoint is not available, or you prefer to reduce the discovery endpoint round-trip, you can disable endpoint discovery and configure relative path values. For example:
quarkus.oidc.auth-server-url=http://localhost:8180/realms/quarkus
quarkus.oidc.discovery-enabled=false
# Authorization endpoint: http://localhost:8180/realms/quarkus/protocol/openid-connect/auth
quarkus.oidc.authorization-path=/protocol/openid-connect/auth
# Token endpoint: http://localhost:8180/realms/quarkus/protocol/openid-connect/token
quarkus.oidc.token-path=/protocol/openid-connect/token
# JWK set endpoint: http://localhost:8180/realms/quarkus/protocol/openid-connect/certs
quarkus.oidc.jwks-path=/protocol/openid-connect/certs
# UserInfo endpoint: http://localhost:8180/realms/quarkus/protocol/openid-connect/userinfo
quarkus.oidc.user-info-path=/protocol/openid-connect/userinfo
# Token Introspection endpoint: http://localhost:8180/realms/quarkus/protocol/openid-connect/token/introspect
quarkus.oidc.introspection-path=/protocol/openid-connect/token/introspect
# End-session endpoint: http://localhost:8180/realms/quarkus/protocol/openid-connect/logout
quarkus.oidc.end-session-path=/protocol/openid-connect/logout
Some OIDC providers support metadata discovery but do not return all the endpoint URLs required for the authorization code flow to complete or to support application functions, such as user logout. To work around this limitation, you can configure the missing endpoint URL values locally, as outlined in the following example:
# Metadata is auto-discovered, but it does not return an end-session endpoint URL

quarkus.oidc.auth-server-url=http://localhost:8180/oidcprovider/account

# Configure the end-session URL locally.
# It can be an absolute or relative (to 'quarkus.oidc.auth-server-url') address
quarkus.oidc.end-session-path=logout
You can use the same configuration to override a discovered endpoint URL if that URL is not suitable for the local Quarkus endpoint and a more specific value is required.
For example, a provider that supports both global and application-specific end-session endpoints returns a global end-session URL such as http://localhost:8180/oidcprovider/account/global-logout.
This URL logs the user out of all applications the user is currently logged into.
However, if the requirement is for the current application to log the user out of a specific application only, you can override the global end-session URL by setting the quarkus.oidc.end-session-path=logout parameter.
OIDC provider client authentication
OIDC providers typically require applications to be identified and authenticated when they interact with the OIDC endpoints.
Quarkus OIDC, specifically the quarkus.oidc.runtime.OidcProviderClient class, authenticates to the OIDC provider when the authorization code must be exchanged for the ID, access, and refresh tokens, or when the ID and access tokens must be refreshed or introspected.
Typically, client IDs and client secrets are defined for a given application when it enlists with the OIDC provider. All OIDC client authentication options are supported. For example:
client_secret_basic:quarkus.oidc.auth-server-url=http://localhost:8180/realms/quarkus/
quarkus.oidc.client-id=quarkus-app
quarkus.oidc.credentials.secret=mysecretOr:
quarkus.oidc.auth-server-url=http://localhost:8180/realms/quarkus/
quarkus.oidc.client-id=quarkus-app
quarkus.oidc.credentials.client-secret.value=mysecret
The following example shows the secret retrieved from a credentials provider:
quarkus.oidc.auth-server-url=http://localhost:8180/realms/quarkus/
quarkus.oidc.client-id=quarkus-app

# This is a key that will be used to retrieve a secret from the map of credentials returned from CredentialsProvider
quarkus.oidc.credentials.client-secret.provider.key=mysecret-key
# This is the keyring provided to the CredentialsProvider when looking up the secret, set only if required by the CredentialsProvider implementation
quarkus.oidc.credentials.client-secret.provider.keyring-name=oidc
# Set it only if more than one CredentialsProvider can be registered
quarkus.oidc.credentials.client-secret.provider.name=oidc-credentials-providerclient_secret_postquarkus.oidc.auth-server-url=http://localhost:8180/realms/quarkus/
quarkus.oidc.client-id=quarkus-app
quarkus.oidc.credentials.client-secret.value=mysecret
quarkus.oidc.credentials.client-secret.method=postclient_secret_jwt, where the signature algorithm is HS256:quarkus.oidc.auth-server-url=http://localhost:8180/realms/quarkus/
quarkus.oidc.client-id=quarkus-app
quarkus.oidc.credentials.jwt.secret=AyM1SysPpbyDfgZld3umj1qzKObwVMkoqQ-EstJQLr_T-1qS0gZH75aKtMN3Yj0iPS4hcgUuTwjAzZr1Z9CAowclient_secret_jwt, where the secret is retrieved from a credentials provider:quarkus.oidc.auth-server-url=http://localhost:8180/realms/quarkus/
quarkus.oidc.client-id=quarkus-app
# This is a key that will be used to retrieve a secret from the map of credentials returned from CredentialsProvider
quarkus.oidc.credentials.jwt.secret-provider.key=mysecret-key
# This is the keyring provided to the CredentialsProvider when looking up the secret, set only if required by the CredentialsProvider implementation
quarkus.oidc.credentials.client-secret.provider.keyring-name=oidc
# Set it only if more than one CredentialsProvider can be registered
quarkus.oidc.credentials.jwt.secret-provider.name=oidc-credentials-providerprivate_key_jwt with the PEM key inlined in application.properties, and where the signature algorithm is RS256:quarkus.oidc.auth-server-url=http://localhost:8180/realms/quarkus/
quarkus.oidc.client-id=quarkus-app
quarkus.oidc.credentials.jwt.key=Base64-encoded private key representationprivate_key_jwt with the PEM key file, and where the signature algorithm is RS256:quarkus.oidc.auth-server-url=http://localhost:8180/realms/quarkus/
quarkus.oidc.client-id=quarkus-app
quarkus.oidc.credentials.jwt.key-file=privateKey.pemprivate_key_jwt with the keystore file, where the signature algorithm is RS256:quarkus.oidc.auth-server-url=http://localhost:8180/realms/quarkus/
quarkus.oidc.client-id=quarkus-app
quarkus.oidc.credentials.jwt.key-store-file=keystore.pkcs12
quarkus.oidc.credentials.jwt.key-store-password=mypassword
quarkus.oidc.credentials.jwt.key-password=mykeypassword
# Private key alias inside the keystore
quarkus.oidc.credentials.jwt.key-id=mykeyAliasUsing client_secret_jwt or private_key_jwt authentication methods ensures that a client secret is not sent to the OIDC provider, thereby avoiding the risk of interception by a 'man-in-the-middle' attack.
quarkus.oidc.auth-server-url=http://localhost:8180/realms/quarkus/
quarkus.oidc.client-id=quarkus-app
quarkus.oidc.credentials.jwt.source=bearer (1)
quarkus.oidc.credentials.jwt.token-path=/var/run/secrets/tokens (2)| 1 | Use a JWT bearer token to authenticate the OIDC provider client. For more information, see the Using JWTs for Client Authentication section. |
| 2 | Path to a JWT bearer token. Quarkus loads a new token from the filesystem and reloads it when the token expires. |
SPIFFE (Secure Production Identity Framework for Everyone) JWT-SVID tokens can be used as client assertions for client authentication.
When the JWT source is set to spiffe-jwt, the client_assertion_type parameter is set to urn:ietf:params:oauth:client-assertion-type:jwt-spiffe and the token’s sub claim must contain a valid SPIFFE ID starting with spiffe://.
quarkus.oidc.auth-server-url=http://localhost:8180/realms/quarkus/
quarkus.oidc.client-id=quarkus-app
quarkus.oidc.credentials.jwt.source=spiffe-jwt (1)
quarkus.oidc.credentials.jwt.token-path=/var/run/secrets/tokens (2)| 1 | Use a SPIFFE JWT-SVID token to authenticate the OIDC provider client. |
| 2 | Path to a SPIFFE JWT-SVID token.
Quarkus loads a new token from the filesystem and reloads it when the token expires.
The token’s sub claim is verified to start with the spiffe:// scheme. |
Additional JWT authentication options
If client_secret_jwt, private_key_jwt, or an Apple post_jwt authentication method is used, then you can customize the JWT signature algorithm, key identifier, audience, subject, and issuer.
例如:
# private_key_jwt client authentication
quarkus.oidc.auth-server-url=http://localhost:8180/realms/quarkus/
quarkus.oidc.client-id=quarkus-app
quarkus.oidc.credentials.jwt.key-file=privateKey.pem
# This is a token key identifier 'kid' header - set it if your OIDC provider requires it:
# Note if the key is represented in a JSON Web Key (JWK) format with a `kid` property, then
# using 'quarkus.oidc.credentials.jwt.token-key-id' is not necessary.
quarkus.oidc.credentials.jwt.token-key-id=mykey
# Use RS512 signature algorithm instead of the default RS256
quarkus.oidc.credentials.jwt.signature-algorithm=RS512
# The token endpoint URL is the default audience value; use the base address URL instead:
quarkus.oidc.credentials.jwt.audience=${quarkus.oidc-client.auth-server-url}
# custom subject instead of the client ID:
quarkus.oidc.credentials.jwt.subject=custom-subject
# custom issuer instead of the client ID:
quarkus.oidc.credentials.jwt.issuer=custom-issuerApple POST JWT
The Apple OIDC provider uses a client_secret_post method, in which the secret is a JWT produced with a private_key_jwt authentication method, but with the Apple account-specific issuer and subject claims.
In Quarkus Security, quarkus-oidc supports a non-standard client_secret_post_jwt authentication method, which you can configure as follows:
# Apple provider configuration sets a 'client_secret_post_jwt' authentication method
quarkus.oidc.provider=apple

quarkus.oidc.client-id=${apple.client-id}
quarkus.oidc.credentials.jwt.key-file=ecPrivateKey.pem
quarkus.oidc.credentials.jwt.token-key-id=${apple.key-id}
# Apple provider configuration sets ES256 signature algorithm

quarkus.oidc.credentials.jwt.subject=${apple.subject}
quarkus.oidc.credentials.jwt.issuer=${apple.issuer}
mutual TLS (mTLS)
Some OIDC providers might require that a client be authenticated as part of the mutual TLS authentication process.
The following example shows how you can configure quarkus-oidc to support mTLS:
quarkus.oidc.tls.tls-configuration-name=oidc

# configure hostname verification if necessary
#quarkus.tls.oidc.hostname-verification-algorithm=NONE

# Keystore configuration
quarkus.tls.oidc.key-store.p12.path=client-keystore.p12
quarkus.tls.oidc.key-store.p12.password=${key-store-password}

# Add more keystore properties if needed:
#quarkus.tls.oidc.key-store.p12.alias=keyAlias
#quarkus.tls.oidc.key-store.p12.alias-password=keyAliasPassword

# Truststore configuration
quarkus.tls.oidc.trust-store.p12.path=client-truststore.p12
quarkus.tls.oidc.trust-store.p12.password=${trust-store-password}
# Add more truststore properties if needed:
#quarkus.tls.oidc.trust-store.p12.alias=certAlias
POST query
Some providers, such as the Strava OAuth2 provider, require client credentials to be posted as HTTP POST query parameters:
quarkus.oidc.provider=strava
quarkus.oidc.client-id=quarkus-app
quarkus.oidc.credentials.client-secret.value=mysecret
quarkus.oidc.credentials.client-secret.method=query
Introspection endpoint authentication
Some OIDC providers require authentication to their introspection endpoint by using Basic authentication with credentials that differ from the client_id and client_secret.
If you have previously configured security authentication to support either the client_secret_basic or client_secret_post client authentication methods as described in the OIDC provider client authentication section, you might need to apply the additional configuration as follows.
If the tokens have to be introspected and the introspection endpoint-specific authentication mechanism is required, you can configure quarkus-oidc as follows:
quarkus.oidc.introspection-credentials.name=introspection-user-name
quarkus.oidc.introspection-credentials.secret=introspection-user-secret
OIDC request filters
You can filter OIDC requests made by Quarkus to the OIDC provider by registering one or more OidcRequestFilter implementations, which can update or add new request headers, customize a request body, and also log requests.
例如:
package io.quarkus.it.keycloak;

import io.quarkus.oidc.OidcConfigurationMetadata;
import jakarta.enterprise.context.ApplicationScoped;

import io.quarkus.arc.Unremovable;
import io.quarkus.oidc.common.OidcRequestFilter;
import io.smallrye.mutiny.Uni;

@ApplicationScoped
@Unremovable
public class OidcTokenRequestCustomizer implements OidcRequestFilter {
    @Override
    public Uni<Void> filter(OidcRequestFilterContext requestContext) {
        OidcConfigurationMetadata metadata = requestContext.contextProperties().get(OidcConfigurationMetadata.class.getName()); (1)
        // Metadata URI is absolute, request URI value is relative
        if (metadata.getTokenUri().endsWith(requestContext.request().uri())) { (2)
            requestContext.request().putHeader("TokenGrantDigest", calculateDigest(requestContext.requestBody().toString()));
        }
        return Uni.createFrom().voidItem();
    }
    private String calculateDigest(String bodyString) {
        // Apply the required digest algorithm to the body string
    }
}| 1 | Get OidcConfigurationMetadata, which contains all supported OIDC endpoint addresses. |
| 2 | Use OidcConfigurationMetadata to filter requests to the OIDC token endpoint only. |
Alternatively, you can use an @OidcEndpoint annotation to apply this filter to responses from the OIDC discovery endpoint only:
package io.quarkus.it.keycloak;

import jakarta.enterprise.context.ApplicationScoped;

import io.quarkus.arc.Unremovable;
import io.quarkus.oidc.common.OidcEndpoint;
import io.quarkus.oidc.common.OidcEndpoint.Type;
import io.quarkus.oidc.common.OidcRequestContext;
import io.quarkus.oidc.common.OidcRequestFilter;
import io.smallrye.mutiny.Uni;

@ApplicationScoped
@Unremovable
@OidcEndpoint(value = Type.DISCOVERY) (1)
public class OidcDiscoveryRequestCustomizer implements OidcRequestFilter {

    @Override
    public Uni<Void> filter(OidcRequestFilterContext requestContext) {
        requestContext.request().putHeader("Discovery", "OK");
        return Uni.createFrom().voidItem();
    }
}| 1 | Restrict this filter to requests targeting the OIDC discovery endpoint only. |
OidcRequestContextProperties can be used to access request properties.
Currently, you can use a tenand_id key to access the OIDC tenant ID and a grant_type key to access the grant type that the OIDC provider uses to acquire tokens.
The grant_type can only be set to either an authorization_code or refresh_token grant type when requests are made to the token endpoint.
It is null in all other cases.
OidcRequestFilter can customize a request body by preparing an instance of io.vertx.mutiny.core.buffer.Buffer
and setting it on a request context, for example:
package io.quarkus.it.keycloak;

import jakarta.enterprise.context.ApplicationScoped;

import io.quarkus.arc.Unremovable;
import io.quarkus.oidc.common.OidcEndpoint;
import io.quarkus.oidc.common.OidcEndpoint.Type;
import io.quarkus.oidc.common.OidcRequestContextProperties;
import io.quarkus.oidc.common.OidcRequestFilter;
import io.smallrye.mutiny.Uni;
import io.vertx.mutiny.core.buffer.Buffer;

@ApplicationScoped
@Unremovable
@OidcEndpoint(value = Type.TOKEN)
public class TokenRequestFilter implements OidcRequestFilter {

    @Override
    public Uni<Void> filter(OidcRequestFilterContext rc) {
        // Add more required properties to the token request
        rc.requestBody(Buffer.buffer(rc.requestBody().toString() + "&opaque_token_param=opaque_token_value"));
        return Uni.createFrom().voidItem();
    }
}
OIDC response filters
You can filter responses from the OIDC providers by registering one or more OidcResponseFilter implementations, which can check the response status, headers, and body to log them or perform other actions.
You can have a single filter intercepting all the OIDC responses, or use an @OidcEndpoint annotation to apply this filter to the specific endpoint responses only. For example:
package io.quarkus.it.keycloak;

import jakarta.enterprise.context.ApplicationScoped;

import io.quarkus.arc.Unremovable;
import io.quarkus.logging.Log;
import io.quarkus.oidc.common.OidcEndpoint;
import io.quarkus.oidc.common.OidcEndpoint.Type;
import io.quarkus.oidc.common.OidcResponseFilter;
import io.smallrye.mutiny.Uni;
import io.quarkus.oidc.common.runtime.OidcConstants;
import io.quarkus.oidc.runtime.OidcUtils;

@ApplicationScoped
@Unremovable
@OidcEndpoint(value = Type.TOKEN) (1)
public class TokenEndpointResponseFilter implements OidcResponseFilter {

    @Override
    public Uni<Void> filter(OidcResponseFilterContext rc) {
        String contentType = rc.responseHeaders().get("Content-Type"); (2)
        if (contentType.equals("application/json")
                && OidcConstants.AUTHORIZATION_CODE.equals(rc.requestProperties().get(OidcConstants.GRANT_TYPE)) (3)
                && "code-flow-user-info-cached-in-idtoken".equals(rc.requestProperties().get(OidcUtils.TENANT_ID_ATTRIBUTE)) (3)
                && rc.responseBody().toJsonObject().containsKey("id_token")) { (4)
            Log.debug("Authorization code completed for tenant 'code-flow-user-info-cached-in-idtoken'");
        }
        return Uni.createFrom().voidItem();
    }
}| 1 | Restrict this filter to requests targeting the OIDC token endpoint only. |
| 2 | Check the response Content-Type header. |
| 3 | Use OidcRequestContextProperties request properties to check only an authorization_code token grant response for the code-flow-user-info-cached-in-idtoken tenant. |
| 4 | Confirm the response JSON contains an id_token property. |
OidcResponseFilter can customize a response body by preparing an instance of io.vertx.mutiny.core.buffer.Buffer
and setting it on a response context, for example:
package io.quarkus.it.keycloak;

import jakarta.enterprise.context.ApplicationScoped;

import io.quarkus.arc.Unremovable;
import io.quarkus.oidc.common.OidcEndpoint;
import io.quarkus.oidc.common.OidcEndpoint.Type;
import io.quarkus.oidc.common.OidcRequestContextProperties;
import io.quarkus.oidc.common.OidcResponseFilter;
import io.smallrye.mutiny.Uni;
import io.vertx.core.json.JsonObject;
import io.vertx.mutiny.core.buffer.Buffer;

@ApplicationScoped
@Unremovable
@OidcEndpoint(value = Type.TOKEN)
public class TokenResponseFilter implements OidcResponseFilter {

    @Override
    public Uni<Void> filter(OidcResponseFilterContext rc) {
        JsonObject body = rc.responseBody().toJsonObject();
        // JSON `scope` property has multiple values separated by a comma character.
        // It must be replaced with a space character.
        String scope = body.getString("scope");
        body.put("scope", scope.replace(",", " "));
        rc.responseBody(Buffer.buffer(body.toString()));
        return Uni.createFrom().voidItem();
    }
}
Restricting OIDC request and response filters to authorization code flow
When you have both the authorization code and bearer access token flows supported by multiple OIDC tenants and the filters have to deal with a flow-specific logic, you can instead have them restricted to the authorization code flow with the io.quarkus.oidc.AuthorizationCodeFlow annotation and the bearer access token flow with the 'io.quarkus.oidc.BearerTokenAuthentication' annotation.
例如:
package io.quarkus.it.keycloak;

import io.quarkus.arc.Unremovable;
import io.quarkus.oidc.AuthorizationCodeFlow;
import io.quarkus.oidc.common.OidcRequestFilter;
import io.smallrye.mutiny.Uni;
import jakarta.enterprise.context.ApplicationScoped;

@AuthorizationCodeFlow
@ApplicationScoped
@Unremovable
public class CustomOidcRequestFilter implements OidcRequestFilter {

    @Override
    public Uni<Void> filter(OidcRequestFilterContext requestContext) {
        requestContext.request().putHeader("custom-header-name", "custom-header-value");
        return Uni.createFrom().voidItem();
    }
}
Redirecting to and from the OIDC provider
When a user is redirected to the OIDC provider to authenticate, the redirect URL includes a redirect_uri query parameter that indicates where the user has to be redirected when authentication is complete.
In our case, this is the Quarkus application.
Quarkus sets this parameter to the current application request URL by default.
For example, if a user is trying to access a Quarkus service endpoint at http://localhost:8080/service/1, then the redirect_uri parameter is set to http://localhost:8080/service/1.
Similarly, if the request URL is http://localhost:8080/service/2, then the redirect_uri parameter is set to http://localhost:8080/service/2.
Some OIDC providers require the redirect_uri to have the same value for a given application across all redirect URLs, for example, http://localhost:8080/service/callback.
In such cases, a quarkus.oidc.authentication.redirect-path property has to be set.
For example, quarkus.oidc.authentication.redirect-path=/service/callback, and Quarkus will set the redirect_uri parameter to an absolute URL such as http://localhost:8080/service/callback, which will be the same regardless of the current request URL.
If quarkus.oidc.authentication.redirect-path is set, but you need the original request URL to be restored after the user is redirected back to a unique callback URL, for example, http://localhost:8080/service/callback, set quarkus.oidc.authentication.restore-path-after-redirect property to true.
This will restore the request URL, such as http://localhost:8080/service/1.
Customizing authentication requests
By default, only the response_type (set to code), scope (set to openid), client_id, redirect_uri, and state properties are passed as HTTP query parameters to the OIDC provider’s authorization endpoint when the user is redirected to it to authenticate.
You can add more properties to it with quarkus.oidc.authentication.extra-params.
For example, some OIDC providers might return the authorization code in the redirect URI’s fragment, which would break the authentication process.
The following example shows how you can work around this issue:
quarkus.oidc.authentication.extra-params.response_mode=querySee also the OIDC redirect filters section explaining how a custom OidcRedirectFilter can be used to customize OIDC redirects, including those to the OIDC authorization endpoint.
Customizing the authentication error response
When the user is redirected to the OIDC authorization endpoint to authenticate and, if necessary, authorize the Quarkus application, this redirect request might fail, for example, when an invalid scope is included in the redirect URI.
In such cases, the provider redirects the user back to Quarkus with error and error_description parameters instead of the expected code parameter.
For example, this can happen when an invalid scope or other invalid parameters are included in the redirect to the provider.
In such cases, an HTTP 401 error is returned by default.
However, you can request that a custom public error endpoint be called to return a more user-friendly HTML error page.
To do this, set the quarkus.oidc.authentication.error-path property, as shown in the following example:
quarkus.oidc.authentication.error-path=/errorEnsure that the property starts with a forward slash (/) character and the path is relative to the base URI of the current endpoint.
For example, if it is set to '/error' and the current request URI is https://localhost:8080/callback?error=invalid_scope, then a final redirect is made to https://localhost:8080/error?error=invalid_scope.
|
To prevent re-authentication after the user is redirected to this page, ensure that this error endpoint is publicly accessible. |
OIDC redirect filters
You can register one or more io.quarkus.oidc.OidcRedirectFilter implementations to filter OIDC redirects to OIDC authorization and logout endpoints, and also local redirects to custom error and session-expired pages.
A custom OidcRedirectFilter can add additional query parameters and response headers, and set new cookies.
For example, the following simple custom OidcRedirectFilter adds an additional query parameter and a custom response header for all redirect requests that Quarkus OIDC can do:
package io.quarkus.it.keycloak;

import jakarta.enterprise.context.ApplicationScoped;

import io.quarkus.arc.Unremovable;
import io.quarkus.oidc.OidcRedirectFilter;

@ApplicationScoped
@Unremovable
public class GlobalOidcRedirectFilter implements OidcRedirectFilter {

    @Override
    public void filter(OidcRedirectContext context) {
        if (context.redirectUri().contains("/session-expired-page")) {
            context.additionalQueryParams().add("redirect-filtered", "true,"); (1)
            context.routingContext().response().putHeader("Redirect-Filtered", "true"); (2)
        }
    }

}| 1 | Add an additional query parameter.
Note that the query names and values are URL-encoded by Quarkus OIDC; in this case, a redirect-filtered=true%20C query parameter is added to the redirect URI. |
| 2 | Add a custom HTTP response header. |
See also the Customizing authentication requests section for information on configuring additional query parameters for the OIDC authorization endpoint.
A custom OidcRedirectFilter for local error and session-expired pages can also create secure cookies to help generate these pages.
For example, let’s assume you need to redirect the current user whose session has expired to a custom session-expired page available at http://localhost:8080/session-expired-page.
The following custom OidcRedirectFilter encrypts the user name in a custom session_expired cookie using an OIDC tenant client secret:
package io.quarkus.it.keycloak;

import jakarta.enterprise.context.ApplicationScoped;

import org.eclipse.microprofile.jwt.Claims;

import io.quarkus.arc.Unremovable;
import io.quarkus.oidc.AuthorizationCodeTokens;
import io.quarkus.oidc.OidcRedirectFilter;
import io.quarkus.oidc.Redirect;
import io.quarkus.oidc.Redirect.Location;
import io.quarkus.oidc.TenantFeature;
import io.quarkus.oidc.runtime.OidcUtils;
import io.smallrye.jwt.build.Jwt;

@ApplicationScoped
@Unremovable
@TenantFeature("tenant-refresh")
@Redirect(Location.SESSION_EXPIRED_PAGE) (1)
public class SessionExpiredOidcRedirectFilter implements OidcRedirectFilter {

    @Override
    public void filter(OidcRedirectContext context) {

        if (context.redirectUri().contains("/session-expired-page")) {
        AuthorizationCodeTokens tokens = context.routingContext().get(AuthorizationCodeTokens.class.getName()); (2)
        String userName = OidcUtils.decodeJwtContent(tokens.getIdToken()).getString(Claims.preferred_username.name()); (3)
        String jwe = Jwt.preferredUserName(userName).jwe()
                .encryptWithSecret(context.oidcTenantConfig().credentials.secret.get()); (4)
        OidcUtils.createCookie(context.routingContext(), context.oidcTenantConfig(), "session_expired",
                jwe + "|" + context.oidcTenantConfig().tenantId.get(), 10); (5)
     }
    }
}| 1 | Make sure this redirect filter is called only during a redirect to the session-expired page. |
| 2 | Access AuthorizationCodeTokens tokens associated with the now-expired session as a RoutingContext attribute. |
| 3 | Decode ID token claims and get a user name. |
| 4 | Save the user name in a JWT token encrypted with the current OIDC tenant’s client secret. |
| 5 | Create a custom session_expired cookie valid for 5 seconds, which joins the encrypted token and a tenant ID using a "|" separator. Recording a tenant ID in a custom cookie can help generate the correct session-expired pages in a multi-tenant OIDC setup. |
Next, a public JAX-RS resource that generates session-expired pages can use this cookie to create a page tailored for this user and the corresponding OIDC tenant, for example:
package io.quarkus.it.keycloak;

import jakarta.inject.Inject;
import jakarta.ws.rs.CookieParam;
import jakarta.ws.rs.GET;
import jakarta.ws.rs.Path;

import org.eclipse.microprofile.jwt.Claims;
import org.eclipse.microprofile.jwt.JsonWebToken;

import io.quarkus.oidc.OidcTenantConfig;
import io.quarkus.oidc.runtime.OidcUtils;
import io.quarkus.oidc.runtime.TenantConfigBean;
import io.smallrye.jwt.auth.principal.DefaultJWTParser;
import io.vertx.ext.web.RoutingContext;

@Path("/session-expired-page")
public class SessionExpiredResource {
    @Inject
    RoutingContext context;

    @Inject
    TenantConfigBean tenantConfig; (1)

    @GET
    public String sessionExpired(@CookieParam("session_expired") String sessionExpired) throws Exception {
        // Cookie format: jwt|<tenant id>

        String[] pair = sessionExpired.split("\\|"); (2)
        OidcTenantConfig oidcConfig = tenantConfig.getStaticTenantsConfig().get(pair[1]).getOidcTenantConfig(); (3)
        JsonWebToken jwt = new DefaultJWTParser().decrypt(pair[0], oidcConfig.credentials.secret.get()); (4)
        OidcUtils.removeCookie(context, oidcConfig, "session_expired"); (5)
        return jwt.getClaim(Claims.preferred_username) + ", your session has expired. "
                + "Please login again at http://localhost:8081/" + oidcConfig.tenantId.get(); (6)
    }
}| 1 | Inject TenantConfigBean, which can be used to access all the current OIDC tenant configurations. |
| 2 | Split the custom cookie value into two parts: the first part is the encrypted token, and the last part is the tenant ID. |
| 3 | Get the OIDC tenant configuration. |
| 4 | Decrypt the cookie value using the OIDC tenant’s client secret. |
| 5 | Remove the custom cookie. |
| 6 | Use the username in the decrypted token and the tenant ID to generate the service expired page response. |
Authentication completion actions
Sometimes you might need to perform one or more actions only after successful completion of the authorization code flow.
One way to achieve it is to listen to OIDC events such as a user login. However, when an event listener must perform an asynchronous action, this action will be completed some time after the request that sent the event has been allowed to proceed.
When you need an action to be completed before the current request is allowed to proceed, especially when an action requires a blocking call, register one or more io.quarkus.oidc.AuthenticationCompletionAction interface implementations.
例如:
package io.quarkus.oidc.test;

import jakarta.enterprise.context.ApplicationScoped;

import io.quarkus.arc.Unremovable;
import io.quarkus.oidc.AuthenticationCompletionAction;
import io.smallrye.mutiny.Uni;

@ApplicationScoped
@Unremovable
public class CustomAuthenticationCompletionAction implements AuthenticationCompletionAction {

    @Override
    public Uni<Void> action(AuthenticationCompletionContext authCompletionContext) {
        // perform a required action
        return Uni.createFrom().voidItem();
    }
}
Accessing authorization data
You can access information about authorization in different ways.
Accessing ID and access tokens
The OIDC code authentication mechanism acquires three tokens during the authorization code flow: ID token, access token, and refresh token.
The ID token is always a JWT and represents user authentication with the JWT claims.
You can use this to get the issuing OIDC endpoint, the username, and other information called claims.
You can access ID token claims by injecting JsonWebToken with an IdToken qualifier:
import jakarta.inject.Inject;
import jakarta.ws.rs.GET;
import jakarta.ws.rs.Path;
import org.eclipse.microprofile.jwt.JsonWebToken;
import io.quarkus.oidc.IdToken;
import io.quarkus.security.Authenticated;

@Path("/web-app")
@Authenticated
public class ProtectedResource {

    @Inject
    @IdToken
    JsonWebToken idToken;

    @GET
    public String getUserName() {
        return idToken.getName();
    }
}
The OIDC web-app application usually uses the access token to access other endpoints on behalf of the currently logged-in user.
You can access the raw access token as follows:
import jakarta.inject.Inject;
import jakarta.ws.rs.GET;
import jakarta.ws.rs.Path;
import org.eclipse.microprofile.jwt.JsonWebToken;
import io.quarkus.oidc.AccessTokenCredential;
import io.quarkus.security.Authenticated;

@Path("/web-app")
@Authenticated
public class ProtectedResource {

    @Inject
    JsonWebToken accessToken;

    // or
    // @Inject
    // AccessTokenCredential accessTokenCredential;

    @GET
    public String getReservationOnBehalfOfUser() {
        String rawAccessToken = accessToken.getRawToken();
        //or
        //String rawAccessToken = accessTokenCredential.getToken();

        // Use the raw access token to access a remote endpoint.
        // For example, use RestClient to set this token as a `Bearer` scheme value of the HTTP `Authorization` header:
        // `Authorization: Bearer rawAccessToken`.
        return getReservationfromRemoteEndpoint(rawAccesstoken);
    }
}|
When an authorization code flow access token is injected as |
|
|
Injection of the JsonWebToken and AccessTokenCredential is supported in both @RequestScoped and @ApplicationScoped contexts.
Quarkus OIDC uses the refresh token to refresh the current ID and access tokens as part of its session management process.
User info
If the ID token does not provide enough information about the currently authenticated user, you can get more information from the UserInfo endpoint.
Set the quarkus.oidc.authentication.user-info-required=true property to request a UserInfo JSON object from the OIDC UserInfo endpoint.
A request is sent to the OIDC provider UserInfo endpoint by using the access token returned with the authorization code grant response, and an io.quarkus.oidc.UserInfo (a simple jakarta.json.JsonObject wrapper) object is created.
io.quarkus.oidc.UserInfo can be injected or accessed as a SecurityIdentity userinfo attribute.
quarkus.oidc.authentication.user-info-required is automatically enabled if one of these conditions is met:
-
if
quarkus.oidc.roles.sourceis set touserinfoorquarkus.oidc.token.verify-access-token-with-user-infois set totrueorquarkus.oidc.authentication.id-token-requiredis set tofalse, the current OIDC tenant must support a UserInfo endpoint in these cases. -
if
io.quarkus.oidc.UserInfoinjection point is detected, but only if the current OIDC tenant supports a UserInfo endpoint.
Accessing the OIDC configuration information
The current tenant’s discovered OpenID Connect configuration metadata is represented by io.quarkus.oidc.OidcConfigurationMetadata and can be injected or accessed as a SecurityIdentity configuration-metadata attribute.
如果端点是公开的,则默认租户的 OidcConfigurationMetadata 会被注入。
Mapping token claims and SecurityIdentity roles
The way the roles are mapped to the SecurityIdentity roles from the verified tokens is identical to how it is done for the Bearer tokens. The only difference is that ID token is used by default as the source of roles.
|
If you use Keycloak, set a |
However, depending on your OIDC provider, roles might be stored in the access token or the user info.
If the access token contains the roles and this access token is not meant to be propagated to the downstream endpoints, then set quarkus.oidc.roles.source=accesstoken.
If UserInfo is the source of the roles, then set quarkus.oidc.roles.source=userinfo, and if needed, quarkus.oidc.roles.role-claim-path.
Additionally, you can also use a custom SecurityIdentityAugmentor to add the roles.
For more information, see SecurityIdentity customization.
You can also map SecurityIdentity roles created from token claims to deployment-specific roles with the HTTP Security policy.
Ensuring validity of tokens and authentication data
A core part of the authentication process is ensuring the chain of trust and validity of the information. This is done by ensuring tokens can be trusted.
Token verification and introspection
The verification process for OIDC authorization code flow tokens follows the Bearer token authentication and introspection logic. For more information, see the Token verification and introspection section of the "Quarkus OpenID Connect (OIDC) Bearer token authentication" guide.
|
In Quarkus |
Token introspection and UserInfo cache
Code flow access tokens are not introspected unless they are expected to be the source of roles.
However, they will be used to get UserInfo.
There will be one or two remote calls with the code flow access token if the token introspection, UserInfo, or both are required.
For more information about using the default token cache or registering a custom cache implementation, see Token introspection and UserInfo cache.
JSON web token claim verification
For information about the claim verification, including the iss (issuer) claim, see the JSON Web Token claim verification section.
It applies to ID tokens and to access tokens in JWT format if the web-app application has requested access token verification.
Jose4j Validator
You can register a custom Jose4j Validator to customize the JWT claim verification process. See the Jose4j section for more information.
Proof Key for Code Exchange (PKCE)
Proof Key for Code Exchange (PKCE) minimizes the risk of authorization code interception.
While PKCE is of primary importance to public OIDC clients, such as SPA scripts running in a browser, it can also provide extra protection to Quarkus OIDC web-app applications.
With PKCE, Quarkus OIDC web-app applications act as confidential OIDC clients that can securely store the client secret and use it to exchange the code for the tokens.
You can enable PKCE for your OIDC web-app endpoint with a quarkus.oidc.authentication.pkce-required property and a 32-character secret that is required to encrypt the PKCE code verifier in the state cookie, as shown in the following example:
quarkus.oidc.authentication.pkce-required=true
quarkus.oidc.authentication.state-secret=eUk1p7UB3nFiXZGUXi0uph1Y9p34YhBU
If you already have a 32-character client secret, you do not need to set the quarkus.oidc.authentication.state-secret property unless you prefer to use a different secret key.
This secret will be auto-generated if it is not configured, and if fallback to the client secret is not possible when the client secret is less than 16 characters.
The secret key is required to encrypt a randomly generated PKCE code_verifier while the user is redirected to an OIDC provider with the code_challenge query parameter to authenticate.
The code_verifier is decrypted when the user is redirected back to Quarkus and sent to the token endpoint alongside the code, client secret, and other parameters to complete the code exchange.
The provider will fail the code exchange if a SHA256 digest of the code_verifier does not match the code_challenge provided during the authentication request.
Pushed Authorization Requests
OAuth 2.0 Pushed Authorization Requests (PAR) allows the authorization server to authenticate the client before any user interaction happens. It mitigates front-channel attacks by preventing malicious actors from intercepting, tampering with, or spoofing the authorization request details in the user’s browser.
You can enable PAR for your OIDC web-app endpoint by setting the quarkus.oidc.authentication.par.enabled configuration property to true.
It will be enabled automatically if the OIDC metadata contains a require_pushed_authorization_requests property that is set to true.
The PAR endpoint is discovered from the OAuth Authorization Server Metadata parameter pushed_authorization_request_endpoint.
If the metadata discovery is disabled, you must configure the PAR endpoint manually, as shown below:
quarkus.oidc.authentication.par.enabled=true
quarkus.oidc.authentication.par.path=/as/par
Rich Authorization Requests
The OAuth 2.0 Rich Authorization Requests (RAR) specification allows OAuth2 client applications to specify fine-grained authorization requirements in the authorization code flow request.
Instead of relying solely on traditional OAuth 2.0 scopes, RAR allows the representing of required permissions as a JSON object that must be URL-encoded and passed as an authorization_details query parameter.
You can configure authorization details using the properties in the quarkus.oidc.authentication.rar configuration namespace:
quarkus.oidc.authentication.rar.type=openid_credential  (1)
quarkus.oidc.authentication.rar.simple.credential_configuration_id=vc-scope-mapping (2)
quarkus.oidc.authentication.rar.array.locations=${quarkus.oidc.auth-server-url} (3)| 1 | The type field is required. |
| 2 | The credential_configuration_id field value vc-scope-mapping is added to the authorization_details as a string. |
| 3 | The common data field locations is added as an array of strings. |
With this configuration, the following JSON is created:
[
    {
        "type": "openid_credential",
        "credential_configuration_id": "vc-scope-mapping",
        "locations": [ "http://localhost:34187/realms/quarkus" ]
    }
]
Next, this JSON is URL-encoded and added as an authorization_details query parameter to the authorization code flow redirect URL.
Add an authorization_details query parameter with OidcRedirectFilter
A complex JSON structure that cannot be expressed with configuration properties in the quarkus.oidc.authentication.rar configuration namespace can be added with the OidcRedirectFilter.
For example:
package io.quarkus.it.keycloak;

import static io.quarkus.oidc.Redirect.Location.OIDC_AUTHORIZATION;

import jakarta.enterprise.context.ApplicationScoped;

import io.quarkus.arc.Unremovable;
import io.quarkus.oidc.OidcRedirectFilter;
import io.quarkus.oidc.Redirect;

@Redirect(OIDC_AUTHORIZATION)
@ApplicationScoped
@Unremovable
class AuthorizationDetailsOidcRedirectFilter implements OidcRedirectFilter {

    @Override
    public void filter(OidcRedirectContext redirectContext) {
        redirectContext.additionalQueryParams().add("authorization_details", """
                [
                    {
                        "type": "openid_credential",
                        "credential_configuration_id": "vc-scope-mapping-1",
                        "locations": [ "http://localhost:34187/realms/quarkus" ]
                    },
                    {
                        "type": "openid_credential",
                        "credential_configuration_id": "vc-scope-mapping-2",
                        "locations": [ "http://localhost:34187/realms/quarkus" ]
                    }
                ]
                """);
    }
}
Handling and controlling the lifetime of authentication
Another important requirement for authentication is to ensure that the data on which the session is based is up-to-date without requiring the user to authenticate for every single request. There are also situations where a logout event is explicitly requested.
Use the following key points to find the right balance for securing your Quarkus applications.
Cookies
The OIDC adapter uses cookies to keep the session, code flow, and post-logout state. This state is a key element controlling the lifetime of authentication data.
Use the quarkus.oidc.authentication.cookie-path property to ensure that the same cookie is visible when you access protected resources with overlapping or different roots.
For example:
-
/index.htmland/web-app/service -
/web-app/service1and/web-app/service2 -
/web-app1/serviceand/web-app2/service
By default, quarkus.oidc.authentication.cookie-path is set to /, but you can change this to a more specific path if required, for example, /web-app.
To set the cookie path dynamically, configure the quarkus.oidc.authentication.cookie-path-header property.
For example, to set the cookie path dynamically by using the value of the X-Forwarded-Prefix HTTP header, configure the property to quarkus.oidc.authentication.cookie-path-header=X-Forwarded-Prefix.
If quarkus.oidc.authentication.cookie-path-header is set but no configured HTTP header is available in the current request, then the quarkus.oidc.authentication.cookie-path will be checked.
If your application is deployed across multiple domains, set the quarkus.oidc.authentication.cookie-domain property so that the session cookie is visible to all protected Quarkus services.
For example, if you have Quarkus services deployed on the following two domains, then you must set the quarkus.oidc.authentication.cookie-domain property to company.net:
-
https://whatever.wherever.company.net/
-
https://another.address.company.net/
State cookies
State cookies are used to support authorization code flow completion.
When an authorization code flow is started, Quarkus creates a state cookie and a matching state query parameter, before redirecting the user to the OIDC provider.
When the user is redirected back to Quarkus to complete the authorization code flow, Quarkus expects the request URI to include the state query parameter that matches the current state cookie value.
The default state cookie age is 5 minutes, and you can change it with a quarkus.oidc.authentication.state-cookie-age Duration property.
Quarkus creates a unique state cookie name every time a new authorization code flow is started to support multi-tab authentication. Many concurrent authentication requests on behalf of the same user can cause multiple state cookies to be created.
If you do not want to allow your users to use multiple browser tabs to authenticate, disable this by specifying quarkus.oidc.authentication.allow-multiple-code-flows=false.
This action also ensures that the same state cookie name is created for every new user authentication.
Session cookie and default TokenStateManager
OIDC CodeAuthenticationMechanism uses the default io.quarkus.oidc.TokenStateManager interface implementation to keep the ID, access, and refresh tokens returned in the authorization code or refresh grant responses in an encrypted session cookie.
It makes Quarkus OIDC endpoints completely stateless, and the preferred approach is to follow this strategy to achieve the best scalability results.
Refer to the Database TokenStateManager section of this guide for information on storing tokens in the database or other server-side storage solutions. This approach is suitable if you prefer and have compelling reasons to store the token state on the server.
See the Session cookie and custom TokenStateManager section for alternative methods of token storage.
You can configure the default TokenStateManager to avoid saving an access token in the session cookie and to only keep ID and refresh tokens, or a single ID token only.
An access token is only required if the endpoint needs to do any of the following:
-
Retrieve
UserInfo -
Access the downstream service with this access token
-
Use the roles associated with the access token, which are checked by default
In such cases, use the quarkus.oidc.token-state-manager.strategy property to configure the token state strategy as follows:
| To… | Set the property to … |
|---|---|
Keep the ID and refresh tokens only |
|
Keep the ID token only |
|
If your chosen session cookie strategy combines tokens and generates a session cookie value exceeding 4KB, some browsers might not be able to handle such large cookie sizes.
This can occur when the ID, access, and refresh tokens are JWT tokens, and the selected strategy is keep-all-tokens, or when the strategy is id-refresh-token and only ID and refresh tokens are provided.
To work around this issue, you can set quarkus.oidc.token-state-manager.split-tokens=true to create a unique session token for each token.
An alternative solution is to have the tokens saved in the database.
For more information, see Database TokenStateManager.
The default TokenStateManager encrypts the tokens before storing them in the session cookie.
The following example shows how you configure it to split the tokens and encrypt them:
quarkus.oidc.auth-server-url=http://localhost:8180/realms/quarkus
quarkus.oidc.client-id=quarkus-app
quarkus.oidc.credentials.secret=secret
quarkus.oidc.application-type=web-app
quarkus.oidc.token-state-manager.split-tokens=true
quarkus.oidc.token-state-manager.encryption-secret=eUk1p7UB3nFiXZGUXi0uph1Y9p34YhBU
The token encryption secret must be at least 32 characters long.
If this key is not configured, then either quarkus.oidc.credentials.secret or quarkus.oidc.credentials.jwt.secret will be hashed to create an encryption key.
Configure the quarkus.oidc.token-state-manager.encryption-secret property if Quarkus authenticates to the OIDC provider by using one of the following authentication methods:
-
mTLS
-
private_key_jwt, where a private RSA or EC key is used to sign a JWT token
Otherwise, a random key is generated, which can be problematic if the Quarkus application is running in the cloud with multiple pods managing the requests.
You can disable token encryption in the session cookie by setting quarkus.oidc.token-state-manager.encryption-required=false.
Session cookie and custom TokenStateManager
If you want to customize the way the tokens are associated with the session cookie, register a custom io.quarkus.oidc.TokenStateManager implementation as an @ApplicationScoped CDI bean.
For example, you might want to keep the tokens in a cache cluster and have only a key stored in a session cookie. Note that this approach might introduce some challenges if you need to make the tokens available across multiple microservice nodes.
Here is a simple example:
package io.quarkus.oidc.test;

import jakarta.annotation.Priority;
import jakarta.enterprise.context.ApplicationScoped;
import jakarta.enterprise.inject.Alternative;
import jakarta.inject.Inject;

import io.quarkus.oidc.AuthorizationCodeTokens;
import io.quarkus.oidc.OidcTenantConfig;
import io.quarkus.oidc.TokenStateManager;
import io.quarkus.oidc.runtime.DefaultTokenStateManager;
import io.smallrye.mutiny.Uni;
import io.vertx.ext.web.RoutingContext;

@ApplicationScoped
@Alternative
@Priority(1)
public class CustomTokenStateManager implements TokenStateManager {

    @Inject
    DefaultTokenStateManager tokenStateManager;

    @Override
    public Uni<String> createTokenState(RoutingContext routingContext, OidcTenantConfig oidcConfig,
            AuthorizationCodeTokens sessionContent, OidcRequestContext<String> requestContext) {
        return tokenStateManager.createTokenState(routingContext, oidcConfig, sessionContent, requestContext)
                .map(t -> (t + "|custom"));
    }

    @Override
    public Uni<AuthorizationCodeTokens> getTokens(RoutingContext routingContext, OidcTenantConfig oidcConfig,
            String tokenState, OidcRequestContext<AuthorizationCodeTokens> requestContext) {
        if (!tokenState.endsWith("|custom")) {
            throw new IllegalStateException();
        }
        String defaultState = tokenState.substring(0, tokenState.length() - 7);
        return tokenStateManager.getTokens(routingContext, oidcConfig, defaultState, requestContext);
    }

    @Override
    public Uni<Void> deleteTokens(RoutingContext routingContext, OidcTenantConfig oidcConfig, String tokenState,
            OidcRequestContext<Void> requestContext) {
        if (!tokenState.endsWith("|custom")) {
            throw new IllegalStateException();
        }
        String defaultState = tokenState.substring(0, tokenState.length() - 7);
        return tokenStateManager.deleteTokens(routingContext, oidcConfig, defaultState, requestContext);
    }
}
For information about the default TokenStateManager storing tokens in an encrypted session cookie, see Session cookie and default TokenStateManager.
For information about the custom Quarkus TokenStateManager implementation storing tokens in a database, see Database TokenStateManager.
Database TokenStateManager
If you prefer to follow a stateful token storage strategy, you can use a custom TokenStateManager provided by Quarkus to have your application store tokens in a database, instead of storing them in an encrypted session cookie, which is done by default as described in the Session cookie and default TokenStateManager section.
To use this feature, add the following extension to your project:
quarkus extension add oidc-db-token-state-manager./mvnw quarkus:add-extension -Dextensions='oidc-db-token-state-manager'./gradlew addExtension --extensions='oidc-db-token-state-manager'This extension will replace the default io.quarkus.oidc.TokenStateManager with a database-based one.
OIDC Database Token State Manager uses a Reactive SQL client under the hood to avoid blocking because the authentication is likely to happen on an IO thread.
Depending on your database, include and configure exactly one Reactive SQL client. The following Reactive SQL clients are supported:
-
Reactive Microsoft SQL client
-
Reactive MySQL client
-
Reactive PostgreSQL client
-
Reactive Oracle client
-
Reactive DB2 client
| Your application does not need to switch to the Reactive SQL client if it already uses Hibernate ORM with one of the JDBC driver extensions. |
For example, you already have an application that uses the Hibernate ORM extension together with a PostgreSQL JDBC Driver, and your datasource is configured like this:
quarkus.datasource.db-kind=postgresql
quarkus.datasource.username=quarkus_test
quarkus.datasource.password=quarkus_test
quarkus.datasource.jdbc.url=jdbc:postgresql://localhost:5432/quarkus_test
Now, if you decided to use OIDC Database Token State Manager, you must add the following dependencies and set a reactive driver URL:
<dependency>
    <groupId>io.quarkus</groupId>
    <artifactId>quarkus-oidc-db-token-state-manager</artifactId>
</dependency>
<dependency>
    <groupId>io.quarkus</groupId>
    <artifactId>quarkus-reactive-pg-client</artifactId>
</dependency>implementation("io.quarkus:quarkus-oidc-db-token-state-manager")
implementation("io.quarkus:quarkus-reactive-pg-client")quarkus.datasource.reactive.url=postgresql://localhost:5432/quarkus_testNow, the tokens are ready to be stored in the database.
By default, a database table used for storing tokens is created for you; however, you can disable this option with the quarkus.oidc.db-token-state-manager.create-database-table-if-not-exists configuration property.
Should you want the Hibernate ORM extension to create this table instead, you must include an Entity, such as the following:
package org.acme.manager;

import jakarta.persistence.Column;
import jakarta.persistence.Entity;
import jakarta.persistence.Id;
import jakarta.persistence.Table;

@Table(name = "oidc_db_token_state_manager") (1)
@Entity
public class OidcDbTokenStateManagerEntity {

    @Id
    String id;

    @Column(name = "id_token", length = 4000) (2)
    String idToken;

    @Column(name = "refresh_token", length = 4000)
    String refreshToken;

    @Column(name = "access_token", length = 4000)
    String accessToken;

    @Column(name = "expires_in")
    Long expiresIn;
}| 1 | The Hibernate ORM extension will only create this table for you when the database schema is generated. For more information, refer to the Hibernate ORM guide. |
| 2 | You can choose a column length depending on the length of your tokens. |
Redis TokenStateManager
Another approach to stateful token storage is to use the custom TokenStateManager provided by Quarkus to store tokens in a Redis cache.
If you decided to use the OIDC Redis Token State Manager, you must add the following dependency:
<dependency>
    <groupId>io.quarkus</groupId>
    <artifactId>quarkus-oidc-redis-token-state-manager</artifactId>
</dependency>implementation("io.quarkus:quarkus-oidc-redis-token-state-manager")Quarkus stores tokens in the default Redis client. If you prefer to use a different Redis client, you can configure it like in the example below:
quarkus.oidc.redis-token-state-manager.redis-client-name=my-redis-client (1)| 1 | The my-redis-client name must correspond to the Redis client config key specified with quarkus.redis.my-redis-client.* configuration properties. |
For information about how to configure the Redis client, see the Quarkus Redis extension reference guide.
Logout and expiration
There are two main ways for the authentication information to expire: the tokens expired and were not renewed, or an explicit logout operation was triggered.
Let’s start with explicit logout operations.
|
You can request setting Clear-Site-Data directives for all of the logout operations with a |
User-initiated logout
Users can request a logout by sending a request to the Quarkus endpoint logout path set with a quarkus.oidc.logout.path property.
For example, if the endpoint address is https://application.com/webapp and the quarkus.oidc.logout.path is set to /logout, then the logout request must be sent to https://application.com/webapp/logout.
This logout request starts an RP-initiated logout. The user will be redirected to the OIDC provider to log out, where they can be asked to confirm the logout is indeed intended.
The user will be returned to the endpoint post-logout page after the logout has been completed, and if the quarkus.oidc.logout.post-logout-path property is set.
For example, if the endpoint address is https://application.com/webapp and the quarkus.oidc.logout.post-logout-path is set to /signin, then the user will be returned to https://application.com/webapp/signin.
The URI must be registered as a valid post_logout_redirect_uri in the OIDC provider.
|
If the quarkus.oidc.logout.post-logout-path is set, then a q_post_logout cookie will be created, and a matching state query parameter will be added to the logout redirect URI, and the OIDC provider will return this state once the logout has been completed.
It is recommended that Quarkus web-app applications verify that a state query parameter matches the value of the q_post_logout cookie, for example, in a Jakarta REST filter.
Note that a cookie name varies when using OpenID Connect Multi-Tenancy.
For example, it will be named q_post_logout_tenant_1 for a tenant with a tenant_1 ID, and so on.
Here is an example of how to configure a Quarkus application to initiate a logout flow:
quarkus.oidc.auth-server-url=http://localhost:8180/realms/quarkus
quarkus.oidc.client-id=frontend
quarkus.oidc.credentials.secret=secret
quarkus.oidc.application-type=web-app

quarkus.oidc.logout.path=/logout
# Logged-out users should be returned to the /welcome.html site, which will offer an option to re-login:
quarkus.oidc.logout.post-logout-path=/welcome.html

# Only the authenticated users can initiate a logout:
quarkus.http.auth.permission.authenticated.paths=/logout
quarkus.http.auth.permission.authenticated.policy=authenticated

# All users can see the Welcome page:
quarkus.http.auth.permission.public.paths=/welcome.html
quarkus.http.auth.permission.public.policy=permit
You might also want to set quarkus.oidc.authentication.cookie-path to a path value common to all the application resources, which is / in this example.
For more information, see the Cookies section.
|
Some OIDC providers do not support a RP-initiated logout specification and do not return an OpenID Connect well-known According to the RP-initiated logout specification, the You can use |
Back-channel logout
The OIDC provider can force all applications to log out by using the authentication data. This is known as back-channel logout. In this case, OIDC will call a specific URL for each application to trigger the logout.
OIDC providers use the Back-channel logout to log out the current user from all the applications the user is currently logged into, bypassing the user agent.
You can configure Quarkus to support Back-channel logout as follows:
quarkus.oidc.auth-server-url=http://localhost:8180/realms/quarkus
quarkus.oidc.client-id=frontend
quarkus.oidc.credentials.secret=secret
quarkus.oidc.application-type=web-app

quarkus.oidc.logout.backchannel.path=/back-channel-logout
The absolute back-channel logout URL is calculated by adding quarkus.oidc.back-channel-logout.path to the current endpoint URL, for example, http://localhost:8080/back-channel-logout.
You will need to configure this URL in the admin console of your OIDC provider.
You will also need to configure a token age property for the logout token verification to succeed if your OIDC provider does not set an expiry claim in the current logout token.
For example, set quarkus.oidc.token.age=10S to ensure that no more than 10 seconds elapse since the logout token’s iat (issued at) time.
Front-channel logout
You can use the Front-channel logout to log out the current user directly from the user agent, for example, the browser. It is similar to Back-channel logout, but the logout steps are executed by the user agent (such as the browser) rather than in the background by the OIDC provider. This option is rarely used.
You can configure Quarkus to support Front-channel logout as follows:
quarkus.oidc.auth-server-url=http://localhost:8180/realms/quarkus
quarkus.oidc.client-id=frontend
quarkus.oidc.credentials.secret=secret
quarkus.oidc.application-type=web-app

quarkus.oidc.logout.frontchannel.path=/front-channel-logout
This path will be compared to the current request’s path, and the user will be logged out if these paths match.
Local logout
User-initiated logout will log the user out of the OIDC provider. If it is used as a single sign-on, it might not be what you require. If, for example, your OIDC provider is Google, you will be logged out of Google and its services. Instead, the user might just want to log out of that specific application. Another use case might be when the OIDC provider does not have a logout endpoint.
By using OidcSession, you can support a local logout, which means that only the local session cookie is cleared, as shown in the following example:
import jakarta.inject.Inject;
import jakarta.ws.rs.GET;
import jakarta.ws.rs.Path;

import io.quarkus.oidc.OidcSession;

@Path("/service")
public class ServiceResource {

    @Inject
    OidcSession oidcSession;

    @GET
    @Path("logout")
    public String logout() {
        oidcSession.logout().await().indefinitely();
        return "You are logged out";
    }
}
Using OidcSession for local logout
io.quarkus.oidc.OidcSession is a wrapper around the current IdToken, which can help to perform a Local logout, retrieve the current session’s tenant identifier, and check when the session will expire.
More useful methods will be added to it over time.
Session management
By default, logout is based on the expiration time of the ID token issued by the OIDC provider. When the ID token expires, the current user session at the Quarkus endpoint is invalidated, and the user is redirected to the OIDC provider to authenticate again. If the session at the OIDC provider is still active, users are automatically re-authenticated without having to provide their credentials again.
The current user session can be automatically extended by enabling the quarkus.oidc.token.refresh-expired property.
If set to true, when the current ID token expires, a refresh token grant will be used to refresh the ID token and the access and refresh tokens.
|
If you have a single page application for service applications where your OIDC provider script, such as |
If you work with a Quarkus OIDC web-app application, then the Quarkus OIDC code authentication mechanism manages the user session lifespan.
To use the refresh token, you should carefully configure the session cookie age. The session age should be longer than the ID token lifespan and close to or equal to the refresh token lifespan.
You calculate the session age by adding the lifespan value of the current ID token and the values of the quarkus.oidc.authentication.session-age-extension and quarkus.oidc.token.lifespan-grace properties.
|
You use only the |
When the current authenticated user returns to the protected Quarkus endpoint and the ID token associated with the session cookie has expired, the user is automatically redirected to the OIDC authorization endpoint to re-authenticate by default. The OIDC provider might challenge the user again if the user session with this provider is still active, which can happen if the session is configured to last longer than the ID token.
If the quarkus.oidc.token.refresh-expired is set to true, then the expired ID token (and the access token) is refreshed by using the refresh token returned with the initial authorization code grant response.
This refresh token might also be recycled (refreshed) itself as part of this process.
As a result, the new session cookie is created, and the session is extended.
When multiple concurrent requests arrive with the same expired session and an OIDC provider restricts how many times a refresh token can be used, duplicate refresh attempts may be rejected.
Set quarkus.oidc.token.refresh-token-cache-time-to-live to a short duration (for example, 5S) to cache the tokens returned in the refresh token grant response so that only one request performs the refresh and the others reuse it.
Avoid setting this property unless concurrent refresh requests are expected and the provider restricts refresh token reuse.
|
In instances where the user is not very active, you can use the Set |
You can go one step further and proactively refresh ID tokens or access tokens that are about to expire.
Set quarkus.oidc.token.refresh-token-time-skew to the value you want to anticipate the refresh.
If, during the current user request, it is determined that the current ID token will expire within the quarkus.oidc.token.refresh-token-time-skew, then it is refreshed, and a new session cookie is created.
This property should be set to a value less than the ID token’s lifespan; the closer it is to that lifespan, the more often the ID token is refreshed.
You can further optimize this process by adding a simple JavaScript function that pings your Quarkus endpoint periodically to simulate user activity, thereby minimizing the time period during which the user might need to be re-authenticated.
|
When the session can not be refreshed, the currently authenticated user is redirected to the OIDC provider to re-authenticate. However, the user experience may not be ideal in such cases if the user, after a previous successful authentication, suddenly sees an OIDC authentication challenge screen when trying to access an application page. Instead, you can request that the user be redirected to a public, application-specific session-expired page first. This page informs the user that the session has now expired and advises re-authenticating by following a link to a secured application welcome page. The user clicks the link, and Quarkus OIDC redirects to the OIDC provider for re-authentication. Use For example, setting See also the OIDC redirect filters section explaining how a custom |
|
You cannot extend the user session indefinitely. The returning user with the expired ID token will have to re-authenticate at the OIDC provider endpoint once the refresh token expires. |
Step Up Authentication
The io.quarkus.oidc.AuthenticationContext annotation can be used to list one or more Authentication Context Class Reference (ACR) values to enforce a required authentication level for the Jakarta REST resource classes and methods.
Consider the following example:
package org.acme.security;

import io.quarkus.oidc.AuthenticationContext;
import jakarta.ws.rs.GET;
import jakarta.ws.rs.Path;

@Path("/transfer")
public class TransferResource {

    @GET
    @AuthenticationContext("gold") (1)
    public String transfer() {
        return "transferred";
    }
}| 1 | The ID token of the current session must have an acr claim with the gold ACR value. |
quarkus.http.auth.proactive=false (1)| 1 | Disable proactive authentication so that the @AuthenticationContext annotation can be matched with the endpoint before Quarkus authenticates incoming requests. |
The authorization request to the OIDC provider includes the acr_values parameter listing the required ACR values, and the max_age parameter when the annotation’s maxAge attribute is set.
When the current session does not provide the required authentication level, for example, because the ID token acr claim does not list the required ACR values, the user is redirected to the OIDC provider to re-authenticate.
This redirect also includes the acr_values parameter, so the provider can request a stronger authentication method, for example, a multi-factor authentication, before issuing new tokens.
How the requested ACR values are enforced is specific to each OIDC provider. For example, see the Keycloak Step-up Authentication documentation describing how Keycloak maps ACR values to Levels of Authentication (LoA) in browser authentication flows.
For information about how a required authentication level is enforced in a Bearer token authentication flow, see the Step Up Authentication section of the Quarkus OIDC Bearer token authentication guide.
Integration with GitHub and non-OIDC OAuth2 providers
Some well-known providers, such as GitHub or LinkedIn, are not OpenID Connect providers, but OAuth2 providers that support the authorization code flow.
For example, GitHub OAuth2 and LinkedIn OAuth2.
Remember, OIDC is built on top of OAuth2.
The main difference between OIDC and OAuth2 providers is that OIDC providers return an ID Token that represents a user authentication, in addition to the standard authorization code flow access and refresh tokens returned by OAuth2 providers.
OAuth2 providers such as GitHub do not return IdToken, and the user authentication is implicit and indirectly represented by the access token.
This access token represents an authenticated user authorizing the current Quarkus web-app application to access some data on the user’s behalf.
In OIDC, you validate the ID token as proof of authentication, whereas in OAuth2, you validate the access token.
This is done by subsequently calling an endpoint that requires the access token and that typically returns user information.
This approach is similar to the OIDC UserInfo approach, with UserInfo fetched by Quarkus OIDC on your behalf.
For example, when working with GitHub, the Quarkus endpoint can acquire an access token, which allows the Quarkus endpoint to request a GitHub profile for the current user.
To support the integration with such OAuth2 servers, quarkus-oidc needs to be configured a bit differently to allow the authorization code flow responses without IdToken: quarkus.oidc.authentication.id-token-required=false.
|
Even though you configure the extension to support the authorization code flows without The default ID token age is 5 minutes, which you can extend further as described in the session management section. This simplifies how you handle applications that support multiple OIDC providers. |
The next step is to ensure that the returned access token is usable and valid for the current Quarkus endpoint.
The first way is to call the OAuth2 provider’s introspection endpoint by configuring quarkus.oidc.introspection-path, if the provider offers one.
In this case, you can use the access token as a source of roles using quarkus.oidc.roles.source=accesstoken.
If no introspection endpoint is present, you can instead request UserInfo from the provider, as it will at least validate the access token.
To do so, specify quarkus.oidc.token.verify-access-token-with-user-info=true.
You also need to set the quarkus.oidc.user-info-path property to a URL endpoint that fetches the user info (or to an endpoint protected by the access token).
For GitHub, since it does not have an introspection endpoint, requesting the UserInfo is required.
|
Requiring UserInfo involves making a remote call on every request. Therefore, Alternatively, you might want to consider caching Most well-known social OAuth2 providers enforce rate limiting, so you might prefer to cache UserInfo. |
OAuth2 servers might not support a well-known configuration endpoint.
In this case, you must disable the discovery and configure the authorization, token, and introspection and UserInfo endpoint paths manually.
For well-known OIDC or OAuth2 providers, such as Apple, Facebook, GitHub, Google, Microsoft, Spotify, and X (formerly Twitter), Quarkus can help significantly simplify your application’s configuration with the quarkus.oidc.provider property.
Here is how you can integrate quarkus-oidc with GitHub after you have created a GitHub OAuth application.
Configure your Quarkus endpoint like this:
quarkus.oidc.provider=github
quarkus.oidc.client-id=github_app_clientid
quarkus.oidc.credentials.secret=github_app_clientsecret

# user:email scope is requested by default, use 'quarkus.oidc.authentication.scopes' to request different scopes such as `read:user`.
# See https://docs.github.com/en/developers/apps/building-oauth-apps/scopes-for-oauth-apps for more information.

# Consider enabling UserInfo Cache
# quarkus.oidc.token-cache.max-size=1000
# quarkus.oidc.token-cache.time-to-live=5M
#
# Or having UserInfo cached inside IdToken itself
# quarkus.oidc.cache-user-info-in-idtoken=true
For more information about configuring other well-known providers, see OpenID Connect providers.
This is all that is needed for an endpoint like this one to return the currently-authenticated user’s profile with GET http://localhost:8080/github/userinfo and access it as the individual UserInfo properties:
package io.quarkus.it.keycloak;

import jakarta.inject.Inject;
import jakarta.ws.rs.GET;
import jakarta.ws.rs.Path;
import jakarta.ws.rs.Produces;

import io.quarkus.oidc.UserInfo;
import io.quarkus.security.Authenticated;

@Path("/github")
@Authenticated
public class TokenResource {

    @Inject
    UserInfo userInfo;

    @GET
    @Path("/userinfo")
    @Produces("application/json")
    public String getUserInfo() {
        return userInfo.getUserInfoString();
    }
}
If you support more than one social provider by using OpenID Connect Multi-Tenancy, for example, Google, which is an OIDC provider that returns IdToken, and GitHub, which is an OAuth2 provider that does not return IdToken and only allows access to UserInfo, then you can have your endpoint working with only the injected SecurityIdentity for both Google and GitHub flows.
A simple augmentation of SecurityIdentity will be required where a principal created with the internally-generated IdToken will be replaced with the UserInfo-based principal when the GitHub flow is active:
package io.quarkus.it.keycloak;

import java.security.Principal;

import jakarta.enterprise.context.ApplicationScoped;

import io.quarkus.oidc.UserInfo;
import io.quarkus.security.identity.AuthenticationRequestContext;
import io.quarkus.security.identity.SecurityIdentity;
import io.quarkus.security.identity.SecurityIdentityAugmentor;
import io.quarkus.security.runtime.QuarkusSecurityIdentity;
import io.smallrye.mutiny.Uni;
import io.vertx.ext.web.RoutingContext;

@ApplicationScoped
public class CustomSecurityIdentityAugmentor implements SecurityIdentityAugmentor {

    @Override
    public Uni<SecurityIdentity> augment(SecurityIdentity identity, AuthenticationRequestContext context) {
        RoutingContext routingContext = identity.getAttribute(RoutingContext.class.getName());
        if (routingContext != null && routingContext.normalizedPath().endsWith("/github")) {
	        QuarkusSecurityIdentity.Builder builder = QuarkusSecurityIdentity.builder(identity);
	        UserInfo userInfo = identity.getAttribute("userinfo");
	        builder.setPrincipal(new Principal() {

	            @Override
	            public String getName() {
	                return userInfo.getString("preferred_username");
	            }

	        });
	        identity = builder.build();
        }
        return Uni.createFrom().item(identity);
    }

}
Now, the following code will work when the user signs into your application by using Google or GitHub:
package io.quarkus.it.keycloak;

import jakarta.inject.Inject;
import jakarta.ws.rs.GET;
import jakarta.ws.rs.Path;
import jakarta.ws.rs.Produces;

import io.quarkus.security.Authenticated;
import io.quarkus.security.identity.SecurityIdentity;

@Path("/service")
@Authenticated
public class TokenResource {

    @Inject
    SecurityIdentity identity;

    @GET
    @Path("/google")
    @Produces("application/json")
    public String getGoogleUserName() {
        return identity.getPrincipal().getName();
    }

    @GET
    @Path("/github")
    @Produces("application/json")
    public String getGitHubUserName() {
        return identity.getPrincipal().getName();
    }
}
Possibly a simpler alternative is to inject both @IdToken JsonWebToken and UserInfo and use JsonWebToken when handling the providers that return IdToken and use UserInfo with the providers that do not return IdToken.
You must ensure that the callback path you enter in the GitHub OAuth application configuration matches the endpoint path where you want the user to be redirected after a successful GitHub authentication and application authorization.
In this case, it has to be set to http://localhost:8080/github/userinfo.
Listening to important authentication events
You can register the @ApplicationScoped bean, which will observe important OIDC authentication events.
When a user logs in for the first time, re-authenticates, or refreshes the session, the listener is updated.
In the future, more events might be reported. For example:
import jakarta.enterprise.context.ApplicationScoped;
import jakarta.enterprise.event.Observes;

import io.quarkus.oidc.SecurityEvent;
import io.vertx.ext.web.RoutingContext;

@ApplicationScoped
public class SecurityEventListener {

    public void event(@Observes SecurityEvent event) {
        String tenantId = event.getSecurityIdentity().getAttribute("tenant-id");
        RoutingContext vertxContext = event.getSecurityIdentity().getAttribute(RoutingContext.class.getName());
        vertxContext.put("listener-message", String.format("event:%s,tenantId:%s", event.getEventType().name(), tenantId));
    }
}| You can listen to other security events as described in the Observe security events section of the Security Tips and Tricks guide. |
Token revocation
Sometimes, you might want to revoke the current authorization code flow access tokens, refresh tokens, or both.
You can revoke tokens with quarkus.oidc.OidcProviderClient, which provides access to the OIDC provider’s UserInfo, token introspection, and revocation endpoints.
For example, when a local logout with OidcSession is performed, you can use an injected OidcProviderClient to revoke access and refresh tokens associated with the current session:
import jakarta.inject.Inject;
import jakarta.ws.rs.GET;
import jakarta.ws.rs.Path;

import io.quarkus.oidc.AccessTokenCredential;
import io.quarkus.oidc.OidcProviderClient;
import io.quarkus.oidc.OidcSession;
import io.quarkus.oidc.RefreshToken;

import io.smallrye.mutiny.Uni;

@Path("/service")
public class ServiceResource {

    @Inject
    OidcSession oidcSession;

    @Inject
    OidcProviderClient oidcProviderClient;

    @Inject
    AccessTokenCredential accessToken;

    @Inject
    RefreshToken refreshToken;

    @GET
    public Uni<String> logout() {
        return oidcSession.logout() (1)
                   .chain(() -> oidcClient.revokeAccessToken(accessToken.getToken())) (2)
                   .chain(() -> oidcClient.revokeRefreshToken(refreshToken.getToken())) (3)
                   .map((result) -> "You are logged out");
    }
}| 1 | Do the local logout by clearing the session cookie. |
| 2 | Revoke the authorization code flow access token. |
| 3 | Revoke the authorization code flow refresh token. |
You can also revoke tokens in the security event listeners.
For example, when your application supports a standard User-initiated logout, you can catch a logout event and revoke tokens:
import java.util.concurrent.CompletableFuture;
import java.util.concurrent.CompletionStage;

import io.quarkus.oidc.AccessTokenCredential;
import io.quarkus.oidc.OidcProviderClient;
import io.quarkus.oidc.RefreshToken;
import io.quarkus.oidc.SecurityEvent;
import io.quarkus.security.identity.SecurityIdentity;
import io.smallrye.mutiny.Uni;
import jakarta.enterprise.context.ApplicationScoped;
import jakarta.enterprise.event.ObservesAsync;

@ApplicationScoped
public class SecurityEventListener {

    public CompletionStage<Void> processSecurityEvent(@ObservesAsync SecurityEvent event) {
        if (SecurityEvent.Type.OIDC_LOGOUT_RP_INITIATED == event.getEventType()) { (1)
	    return revokeTokens(event.getSecurityIdentity()).subscribeAsCompletionStage();
	}
	return CompletableFuture.completedFuture(null);
    }
    private Uni<Void> revokeTokens(SecurityIdentity securityIdentity) {
        return Uni.join().all(
                   revokeAccessToken(securityIdentity),
	           revokeRefreshToken(securityIdentity)
               ).andCollectFailures()
                .replaceWithVoid()
                .onFailure().recoverWithUni(t -> logFailure(t));
    }

    private static Uni<Boolean> revokeAccessToken(SecurityIdentity securityIdentity) { (2)
        OidcProviderClient oidcProvider = securityIdentity.getAttribute(OidcProviderClient.class.getName());
        String accessToken = securityIdentity.getCredential(AccessTokenCredential.class).getToken();
        return oidcProvider.revokeAccessToken(accessToken);
    }

    private static Uni<Boolean> revokeRefreshToken(SecurityIdentity securityIdentity) { (3)
        OidcProviderClient oidcProvider = securityIdentity.getAttribute(OidcProviderClient.class.getName());
        String refreshToken = securityIdentity.getCredential(RefreshToken.class).getToken();
        return oidcProvider.revokeRefreshToken(refreshToken);
    }

    private static Uni<Void> logFailure(Throwable t) {
        // Log failure as required
        return Uni.createFrom().voidItem();
    }
}| 1 | Revoke tokens if an RP-initiated logout event is observed. |
| 2 | Revoke the authorization code flow access token. |
| 3 | Revoke the authorization code flow refresh token. |
Propagating tokens to downstream services
For information about Authorization Code Flow access token propagation to downstream services, see the Token Propagation section.
Integration considerations
Your OIDC-secured application integrates into an environment where it can be called from single-page applications. Therefore, it needs to work with major OIDC providers, run behind an HTTP reverse proxy, support external and internal access, and so on.
This section discusses these considerations.
Single-page applications
You can check whether implementing single-page applications (SPAs) as suggested in the Single-page applications section of the "OpenID Connect (OIDC) Bearer token authentication" guide meets your requirements.
If you prefer to use SPAs and JavaScript APIs such as Fetch or XMLHttpRequest(XHR) with Quarkus web applications, be aware that OIDC providers might not support cross-origin resource sharing (CORS) for authorization endpoints where the users are authenticated after a redirect from Quarkus.
This will lead to authentication failures if the Quarkus application and the OIDC provider are hosted on different HTTP domains, ports, or both.
In such cases, set the quarkus.oidc.authentication.java-script-auto-redirect property to false, which will instruct Quarkus to return a 499 status code and a WWW-Authenticate header with the OIDC value.
The browser script must set a header to identify the current request as a JavaScript request for a 499 status code to be returned when the quarkus.oidc.authentication.java-script-auto-redirect property is set to false.
If the script engine sets an engine-specific request header itself, then you can register a custom quarkus.oidc.JavaScriptRequestChecker bean, which will inform Quarkus if the current request is a JavaScript request.
For example, if the JavaScript engine sets a header such as HX-Request: true, then you can have it checked like this:
import jakarta.enterprise.context.ApplicationScoped;

import io.quarkus.oidc.JavaScriptRequestChecker;
import io.vertx.ext.web.RoutingContext;

@ApplicationScoped
public class CustomJavaScriptRequestChecker implements JavaScriptRequestChecker {

    @Override
    public boolean isJavaScriptRequest(RoutingContext context) {
        return "true".equals(context.request().getHeader("HX-Request"));
    }
}
After that, reload the last requested page if the status code is 499.
Otherwise, you must also update the browser script to set the X-Requested-With header with the JavaScript value and reload the last requested page in case of a 499 status code.
例如:
Future<void> callQuarkusService() async {
    Map<String, String> headers = Map.fromEntries([MapEntry("X-Requested-With", "JavaScript")]);

    await http
        .get("https://localhost:443/serviceCall")
        .then((response) {
            if (response.statusCode == 499) {
                window.location.assign("https://localhost.com:443/serviceCall");
            }
         });
  }
Cross-Origin 资源共享
If you plan to consume this application from a single-page application running on a different domain, you need to configure cross-origin resource sharing (CORS).
For more information, see the CORS filter section of the "Cross-origin resource sharing" guide.
Calling Cloud provider services
Google Cloud
You can have Quarkus OIDC web-app applications access Google Cloud services such as BigQuery on behalf of the currently authenticated users who have enabled OIDC authorization code flow permissions to such services in their Google developer consoles.
You can do so by using Quarkiverse Google Cloud Services. You need only to add the latest tag service dependency as shown in the following example:
<dependency>
    <groupId>io.quarkiverse.googlecloudservices</groupId>
    <artifactId>quarkus-google-cloud-bigquery</artifactId>
    <version>${quarkiverse.googlecloudservices.version}</version>
</dependency>implementation("io.quarkiverse.googlecloudservices:quarkus-google-cloud-bigquery:${quarkiverse.googlecloudservices.version}")Then, configure Google OIDC properties:
quarkus.oidc.provider=google
quarkus.oidc.client-id={GOOGLE_CLIENT_ID}
quarkus.oidc.credentials.secret={GOOGLE_CLIENT_SECRET}
quarkus.oidc.token.issuer=https://accounts.google.com
Running Quarkus application behind a reverse proxy
The OIDC authentication mechanism can be affected if your Quarkus application is running behind a reverse proxy, gateway, or firewall, where the HTTP Host header might be reset to the internal IP address, the HTTPS connection might be terminated, and so on.
For example, the redirect_uri parameter in the authorization code flow might be set to the internal host instead of the expected external one.
In such cases, configuring Quarkus to recognize the original headers forwarded by the proxy will be required. For more information, see the Running behind a reverse proxy Vert.x documentation section.
For example, if your Quarkus endpoint runs in a cluster behind Kubernetes Ingress, then a redirect from the OIDC provider back to this endpoint might not work because the calculated redirect_uri parameter might point to the internal endpoint address.
You can resolve this problem by using the following configuration, where X-ORIGINAL-HOST is set by Kubernetes Ingress to represent the external endpoint address.:
quarkus.http.proxy.proxy-address-forwarding=true
quarkus.http.proxy.allow-forwarded=false
quarkus.http.proxy.enable-forwarded-host=true
quarkus.http.proxy.forwarded-host-header=X-ORIGINAL-HOST
quarkus.oidc.authentication.force-redirect-https-scheme property can also be used when the Quarkus application is running behind an SSL-terminating reverse proxy.
External and internal access to the OIDC provider
The OIDC provider externally-accessible authorization, logout, and other endpoints can have different HTTP(S) URLs compared to the URLs auto-discovered or configured relative to the quarkus.oidc.auth-server-url internal URL.
In such cases, the endpoint might report an issuer verification failure, and redirects to externally accessible OIDC provider endpoints might fail.
If you work with Keycloak, start it with the KEYCLOAK_FRONTEND_URL system property set to the externally accessible base URL.
If you work with other OIDC providers, check the documentation of your provider.
OIDC HTTP client redirects
OIDC providers behind a firewall might redirect the Quarkus OIDC HTTP client’s GET requests to some of their endpoints, such as a well-known configuration endpoint. By default, Quarkus OIDC HTTP client follows HTTP redirects automatically, excluding cookies that might have been set during the redirect request for security reasons.
If you would like, you can disable it with quarkus.oidc.follow-redirects=false.
When following redirects automatically is disabled, and the Quarkus OIDC HTTP client receives a redirect request, it will attempt to recover only once by following the redirect URI, but only if it is exactly the same as the original request URI, and as long as one or more cookies were set during the redirect request.
OIDC SAML identity broker
If your identity provider does not implement OpenID Connect but only the legacy XML-based SAML2.0 SSO protocol, then Quarkus cannot be used as a SAML 2.0 adapter, similarly to how quarkus-oidc is used as an OIDC adapter.
However, many OIDC providers, such as Keycloak, Okta, Auth0, and Microsoft ADFS, offer bridges from OIDC to SAML 2.0.
You can create an identity broker connection to a SAML 2.0 provider in your OIDC provider and use quarkus-oidc to authenticate your users to this SAML 2.0 provider, with the OIDC provider coordinating OIDC and SAML 2.0 communications.
As far as Quarkus endpoints are concerned, they can continue using the same Quarkus Security and OIDC API annotations, such as @Authenticated, SecurityIdentity, and so on.
For example, assume Okta is your SAML 2.0 provider and Keycloak is your OIDC provider.
Here is a typical sequence for configuring Keycloak to act as a broker with the Okta SAML 2.0 provider.
-
Create a new
SAML2integration in yourOktaDashboard/Applications:
For example, name it as
OktaSaml:
-
Configure it to point to a Keycloak SAML broker endpoint.
At this point, you need to know the name of the Keycloak realm, for example,
quarkus, and, assuming that the Keycloak SAML broker alias issaml, enter the endpoint address ashttp://localhost:8081/realms/quarkus/broker/saml/endpoint. -
Enter the service provider (SP) entity ID as
http://localhost:8081/realms/quarkus, wherehttp://localhost:8081is a Keycloak base address andsamlis a broker alias:
-
Save this SAML integration and note its Metadata URL:
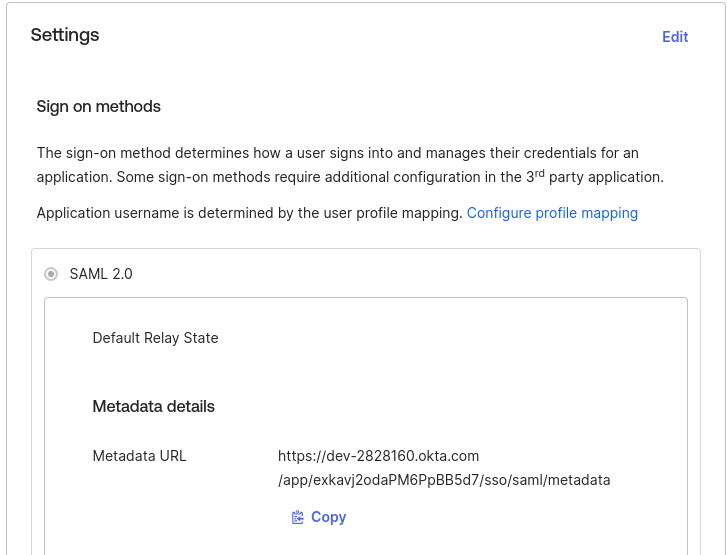
-
Add a SAML provider to Keycloak:
Create a new realm or import the existing realm to
Keycloak. In this case, the realm name has to bequarkus. -
In the
quarkusrealm properties, navigate toIdentity Providersand add a new SAML provider: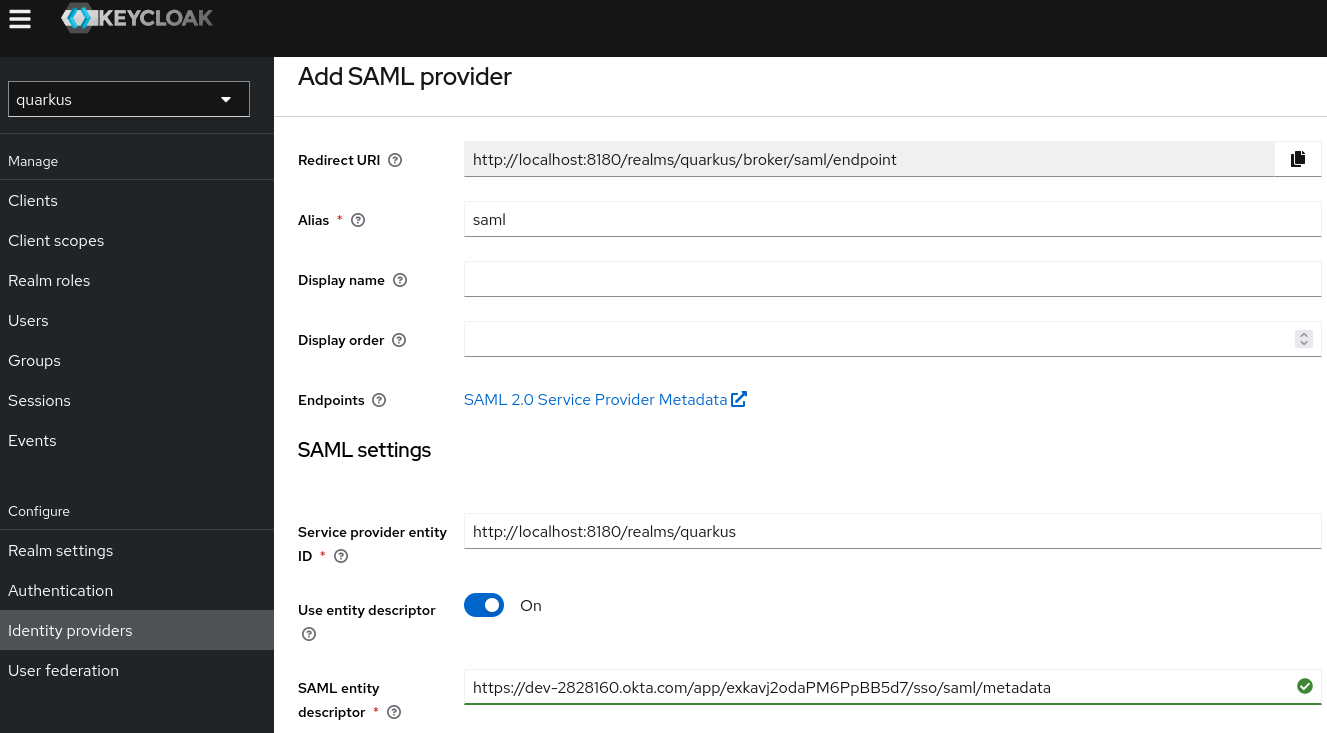
Note the alias is set to
saml,Redirect URIishttp://localhost:8081/realms/quarkus/broker/saml/endpoint, andService provider entity IDishttp://localhost:8081/realms/quarkus- these are the same values you entered when creating the Okta SAML integration in the previous step. -
Set
Service entity descriptorto point to the Okta SAML Integration Metadata URL you noted at the end of the previous step.-
Optionally, you can register this Keycloak SAML provider as a default provider by navigating to
Authentication/browser/Identity Provider Redirector configand setting both theAliasandDefault Identity Providerproperties tosaml. If you do not configure it as a default provider, then, at authentication time, Keycloak offers 2 options:-
Authenticate with the SAML provider
-
Authenticate directly to Keycloak with the name and password
-
-
-
Configure the Quarkus OIDC
web-appapplication to point to the Keycloakquarkusrealm,quarkus.oidc.auth-server-url=http://localhost:8180/realms/quarkus.Now, you are ready to start authenticating your Quarkus users to the Okta SAML 2.0 provider by using an OIDC-to-SAML bridge provided by the Keycloak OIDC and Okta SAML 2.0 providers.
You can configure other OIDC providers to provide a SAML bridge similarly to how it’s done with Keycloak.
测试
Testing authentication to a separate OIDC-like server can be tricky. Quarkus offers several options, from mocking to running a local OIDC provider.
首先在你的测试项目中添加以下依赖项:
<dependency>
    <groupId>org.htmlunit</groupId>
    <artifactId>htmlunit</artifactId>
    <exclusions>
        <exclusion>
            <groupId>org.eclipse.jetty</groupId>
            <artifactId>*</artifactId>
       </exclusion>
    </exclusions>
    <scope>test</scope>
</dependency>
<dependency>
    <groupId>io.quarkus</groupId>
    <artifactId>quarkus-junit</artifactId>
    <scope>test</scope>
</dependency>testImplementation("org.htmlunit:htmlunit")
testImplementation("io.quarkus:quarkus-junit")为Keycloak提供的开发服务
For integration testing against Keycloak, use Dev services for Keycloak.
This service initializes a test container, creates a quarkus realm, and configures a quarkus-app client with the secret secret.
It also sets up two users: alice with admin and user roles, and bob with the user role.
-
Prepare the
application.propertiesfile.-
If starting from an empty
application.propertiesfile,Dev Services for Keycloakautomatically registers the following properties:-
quarkus.oidc.auth-server-url, which points to the running test container. -
quarkus.oidc.client-id=quarkus-app. -
quarkus.oidc.credentials.secret=secret.
-
-
If you already have the required
quarkus-oidcproperties configured, associatequarkus.oidc.auth-server-urlwith theprodprofile. This ensures thatDev Services for Keycloakstarts the container as expected.例如:
%prod.quarkus.oidc.auth-server-url=http://localhost:8180/realms/quarkus
-
-
Optional: To import a custom realm file into Keycloak before running the tests, configure
Dev services for Keycloak:%prod.quarkus.oidc.auth-server-url=http://localhost:8180/realms/quarkus quarkus.keycloak.devservices.realm-path=quarkus-realm.json -
Write the test code as described in the Wiremock section. The only difference is that
@QuarkusTestResourceis no longer required:@QuarkusTest public class CodeFlowAuthorizationTest { }
Wiremock
-
添加以下依赖关系:
pom.xml<dependency> <groupId>io.quarkus</groupId> <artifactId>quarkus-test-oidc-server</artifactId> <scope>test</scope> </dependency>build.gradletestImplementation("io.quarkus:quarkus-test-oidc-server") -
Prepare the REST test endpoints and set
application.properties.例如:
# keycloak.url is set by OidcWiremockTestResource quarkus.oidc.auth-server-url=${keycloak.url:replaced-by-test-resource}/realms/quarkus/ quarkus.oidc.client-id=quarkus-web-app quarkus.oidc.credentials.secret=secret quarkus.oidc.application-type=web-app -
Write the test code, for example:
import static org.junit.jupiter.api.Assertions.assertEquals;

import org.junit.jupiter.api.Test;

import org.htmlunit.SilentCssErrorHandler;
import org.htmlunit.WebClient;
import org.htmlunit.html.HtmlForm;
import org.htmlunit.html.HtmlPage;

import io.quarkus.test.common.QuarkusTestResource;
import io.quarkus.test.junit.QuarkusTest;
import io.quarkus.test.oidc.server.OidcWiremockTestResource;

@QuarkusTest
@QuarkusTestResource(OidcWiremockTestResource.class)
public class CodeFlowAuthorizationTest {

    @Test
    public void testCodeFlow() throws Exception {
        try (final WebClient webClient = createWebClient()) {
            // the test REST endpoint listens on '/code-flow'
            HtmlPage page = webClient.getPage("http://localhost:8081/code-flow");

            HtmlForm form = page.getForms().get(0);
            // user 'alice' has the 'user' role
            form.getInputByName("username").type("alice");
            form.getInputByName("password").type("alice");

            page = form.getButtonByName("login").click();

            assertEquals("alice", page.getBody().asNormalizedText());
        }
    }

    private WebClient createWebClient() {
        WebClient webClient = new WebClient();
        webClient.setCssErrorHandler(new SilentCssErrorHandler());
        return webClient;
    }
}
As a result,
OidcWiremockTestResourcerecognizesaliceandadminusers. The useralicehas theuserrole only by default - it can be customized with aquarkus.test.oidc.token.user-rolessystem property. The useradminhas theuserandadminroles by default - it can be customized with aquarkus.test.oidc.token.admin-rolessystem property.Additionally,
OidcWiremockTestResourcesets the token issuer and audience tohttps://service.example.com, which can be customized withquarkus.test.oidc.token.issuerandquarkus.test.oidc.token.audiencesystem properties.OidcWiremockTestResourcecan be used to emulate all OIDC providers.
Using KeycloakTestResourceLifecycleManager
Use KeycloakTestResourceLifecycleManager for your tests only if there is a good reason not to use Dev Services for Keycloak.
If you need to do integration testing against Keycloak, you are encouraged to use Dev Services for Keycloak.
-
添加以下依赖关系:
pom.xml<dependency> <groupId>io.quarkus</groupId> <artifactId>quarkus-test-keycloak-server</artifactId> <scope>test</scope> </dependency>build.gradletestImplementation("io.quarkus:quarkus-test-keycloak-server")This provides
io.quarkus.test.keycloak.server.KeycloakTestResourceLifecycleManager, an implementation ofio.quarkus.test.common.QuarkusTestResourceLifecycleManagerthat starts a Keycloak container. -
Configure the Maven Surefire plugin as follows (and similarly the Maven Failsafe plugin when testing in native image):
<plugin> <artifactId>maven-surefire-plugin</artifactId> <configuration> <systemPropertyVariables> <!-- or, alternatively, configure 'keycloak.version' --> <keycloak.docker.image>${keycloak.docker.image}</keycloak.docker.image> <!-- Disable HTTPS if required: <keycloak.use.https>false</keycloak.use.https> --> </systemPropertyVariables> </configuration> </plugin> -
Set the configuration and write the test code the same way as it is described in the Wiremock section.
The only difference is the name of
QuarkusTestResource:import io.quarkus.test.keycloak.server.KeycloakTestResourceLifecycleManager; @QuarkusTest @QuarkusTestResource(KeycloakTestResourceLifecycleManager.class) public class CodeFlowAuthorizationTest { }KeycloakTestResourceLifecycleManagerregistersaliceandadminusers. The useralicehas theuserrole only by default - it can be customized with akeycloak.token.user-rolessystem property.The user
adminhas theuserandadminroles by default - it can be customized with akeycloak.token.admin-rolessystem property.By default,
KeycloakTestResourceLifecycleManageruses HTTPS to initialize a Keycloak instance that can be disabled by specifyingkeycloak.use.https=false.The default realm name is
quarkusand client id isquarkus-web-app- setkeycloak.realmandkeycloak.web-app.clientsystem properties to customize the values if needed.
TestSecurity注解
You can use @TestSecurity and @OidcSecurity annotations to test the web-app application endpoint code, which depends on either one of the following injections, or all four:
-
ID
JsonWebToken -
Access
JsonWebToken -
UserInfo -
OidcConfigurationMetadata
For more information, see Use TestingSecurity with injected JsonWebToken.
Checking errors in the logs
To see details about the token verification errors, you must enable io.quarkus.oidc.runtime.OidcProvider TRACE level logging:
quarkus.log.category."io.quarkus.oidc.runtime.OidcProvider".level=TRACE
quarkus.log.category."io.quarkus.oidc.runtime.OidcProvider".min-level=TRACE
To see details about the OidcProvider client initialization errors, enable io.quarkus.oidc.runtime.OidcRecorder TRACE level logging:
quarkus.log.category."io.quarkus.oidc.runtime.OidcRecorder".level=TRACE
quarkus.log.category."io.quarkus.oidc.runtime.OidcRecorder".min-level=TRACE
From the quarkus dev console, type j to change the application global log level.
Programmatic OIDC start-up
OIDC tenants can be created programmatically, as follows:
package io.quarkus.it.oidc;

import io.quarkus.oidc.Oidc;
import jakarta.enterprise.event.Observes;

public class OidcStartup {

    void observe(@Observes Oidc oidc) {
        oidc.createWebApp("http://localhost:8180/realms/quarkus", "quarkus-app", "mysecret");
    }

}
The code above is a programmatic equivalent to the following configuration in the application.properties file:
quarkus.oidc.auth-server-url=http://localhost:8180/realms/quarkus
quarkus.oidc.application-type=web-app
quarkus.oidc.client-id=quarkus-app
quarkus.oidc.credentials.secret=mysecret
Should you need to configure more OIDC tenant properties, use the OidcTenantConfig builder like in the example below:
package io.quarkus.it.oidc;

import io.quarkus.oidc.Oidc;
import io.quarkus.oidc.OidcTenantConfig;
import io.quarkus.oidc.common.runtime.config.OidcClientCommonConfig.Credentials.Secret.Method;
import jakarta.enterprise.event.Observes;

public class OidcStartup {

    void createDefaultTenant(@Observes Oidc oidc) {
        var defaultTenant = OidcTenantConfig
                .authServerUrl("http://localhost:8180/realms/quarkus/")
                .clientId("quarkus-app")
                .credentials().clientSecret("mysecret", Method.POST).end()
                .build();
        oidc.create(defaultTenant);
    }
}
For more complex setup involving multiple tenants, see the Programmatic OIDC start-up for multitenant application section of the OpenID Connect Multi-Tenancy guide.