Getting Started to Quarkus Messaging with Apache Pulsar
This guide demonstrates how your Quarkus application can utilize Quarkus Messaging to interact with Apache Pulsar.
先决条件
完成这个指南,你需要:
-
大概15分钟
-
编辑器
-
JDK 17+ installed with
JAVA_HOMEconfigured appropriately -
Apache Maven 3.9.16
-
Docker and Docker Compose or Podman, and Docker Compose
-
如果你愿意的话,还可以选择使用Quarkus CLI
-
如果你想构建原生可执行程序,可以选择安装Mandrel或者GraalVM,并正确配置(或者使用Docker在容器中进行构建)
架构
In this guide, we are going to develop two applications communicating with Pulsar. The first application sends a quote request to Pulsar and consumes Pulsar messages from the quote topic. The second application receives the quote request and sends a quote back.

The first application, the producer, will let the user request some quotes over an HTTP endpoint.
For each quote request a random identifier is generated and returned to the user, to mark the quote request as pending.
At the same time, the generated request id is sent over a Pulsar topic quote-requests.
The second application, the processor, will read from the quote-requests topic, put a random price to the quote, and send it to a Pulsar topic named quotes.
Lastly, the producer will read the quotes and send them to the browser using server-sent events. The user will therefore see the quote price updated from pending to the received price in real-time.
解决方案
我们建议你按照下面章节中的说明,一步一步地创建应用程序。但是,你可以直接转到已完成的示例。
克隆 Git 仓库: git clone https://github.com/quarkusio/quarkus-quickstarts.git ,或者下载 存档 。
The solution is located in the pulsar-quickstart directory.
创建Maven项目
首先,我们需要创建两个项目: producer 和 processor 。
要创建 producer 项目,请在终端中运行:
For Windows users:
-
If using cmd, (don’t use backward slash
\and put everything on the same line) -
If using Powershell, wrap
-Dparameters in double quotes e.g."-DprojectArtifactId=pulsar-quickstart-producer"
This command creates the project structure and selects two Quarkus extensions we will be using:
-
Quarkus REST (formerly RESTEasy Reactive) and its Jackson support (to handle JSON) to serve the HTTP endpoint.
-
The Pulsar connector for Reactive Messaging
要创建 processor 项目,请在同一目录下运行:
For Windows users:
-
If using cmd, (don’t use backward slash
\and put everything on the same line) -
If using Powershell, wrap
-Dparameters in double quotes e.g."-DprojectArtifactId=pulsar-quickstart-processor"
At that point, you should have the following structure:
.
├── pulsar-quickstart-processor
│  ├── README.md
│  ├── mvnw
│  ├── mvnw.cmd
│  ├── pom.xml
│  └── src
│     └── main
│        ├── docker
│        ├── java
│        └── resources
│           └── application.properties
└── pulsar-quickstart-producer
   ├── README.md
   ├── mvnw
   ├── mvnw.cmd
   ├── pom.xml
   └── src
      └── main
         ├── docker
         ├── java
         └── resources
            └── application.properties
在你喜欢的IDE中打开这两个项目。
|
开发服务
No need to start a Pulsar broker when using the dev mode or for tests. Quarkus starts a broker for you automatically. See Dev Services for Pulsar for details. |
Quote对象
The Quote class will be used in both producer and processor projects.
For the sake of simplicity, we will duplicate the class.
In both projects, create the src/main/java/org/acme/pulsar/model/Quote.java file, with the following content:
package org.acme.pulsar.model;

public class Quote {

    public String id;
    public int price;

    /**
    * Default constructor required for Jackson serializer
    */
    public Quote() { }

    public Quote(String id, int price) {
        this.id = id;
        this.price = price;
    }

    @Override
    public String toString() {
        return "Quote{" +
                "id='" + id + '\'' +
                ", price=" + price +
                '}';
    }
}
JSON representation of Quote objects will be used in messages sent to the Pulsar topic
and also in the server-sent events sent to web browsers.
Quarkus has built-in capabilities to deal with JSON Pulsar messages. In a following section, we will create serializer/deserializer classes for Jackson.
发送报价请求
Inside the producer project, create the src/main/java/org/acme/pulsar/producer/QuotesResource.java file and add the following content:
package org.acme.pulsar.producer;

import java.util.UUID;

import jakarta.ws.rs.GET;
import jakarta.ws.rs.POST;
import jakarta.ws.rs.Path;
import jakarta.ws.rs.Produces;
import jakarta.ws.rs.core.MediaType;

import org.acme.pulsar.model.Quote;
import org.eclipse.microprofile.reactive.messaging.Channel;
import org.eclipse.microprofile.reactive.messaging.Emitter;

@Path("/quotes")
public class QuotesResource {

    @Channel("quote-requests")
    Emitter<String> quoteRequestEmitter; (1)

    /**
     * Endpoint to generate a new quote request id and send it to "quote-requests" Pulsar topic using the emitter.
     */
    @POST
    @Path("/request")
    @Produces(MediaType.TEXT_PLAIN)
    public String createRequest() {
        UUID uuid = UUID.randomUUID();
        quoteRequestEmitter.send(uuid.toString()); (2)
        return uuid.toString(); (3)
    }
}| 1 | 注入一个响应式消息 Emitter ,来向 quote-requests 通道发送消息。 |
| 2 | On a post request, generate a random UUID and send it to the Pulsar topic using the emitter. |
| 3 | Return the same UUID to the client. |
The quote-requests channel is going to be managed as a Pulsar topic, as that’s the only connector on the classpath.
If not indicated otherwise, like in this example, Quarkus uses the channel name as topic name.
So, in this example, the application writes into the quote-requests topic.
Quarkus also configures the serializer automatically, because it finds that the Emitter produces String values.
| 当你有多个连接器时,你需要在应用程序配置中指出你想要使用哪个连接器。 |
处理报价请求
Now let’s consume the quote request and give out a price.
Inside the processor project, create the src/main/java/org/acme/pulsar/processor/QuotesProcessor.java file and add the following content:
package org.acme.pulsar.processor;

import java.util.Random;

import jakarta.enterprise.context.ApplicationScoped;

import org.acme.pulsar.model.Quote;
import org.eclipse.microprofile.reactive.messaging.Incoming;
import org.eclipse.microprofile.reactive.messaging.Outgoing;

import io.smallrye.reactive.messaging.annotations.Blocking;

/**
 * A bean consuming data from the "quote-requests" Pulsar topic (mapped to "requests" channel) and giving out a random quote.
 * The result is pushed to the "quotes" Pulsar topic.
 */
@ApplicationScoped
public class QuotesProcessor {

    private Random random = new Random();

    @Incoming("requests") (1)
    @Outgoing("quotes")   (2)
    @Blocking             (3)
    public Quote process(String quoteRequest) throws InterruptedException {
        // simulate some hard working task
        Thread.sleep(200);
        return new Quote(quoteRequest, random.nextInt(100));
    }
}| 1 | Indicates that the method consumes the items from the requests channel. |
| 2 | Indicates that the objects returned by the method are sent to the quotes channel. |
| 3 | 表示该处理是 blocking ,不能在调用者线程上运行。 |
For every Pulsar message from the quote-requests topic, Reactive Messaging calls the process method, and sends the returned Quote object to the quotes channel.
In this case, we need to configure the channel in the application.properties file, to configures the requests and quotes channels:
%dev.quarkus.http.port=8081

# Configure the incoming `quote-requests` Pulsar topic
mp.messaging.incoming.requests.topic=quote-requests
mp.messaging.incoming.requests.subscriptionInitialPosition=Earliest
Note that in this case we have one incoming and one outgoing connector configuration, each one distinctly named. The configuration properties are structured as follows:
mp.messaging.[outgoing|incoming].{channel-name}.property=value
channel-name 片段必须与 @Incoming 和 @Outgoing 注解中设定的值相匹配:
-
quote-requests→ Pulsar topic from which we read the quote requests -
quotes→ Pulsar topic in which we write the quotes
|
More details about this configuration is available on the https://pulsar.apache.org/docs/3.0.x/concepts-messaging/ section from the Pulsar documentation.
These properties are configured with the prefix |
mp.messaging.incoming.requests.subscriptionInitialPosition=Earliest instructs the application to start reading the topics from the first message on the topic, when there is no previously acked messages.
In other words, it will also process messages sent before we start the processor application.
There is no need to set schemas.
Quarkus detects them, and if none are found, generates them using appropriate schema types.
Structured types like Quote bean use JSON schema.
接收报价
Back to our producer project.
Let’s modify the QuotesResource to consume quotes from Pulsar and send them back to the client via Server-Sent Events:
import io.smallrye.mutiny.Multi;

...

@Channel("quotes")
Multi<Quote> quotes; (1)

/**
 * Endpoint retrieving the "quotes" Pulsar topic and sending the items to a server sent event.
 */
@GET
@Produces(MediaType.SERVER_SENT_EVENTS) (2)
public Multi<Quote> stream() {
    return quotes; (3)
}| 1 | 使用 @Channel 修饰符注入 quotes 通道 |
| 2 | 表示内容是使用 Server Sent Events 发送的 |
| 3 | 返回流 (Reactive Stream) 。 |
No need to configure anything, as Quarkus will automatically associate the quotes channel to the quotes Pulsar topic.
It will also generate a deserializer for the Quote class.
|
Message Schemas in Pulsar
In this example we used JSON Schema with Pulsar messages. For more information on Pulsar Schemas, see Pulsar Reference Guide - Schema. |
HTML页面
Final touch, the HTML page requesting quotes and displaying the prices obtained over SSE.
Inside the pulsar-quickstart-producer project, create the src/main/resources/META-INF/resources/quotes.html file with the following content:
<!DOCTYPE html>
<html lang="en">
<head>
<meta charset="UTF-8">
<title>Prices</title>
<link rel="stylesheet" type="text/css"
href="https://cdnjs.cloudflare.com/ajax/libs/patternfly/3.24.0/css/patternfly.min.css">
<link rel="stylesheet" type="text/css"
href="https://cdnjs.cloudflare.com/ajax/libs/patternfly/3.24.0/css/patternfly-additions.min.css">
</head>
<body>
<div class="container">
<div class="card">
<div class="card-body">
<h2 class="card-title">Quotes</h2>
<button class="btn btn-info" id="request-quote">Request Quote</button>
<div class="quotes"></div>
</div>
</div>
</div>
</body>
<script src="https://code.jquery.com/jquery-3.6.0.min.js"></script>
<script>
$("#request-quote").click((event) => {
fetch("/quotes/request", {method: "POST"})
.then(res => res.text())
.then(qid => {
var row = $(`<h4 class='col-md-12' id='${qid}'>Quote # <i>${qid}</i> | <strong>Pending</strong></h4>`);
$(".quotes").prepend(row);
});
});
var source = new EventSource("/quotes");
source.onmessage = (event) => {
var json = JSON.parse(event.data);
$(`#${json.id}`).html((index, html) => {
return html.replace("Pending", `\$\xA0${json.price}`);
});
};
</script>
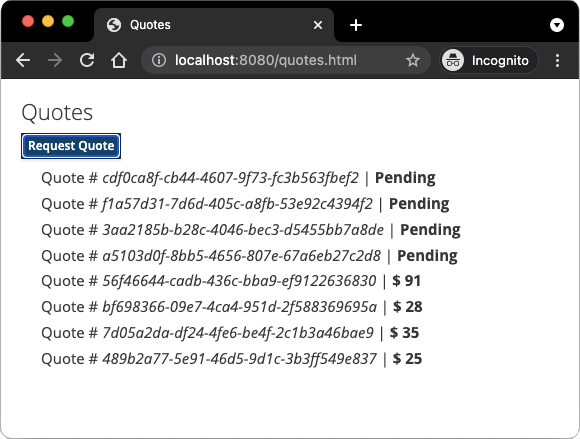
</html>Nothing spectacular here. When the user clicks the button, HTTP request is made to request a quote, and a pending quote is added to the list. On each quote received over SSE, the corresponding item in the list is updated.
让它运行起来
You just need to run both applications. In one terminal, run:
mvn -f pulsar-quickstart-producer quarkus:dev在另外一个终端中,运行:
mvn -f pulsar-quickstart-processor quarkus:devQuarkus starts a Pulsar broker automatically, configures the application and shares the Pulsar broker instance between different applications. See Dev Services for Pulsar for more details.
在你的浏览器中打开 http://localhost:8080/quotes.html ,点击按钮来请求一些报价。
在JVM或本地模式下运行
When not running in dev or test mode, you will need to start your Pulsar broker.
You can follow the instructions from the Run a standalone Pulsar cluster in Docker or create a docker-compose.yaml file with the following content:
version: '3.8'

services:

  pulsar:
    image: docker.io/apachepulsar/pulsar:3.2.4
    command: [
      "sh", "-c",
      "bin/apply-config-from-env.py conf/standalone.conf && bin/pulsar standalone -nfw -nss"
    ]

    ports:
      - "6650:6650"
      - "8080:8080"
    tmpfs:
      - /pulsar/data
    healthcheck:
      test: curl --fail http://localhost:8080/admin/v2/clusters || exit 1
      interval: 10s
      timeout: 10s
      retries: 5
      start_period: 5s
    environment:
      PULSAR_PREFIX_advertisedListeners: internal:pulsar://localhost:6650,external:pulsar://pulsar:6650
      PULSAR_PREFIX_transactionCoordinatorEnabled: true
      PULSAR_PREFIX_systemTopicEnabled: true
    networks:
      - pulsar-quickstart-network

  producer:
    image: quarkus-quickstarts/pulsar-quickstart-producer:1.0-${QUARKUS_MODE:-jvm}
    depends_on:
      pulsar:
        condition: service_healthy
    build:
      context: pulsar-quickstart-producer
      dockerfile: src/main/docker/Dockerfile.${QUARKUS_MODE:-jvm}
    deploy:
      restart_policy:
        condition: on-failure
    environment:
      PULSAR_CLIENT_SERVICE_URL: pulsar://pulsar:6650
    ports:
      - "8082:8080"
    networks:
      - pulsar-quickstart-network

  processor:
    image: quarkus-quickstarts/pulsar-quickstart-processor:1.0-${QUARKUS_MODE:-jvm}
    depends_on:
      pulsar:
        condition: service_healthy
    build:
      context: pulsar-quickstart-processor
      dockerfile: src/main/docker/Dockerfile.${QUARKUS_MODE:-jvm}
    deploy:
      restart_policy:
        condition: on-failure
    environment:
      QUARKUS_HTTP_PORT: 8082
      PULSAR_CLIENT_SERVICE_URL: pulsar://pulsar:6650
    ports:
      - "8083:8080"
    networks:
      - pulsar-quickstart-network

networks:
  pulsar-quickstart-network:
    name: pulsar-quickstart
Make sure you first build both applications in JVM mode with:
mvn -f pulsar-quickstart-producer package
mvn -f pulsar-quickstart-processor package
Once packaged, run docker-compose up.
| This is a development cluster, do not use in production. |
You can also build and run our applications as native executables. First, compile both applications as native:
mvn -f pulsar-quickstart-producer package -Dnative -Dquarkus.native.container-build=true
mvn -f pulsar-quickstart-processor package -Dnative -Dquarkus.native.container-build=true
Run the system with:
export QUARKUS_MODE=native
docker-compose up --build
进一步探索
This guide has shown how you can interact with Pulsar using Quarkus. It utilizes SmallRye Reactive Messaging to build data streaming applications.
For the exhaustive list of features and configuration options, check the Reference guide for Apache Pulsar Extension.
|
In this guide we explore how to interact with Apache Pulsar using the Quarkus Messaging extensions. using Pulsar clients directly. |