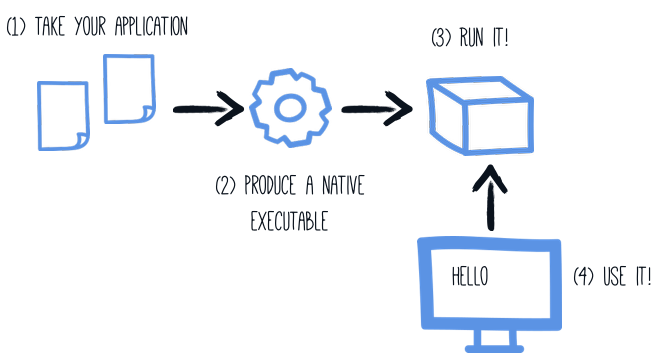
构建一个原生可执行文件
准备工作
完成这个指南,你需要:
-
大概15分钟
-
编辑器
-
JDK 17+ installed with
JAVA_HOMEconfigured appropriately -
Apache Maven 3.9.16
-
A working container runtime (Docker or Podman)
-
如果你愿意的话,还可以选择使用Quarkus CLI
-
可以安装Mandrel或者GraalVM,并正确配置
-
一个 C语言工作开发环境
-
在 入门指南 中开发的应用程序代码。
|
支持在C语言中进行原生编译
拥有一个C语言工作开发者环境意味着什么?
|
Background
构建一个原生可执行文件需要使用GraalVM的发行版。有三个发行版:Oracle GraalVM社区版(CE)、Oracle GraalVM企业版(EE)和Mandrel。Oracle和Mandrel发行版之间的区别如下:
-
Mandrel是Oracle GraalVM CE的一个下游发行版。Mandrel的主要目标是提供一种方法来构建专门为支持Quarkus而设计的原生可执行文件。
-
Mandrel版本的代码库来自于上游的Oracle GraalVM CE代码库,只做了一些小的改动,但也有一些重要的对于Quarkus本地应用程序来说是没有必要的排除项。它们支持与Oracle GraalVM CE相同的构建原生可执行文件的能力,在功能上没有重大变化。值得注意的是,它们不包括对多语言编程的支持。之所以排除这些功能,是为了给大多数Quarkus用户提供更好的支持水平。与Oracle GraalVM CE/EE相比,这些不包括的内容也意味着Mandrel发布的软件包大小大大减小。
-
Mandrel的构建方式与Oracle GraalVM CE略有不同,它使用标准的OpenJDK项目。这意味着,Oracle往OpenJDK增加了一些小增强功能,并用于构建Oracle自己的GraalVM,但Mandrel不能从中获益。这些增强功能被省略了,因为它上游的标准OpenJDK并不管理这些特性,也无法提供保障。这一点在涉及到一致性和安全性时尤其重要。
-
Mandrel is recommended for building native executables that target Linux containerized environments. This means that Mandrel users are encouraged to use containers to build their native executables. If you are building native executables for macOS on amd64/x86, you should consider using Oracle GraalVM instead, because Mandrel does not currently target this platform. Building native executables directly on bare metal Linux, macOS (on M processors), or Windows is possible, with details available in the Mandrel README and Mandrel releases.
配置GraalVM
|
This step is only required for generating native executables targeting non-Linux operating systems. For generating native executables targeting Linux, you can optionally skip this section and use a builder image instead. |
|
If you cannot install GraalVM, you can use a multi-stage Docker build to run Maven inside a Docker container that embeds GraalVM. There is an explanation of how to do this at the end of this guide. |
GraalVM for JDK 21 is required.
-
如果你还没有安装 GraalVM。那么你有几个选择:
-
从 https://github.com/graalvm/mandrel/releases 或 https://github.com/graalvm/graalvm-ce-builds/releases 下载相应的归档文件,然后像对待其他 JDK 一样将其解压。
-
Use platform-specific installer tools like sdkman, homebrew, or scoop. We recommend the community edition of GraalVM. For example, install it with
sdk install java 21-graalce.
-
-
配置运行环境。将
GRAALVM_HOME环境变量设置为GraalVM的安装目录,例如:export GRAALVM_HOME=$HOME/Development/mandrel/On macOS (amd64/x86 based Macs not supported), point the variable to the
Homesub-directory:export GRAALVM_HOME=$HOME/Development/graalvm/Contents/Home/在Windows上,您将需要通过控制面板来设置环境变量。
通过scoop安装将为你做到这一点。
-
(可选)将
JAVA_HOME环境变量设置为GraalVM的安装目录。export JAVA_HOME=${GRAALVM_HOME} -
(可选)将GraalVM
bin目录添加到路径中export PATH=${GRAALVM_HOME}/bin:$PATH
|
Issues using GraalVM with macOS
GraalVM binaries are not (yet) notarized for macOS as reported in this GraalVM issue. This means that you may see the following error when using 其中一种解决方法是,使用以下命令递归删除GraalVM安装目录上的 |
解决方案
我们建议您按照下面几节的说明,一步一步地打包应用。不过您还可以直接进入完成的例子。
克隆 Git 仓库:git clone https://github.com/quarkusio/quarkus-quickstarts.git,或者下载 存档。
该解决方案位于 getting-started 目录中。
制作一个原生可执行文件
我们应用程序的原生可执行文件将包含应用程序代码、所需的库、Java API和一个缩小版的虚拟机。较小的虚拟机基础提高了应用程序的启动时间和最小的磁盘占用。
If you have generated the application from the previous tutorial, you can find in the pom.xml the following Maven profile section:
<profiles>
    <profile>
        <id>native</id>
        <activation>
            <property>
                <name>native</name>
            </property>
        </activation>
        <properties>
            <skipITs>false</skipITs>
            <quarkus.native.enabled>true</quarkus.native.enabled>
        </properties>
    </profile>
</profiles>|
You can provide custom options for the By convention 你可以在下面的 Creating a Native Image Bundle 部分找到关于如何配置原生镜像构建过程的更多信息。 |
We use a profile because, you will see very soon, packaging the native executable takes a few minutes. You could just pass -Dquarkus.native.enabled=true as a property on the command line, however it is better to use a profile as this allows native image tests to also be run.
使用以下方法创建一个原生可执行文件:
quarkus build --native./mvnw install -Dnative./gradlew build -Dquarkus.native.enabled=true|
在Windows上打包的问题
The Microsoft Native Tools for Visual Studio must first be initialized before packaging.
You can do this by starting the 另一个解决方案是写一个脚本来完成: |
除了常规文件外,该构建还产生了 target/getting-started-1.0.0-SNAPSHOT-runner 。你可以用以下方式运行它: ./target/getting-started-1.0.0-SNAPSHOT-runner 。
|
Java预览功能
依赖于预览功能的Java代码需要特别注意。为了产生一个原生可执行文件,这意味着需要将 |
构建纯静态原生可执行文件
| 纯静态原生可执行文件支持是试验性的。 |
On Linux it’s possible to package a native executable that doesn’t depend on any system shared library.
There are some system requirements to be fulfilled and additional build arguments to be used along with the native-image invocation, a minimum is -Dquarkus.native.additional-build-args="--static","--libc=musl".
编译纯静态的二进制文件是通过静态链接 musl 而不是 glibc ,如果没有严格的测试,不应该在生产中使用。
测试原生可执行文件
制作一个原生可执行文件可能会导致一些问题,因此,建议针对以原生可执行文件运行的应用程序运行一些测试。具体原因在 测试指南 中有详细解释。
To see the GreetingResourceIT run against the native executable, use ./mvnw verify -Dnative:
$ ./mvnw verify -Dnative
...
Finished generating 'getting-started-1.0.0-SNAPSHOT-runner' in 22.0s.
[INFO] [io.quarkus.deployment.pkg.steps.NativeImageBuildRunner] docker run --env LANG=C --rm --user 1000:1000 -v /home/zakkak/code/quarkus-quickstarts/getting-started/target/getting-started-1.0.0-SNAPSHOT-native-image-source-jar:/project:z --entrypoint /bin/bash quay.io/quarkus/ubi9-quarkus-mandrel-builder-image:jdk-21 -c objcopy --strip-debug getting-started-1.0.0-SNAPSHOT-runner
[INFO] [io.quarkus.deployment.QuarkusAugmentor] Quarkus augmentation completed in 70686ms
[INFO]
[INFO] --- maven-failsafe-plugin:3.0.0-M7:integration-test (default) @ getting-started ---
[INFO] Using auto detected provider org.apache.maven.surefire.junitplatform.JUnitPlatformProvider
[INFO]
[INFO] -------------------------------------------------------
[INFO]  T E S T S
[INFO] -------------------------------------------------------
[INFO] Running org.acme.getting.started.GreetingResourceIT
Executing "/home/zakkak/code/quarkus-quickstarts/getting-started/target/getting-started-1.0.0-SNAPSHOT-runner -Dquarkus.http.port=8081 -Dquarkus.http.ssl-port=8444 -Dquarkus.log.file.path=/home/zakkak/code/quarkus-quickstarts/getting-started/target/quarkus.log -Dquarkus.log.file.enable=true -Dquarkus.log.category."io.quarkus".level=INFO"
__  ____  __  _____   ___  __ ____  ______
 --/ __ \/ / / / _ | / _ \/ //_/ / / / __/
 -/ /_/ / /_/ / __ |/ , _/ ,< / /_/ /\ \
--\___\_\____/_/ |_/_/|_/_/|_|\____/___/
2023-05-05 10:55:52,068 INFO  [io.quarkus] (main) getting-started 1.0.0-SNAPSHOT native (powered by Quarkus 3.0.2.Final) started in 0.009s. Listening on: http://0.0.0.0:8081
2023-05-05 10:55:52,069 INFO  [io.quarkus] (main) Profile prod activated.
2023-05-05 10:55:52,069 INFO  [io.quarkus] (main) Installed features: [cdi, rest, smallrye-context-propagation, vertx]
[INFO] Tests run: 2, Failures: 0, Errors: 0, Skipped: 0, Time elapsed: 0.99 s - in org.acme.getting.started.GreetingResourceIT
...|
By default, Quarkus waits for 60 seconds for the native image to start before automatically failing the native tests. This
duration can be changed using the |
|
This procedure was formerly accomplished using the |
配置文件
集成测试默认使用 prod 的配置(profile) 构建 并 运行 原生可执行文件。
You can override the profile the executable runs with during the test using the quarkus.test.integration-test-profile property.
Either by adding it to application.properties or by appending it to the command line:
./mvnw verify -Dnative -Dquarkus.test.integration-test-profile=test.
Your %test. prefixed properties will be used at the test runtime.
You can override the profile the executable is built with and runs with using the quarkus.profile=test property, e.g.
./mvnw clean verify -Dnative -Dquarkus.profile=test. This might come handy if there are test specific resources to be processed,
such as importing test data into the database.
quarkus.native.resources.includes=version.txt
%test.quarkus.native.resources.includes=version.txt,import-dev.sql
%test.quarkus.hibernate-orm.schema-management.strategy=drop-and-create
%test.quarkus.hibernate-orm.sql-load-script=import-dev.sql
在前面提到的 application.properties 例子中。在JVM模式测试运行期间和原生模式测试运行期间,Hibernate ORM管理的数据库将填充测试数据。生产可执行文件将只包含 version.txt 资源,没有多余的测试数据。
|
The executable built with Alternatively, if you need to specify specific properties when running tests against the native executable
built using the |
Java预览功能
|
Java预览功能
依赖于预览功能的Java代码需要特别注意。为了测试一个原生可执行文件,这意味着需要将 |
作为原生可执行文件运行时排除测试
When running tests this way, the only things that actually run natively are your application endpoints, which you can only test via HTTP calls. Your test code does not actually run natively, so if you are testing code that does not call your HTTP endpoints, it’s probably not a good idea to run them as part of native tests.
如果你像我们上面建议的那样,在JVM和原生执行之间共享测试类,你可以用 @DisabledOnNativeImage 注解标记某些测试,被标注的测试只在JVM上运行。
|
使用 |
测试一个现有的原生可执行文件
It is also possible to re-run the tests against a native executable that has already been built. To do this run
./mvnw test-compile failsafe:integration-test -Dnative. This will discover the existing native image and run the tests against it using failsafe.
如果进程由于某种原因找不到原生镜像,或者你想测试一个已经不在目标目录中的原生镜像,你可以用 -Dnative.image.path= 系统属性指定可执行文件。
在没有安装GraalVM的情况下创建一个Linux可执行文件
| 在进一步行动之前,请确保有一个工作的容器运行环境(Docker或podman)。如果你在Windows上使用Docker,你应该在Docker Desktop文件共享设置中共享你的项目的驱动器,并重新启动Docker Desktop。 |
很多时候,人们只需要为他们的Quarkus应用程序创建一个原生Linux可执行文件(例如,为了在容器化环境中运行),并希望避免安装适当的GraalVM版本来完成这项麻烦任务(例如,在CI环境中,通常的做法是尽可能少地安装软件)。
为此,Quarkus提供了一个非常方便的方法,通过利用容器运行时(如Docker或podman)来创建一个原生Linux可执行文件。完成这项任务的最简单方法是执行:
quarkus build --native --no-tests -Dquarkus.native.container-build=true
# The --no-tests flag is required only on Windows and macOS../mvnw install -Dnative -DskipTests -Dquarkus.native.container-build=true./gradlew build -Dquarkus.native.enabled=true -Dquarkus.native.container-build=true|
默认情况下,Quarkus会自动检测容器的运行时。如果你想显式指定择容器的运行时,你可以通过以下方式实现: 对于Docker: CLI
Maven
Gradle
对于podman: CLI
Maven
Gradle
These are regular Quarkus config properties, so if you always want to build in a container
it is recommended you add these to your |
Executable built that way with the container runtime will be a 64-bit Linux executable, so depending on your operating system, it may no longer be runnable.
|
Starting with Quarkus 3.19+, the builder image used to build the native executable is based on UBI 9.
It means that the native executable produced by the container build will be based on UBI 9 as well.
So, if you plan to build a container, make sure that the base image in your You can configure the builder image used for the container build by setting the
You can see the available tags for UBI8 here and for UBI9 here (UBI 9)) |
|
如果你在试图使用容器构建创建原生可执行文件时,尽管你的JAR已经成功构建,仍看到应用程序JAR出现以下无效路径错误,您很可能为容器运行时使用了一个远程守护进程。 Error: Invalid Path entry getting-started-1.0.0-SNAPSHOT-runner.jar Caused by: java.nio.file.NoSuchFileException: /project/getting-started-1.0.0-SNAPSHOT-runner.jar 在这种情况下,使用参数 原因是通过 |
|
Building with GraalVM instead of Mandrel requires a custom builder image parameter to be passed additionally: CLI
Maven
Gradle
Please note that the above command points to a floating tag. It is highly recommended to use the floating tag, so that your builder image remains up-to-date and secure. If you absolutely must, you may hard-code to a specific tag (see here (UBI 8) and here (UBI 9) for available tags), but be aware that you won’t get security updates that way and it’s unsupported. |
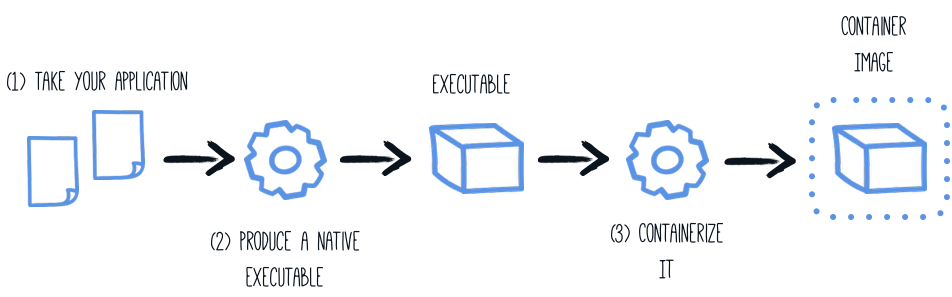
创建一个容器
使用容器-镜像扩展
到目前为止,从你的Quarkus应用程序中创建一个容器镜像的最简单方法是利用容器镜像扩展。
如果这些扩展之一是存在的,那么为原生可执行文件创建一个容器镜像基本上就是执行一个命令的问题:
./mvnw package -Dnative -Dquarkus.native.container-build=true -Dquarkus.container-image.build=true-
quarkus.native.container-build=true允许在不安装GralVM的情况下创建一个Linux可执行文件(只有在你没有安装GralVM或者你的本地操作系统不是Linux的情况下才需要)
|
If you’re running a remote Docker daemon, you need to replace See Creating a Linux executable without GraalVM installed for more details. |
-
quarkus.container-image.build=true指示Quarkus使用最终的应用程序工件(在本例中是原生可执行文件)创建一个容器镜像
更多细节见 容器镜像指南 。
手动使用微基础镜像
You can run the application in a container using the JAR produced by the Quarkus Maven Plugin. However, in this section, we focus on creating a container image using the produced native executable.
使用本地GraalVM安装时,原生可执行文件的目标是您的本地操作系统(Linux、macOS、Windows等)。然而,由于容器可能不使用与操作系统相同的 executable 格式,我们将指示Maven构建通过利用容器运行时( 如 this section 所述)来生成可执行文件:
The produced executable will be a 64-bit Linux executable, so depending on your operating system, it may no longer be runnable.
However, it’s not an issue as we are going to copy it to a container.
The project generation has provided a Dockerfile.native-micro in the src/main/docker directory with the following content:
FROM quay.io/quarkus/ubi9-quarkus-micro-image:2.0
WORKDIR /work/
RUN chown 1001 /work \
    && chmod "g+rwX" /work \
    && chown 1001:root /work
COPY --chown=1001:root --chmod=755 target/*-runner /work/application

EXPOSE 8080
USER 1001

ENTRYPOINT ["./application", "-Dquarkus.http.host=0.0.0.0"]|
什么是Quarkus微镜像?
The Quarkus Micro Image is a small container image providing the right set of dependencies to run your native application. It is based on UBI Micro. This base image has been tailored to work perfectly in containers. 你可以在这里阅读更多关于UBI镜像的内容: UBI镜像可以不受任何限制地使用。 此页 解释了当你的应用有特殊要求时,如何扩展 |
然后,如果你没有删除生成的原生可执行文件,可以用以下方法构建docker镜像:
docker build -f src/main/docker/Dockerfile.native-micro -t quarkus-quickstart/getting-started .最后,用以下方式运行:
docker run -i --rm -p 8080:8080 quarkus-quickstart/getting-started手工使用最小基础镜像
生成的项目也在 src/main/docker 目录中提供了一个 Dockerfile.native ,内容如下:
FROM registry.access.redhat.com/ubi9/ubi-minimal:9.6
WORKDIR /work/
RUN chown 1001 /work \
    && chmod "g+rwX" /work \
    && chown 1001:root /work
COPY --chown=1001:root --chmod=0755 target/*-runner /work/application

EXPOSE 8080
USER 1001

CMD ["./application", "-Dquarkus.http.host=0.0.0.0"]
UBI最小镜像比上面提到的微镜像要大。它包含更多的实用程序,如 microdnf 软件包管理器。
使用多阶段的Docker构建
上一节向你展示了如何使用Maven或Gradle构建原生可执行文件,但这需要你先创建原生可执行文件。此外,这个原生可执行文件必须是Linux 64位可执行文件。
你可能想直接在一个容器中构建原生可执行文件,而不需要一个包含构建工具的最终容器。这种方法可以通过多阶段的Docker构建来实现:
-
第一阶段使用Maven或Gradle构建原生可执行文件
-
第二阶段是复制产生了原生可执行文件的最小镜像
|
Before building a container image from the Dockerfiles shown below, you need to update the default |
这样的多阶段构建可以通过以下方式实现:
用Maven构建的Docker文件例子:
## Stage 1 : build with maven builder image with native capabilities
FROM quay.io/quarkus/ubi9-quarkus-mandrel-builder-image:jdk-21 AS build
COPY --chown=quarkus:quarkus --chmod=0755 mvnw /code/mvnw
COPY --chown=quarkus:quarkus .mvn /code/.mvn
COPY --chown=quarkus:quarkus pom.xml /code/
USER quarkus
WORKDIR /code
RUN ./mvnw -B org.apache.maven.plugins:maven-dependency-plugin:3.8.1:go-offline
COPY src /code/src
RUN ./mvnw package -Dnative

## Stage 2 : create the docker final image
FROM quay.io/quarkus/ubi9-quarkus-micro-image:2.0
WORKDIR /work/
COPY --from=build /code/target/*-runner /work/application

# set up permissions for user `1001`
RUN chmod 775 /work /work/application \
  && chown -R 1001 /work \
  && chmod -R "g+rwX" /work \
  && chown -R 1001:root /work

EXPOSE 8080
USER 1001

CMD ["./application", "-Dquarkus.http.host=0.0.0.0"]
This multi-stage Docker build copies the Maven wrapper from the host machine.
The Maven wrapper (or the Gradle wrapper) is a convenient way to provide a specific version of Maven/Gradle.
It avoids having to create a base image with Maven and Gradle.
To provision the Maven Wrapper in your project, use: mvn wrapper:wrapper.
|
将此文件保存在 src/main/docker/Dockerfile.multistage ,因为它不包括在开始快速入门中。
用Gradle构建的Docker文件例子:
## Stage 1 : build with maven builder image with native capabilities
FROM quay.io/quarkus/ubi9-quarkus-mandrel-builder-image:jdk-21 AS build
USER root
RUN microdnf install findutils -y
COPY --chown=quarkus:quarkus gradlew /code/gradlew
COPY --chown=quarkus:quarkus gradle /code/gradle
COPY --chown=quarkus:quarkus build.gradle /code/
COPY --chown=quarkus:quarkus settings.gradle /code/
COPY --chown=quarkus:quarkus gradle.properties /code/
USER quarkus
WORKDIR /code
COPY src /code/src
RUN ./gradlew build -Dquarkus.native.enabled=true

## Stage 2 : create the docker final image
FROM quay.io/quarkus/ubi9-quarkus-micro-image:2.0
WORKDIR /work/
COPY --from=build /code/build/*-runner /work/application
RUN chmod 775 /work
EXPOSE 8080
CMD ["./application", "-Dquarkus.http.host=0.0.0.0"]
如果在项目中使用Gradle,你可以使用这个Docker文件例子。将其保存在 src/main/docker/Dockerfile.multistage 。
docker build -f src/main/docker/Dockerfile.multistage -t quarkus-quickstart/getting-started .最后,用以下方式运行:
docker run -i --rm -p 8080:8080 quarkus-quickstart/getting-started|
如果你的原生可执行文件需要SSL支持,你可以轻松地在Docker镜像中包含必要的库。 更多信息请参见 我们的使用SSL与原生可执行文件指南 。 |
|
To use GraalVM CE instead of Mandrel, update the |
使用无发行版基础镜像
| 无发行版支持是试验性的。 |
如果你正在寻找小型的容器镜像,https://github.com/GoogleContainerTools/distroless[无发行] 的方法可以减少基础层的大小。 distroless 背后的想法是使用一个单一和最小的基础镜像包含所有的需求,有时甚至是应用程序本身。
Quarkus提供了一个无发行版的基础镜像,可以用于你的 Dockerfile 。你只需要复制你的应用程序,就可以了:
FROM quay.io/quarkus/quarkus-distroless-image:2.0
COPY target/*-runner /application

EXPOSE 8080
USER nonroot

CMD ["./application", "-Dquarkus.http.host=0.0.0.0"]
Quarkus provides the quay.io/quarkus/quarkus-distroless-image:2.0 image.
It contains the required packages to run a native executable and is only 9Mb.
Just add your application on top of this image, and you will get a tiny container image.
在没有经过严格测试的情况下,不应该在生产中使用无发行版镜像。
Build a container image from scratch
| Scratch镜像的支持是试验性的。 |
Building fully statically linked binaries enables the usage of a scratch image containing solely the resulting native executable.
以下是基于 scratch 镜像,使用Dockerfile多阶段构建镜像的例子:
## Stage 1 : build with maven builder image with native capabilities
FROM quay.io/quarkus/ubi9-quarkus-graalvmce-builder-image:jdk-21 AS build
USER root
RUN microdnf install make gcc -y
COPY --chown=quarkus:quarkus mvnw /code/mvnw
COPY --chown=quarkus:quarkus .mvn /code/.mvn
COPY --chown=quarkus:quarkus pom.xml /code/
RUN mkdir /musl && \
    curl -L -o musl.tar.gz https://more.musl.cc/11.2.1/x86_64-linux-musl/x86_64-linux-musl-native.tgz && \
    tar -xvzf musl.tar.gz -C /musl --strip-components 1 && \
    curl -L -o zlib.tar.gz https://github.com/madler/zlib/releases/download/v1.2.13/zlib-1.2.13.tar.gz && \
    mkdir zlib && tar -xvzf zlib.tar.gz -C zlib --strip-components 1 && \
    cd zlib && ./configure --static --prefix=/musl && \
    make && make install && \
    cd .. && rm -rf zlib && rm -f zlib.tar.gz && rm -f musl.tar.gz
ENV PATH="/musl/bin:${PATH}"
USER quarkus
WORKDIR /code
RUN ./mvnw -B org.apache.maven.plugins:maven-dependency-plugin:3.8.1:go-offline
COPY src /code/src
RUN ./mvnw package -Dnative -DskipTests -Dquarkus.native.additional-build-args="--static","--libc=musl"

## Stage 2 : create the final image
FROM scratch
COPY --from=build /code/target/*-runner /application
EXPOSE 8080
ENTRYPOINT [ "/application" ]
在没有经过严格测试的情况下,不应该在生产中使用Scratch镜像。
| The versions of musl and zlib may need to be updated to meet the native-image executable requirements (and UPX if you use native image compression). |
Compress native images
Quarkus可以使用UPX压缩产生的原生可执行文件。更多细节见 UPX压缩文档 。
Java和原生镜像分开编译
In certain circumstances, you may want to build the native image in a separate step.
For example, in a CI/CD pipeline, you may want to have one step to generate the source that will be used for the native image generation and another step to use these sources to actually build the native executable.
For this use case, you can set the additional flag quarkus.native.sources-only=true.
This will execute the java compilation as if you had started native compilation (-Dnative), but stops before triggering the actual call to GraalVM’s native-image.
$ ./mvnw clean package -Dnative -Dquarkus.native.sources-only=true编译完成后,你可以在 target/native-sources 找到构建工件:
$ cd target/native-sources
$ ls
getting-started-1.0.0-SNAPSHOT-runner.jar  graalvm.version  lib  native-image.args
From the output above one can see that, in addition to the produced jar file and the associated lib directory, a text file named native-image.args was created.
This file holds all parameters (including the name of the JAR to compile) to pass along to GraalVM’s native-image command.
A text file named graalvm.version was also created and holds the GraalVM version that should be used.
If you have GraalVM installed and it matches this version, you can start the native compilation by executing:
$ cd target/native-sources
$ native-image $(cat native-image.args)
...
$ ls
native-image.args
getting-started-1.0.0-SNAPSHOT-runner
getting-started-1.0.0-SNAPSHOT-runner.build_artifacts.txt
getting-started-1.0.0-SNAPSHOT-runner.jar
Gradle的过程是类似的。
在一个容器中运行构建过程也是可能的:
$ ./mvnw clean package -Dquarkus.native.enabled=true -Dquarkus.native.sources-only=true -Dquarkus.native.container-build=true-Dquarkus.native.container-build=true will produce an additional text file named native-builder.image holding the docker image name to be used to build the native image.
cd target/native-sources
docker run \
  -it \
  --user $(id -ur):$(id -gr) \
  --rm \
  -v $(pwd):/work \(1)
  -w /work \(2)
  --entrypoint /bin/sh \
  $(cat native-builder.image) \(3)
-c "native-image $(cat native-image.args) -J-Xmx4g"(4)| 1 | 将主机的目录 target/native-image 挂载到容器的 /work 。因此,生成的二进制文件也将被写入这个目录。 |
| 2 | 将工作目录切换到 /work ,我们已经在<1>中挂载了这个目录。 |
| 3 | Use the docker image from the file native-builder.image. |
| 4 | 以文件 native-image.args 的内容为参数调用 native-image 。我们还提供了一个额外的参数,将进程的最大内存限制在4G字节(这可能取决于正在构建的项目和构建它的机器)。 |
|
如果你是在Windows机器上运行,请记住,二进制文件是在Linux docker容器中创建的。因此,二进制文件在Windows主机上是无法执行的。 |
以下是对CI/CD管道的各个步骤的高度概述:
-
将执行
./mvnw …命令的步骤的输出(即目录target/native-image)注册为构建工件, -
在执行
native-image …命令的步骤中需要这个工件,并且 -
将执行
native-image …命令的步骤的输出(即匹配target/*runner的文件)注册为构建工件。
执行步骤 1 的环境只需要安装Java和Maven(或Gradle),而执行步骤 3 的环境只需要安装GralVM(包括 native-image 功能)。
根据CI/CD管道的最终期望输出,生成的二进制文件可能被用来创建一个容器镜像。
调试原生可执行文件
Native executables can be debugged using tools such as gdb.
For this to be possible native executables need to be generated with debug symbols.
|
Debug symbol generation is only supported on Linux. Windows support is still under development, while macOS is not supported. |
要生成调试符号,在生成原生可执行文件时添加 -Dquarkus.native.debug.enabled=true 标志。你将在原生可执行文件旁边的 .debug 文件中找到原生可执行文件的调试符号。
|
The generation of the When |
Aside from debug symbols,
setting -Dquarkus.native.debug.enabled=true flag generates a cache of source files
for any JDK runtime classes, GraalVM classes, and application classes resolved during native executable generation.
This source cache is useful for native debugging tools,
to establish the link between the symbols and the matching source code.
It provides a convenient way of making just the necessary sources available to the debugger/IDE when debugging a native executable.
第三方jar依赖的源,包括Quarkus源代码,默认情况下不会被添加到源缓存中。要包括这些,请确保你先调用 mvn dependency:sources 。这一步是必须的,以便拉出这些依赖的源代码,并将其包含在源代码缓存中。
源缓存位于 target/sources 文件夹中。
|
如果从与 在 或这样运行 比如: |
关于调试原生镜像的更详细指南,请参考 原生参考指南 。
Using Monitoring Options
Monitoring options such as JDK flight recorder, jvmstat, heap dumps, NMT (starting with Mandrel 24.1 for JDK 23), and remote JMX can be added to the native executable build. Simply supply a comma separated list of the monitoring options you wish to include at build time.
-Dquarkus.native.monitoring=<comma separated list of options>| Monitoring Option | 描述 | Availability As Of |
|---|---|---|
jcmd |
Include JCMD support |
GraalVM CE for JDK 24 Mandrel 24.2 |
jfr |
Include JDK Flight Recorder support |
GraalVM CE 21.3 Mandrel 21.3 |
jvmstat |
Adds jvmstat support |
GraalVM 22.3, GraalVM CE 17.0.7 Mandrel 22.3 Mandrel 23.0 (17.0.7) |
heapdump |
Adds support for generating heap dumps |
GraalVM 22.3, GraalVM CE 17.0.7 Mandrel 22.3 Mandrel 23.0 (17.0.7) |
jmxclient |
Adds support for connections to JMX servers. |
GraalVM for JDK 17/20 Mandrel 23.0 |
jmxserver |
Adds support for accepting connections from JMX clients. |
GraalVM for JDK 17/20 Mandrel 23.0 (17.0.7) |
nmt |
Adds support for native memory tracking. |
GraalVM for JDK 23 Mandrel 24.1 |
threaddump |
Adds support for dumping thread stacks on SIGQUIT/SIGBREAK. |
GraalVM for JDK 22 Mandrel 24.0 |
none |
Disables support for all monitoring options that would be enabled by default in Quarkus |
Pseudo option used by Quarkus |
all |
Adds all monitoring options. |
GraalVM 22.3, GraalVM CE 17.0.7 Mandrel 22.3 Mandrel 23.0 (17.0.7) |
Please see the Quarkus Native Reference Guide for more detailed information on these monitoring options.
Creating a Native Image Bundle
A native image bundle containing everything required to build a native image can be generated. This is useful to inspect the build inputs and configuration.
The generation of the bundle can be activated by setting any of the following parameters:
| Parameter | 描述 | 默认 |
|---|---|---|
quarkus.native.bundle.enabled |
Enables the native-image bundle generation |
|
quarkus.native.bundle.dry-run |
Generates the bundle without building the native executable |
|
quarkus.native.bundle.name |
Sets the name of the bundle |
To use this feature, run:
./mvnw package -Dnative -Dquarkus.native.bundle.enabled=trueThis command will generate all the files and configuration needed for the native image build in target/{project.name}-{project.version}-runner.nib.
|
More details on the GraalVM native-image bundle are available in the GraalVM documentation. |
配置原生可执行文件
有很多不同的配置选项可以影响原生可执行文件的生成方式。这些都是在 application.properties ,与其他配置属性相同。
这些属性显示如下:
Configuration property fixed at build time - All other configuration properties are overridable at runtime
Configuration property |
类型 |
默认 |
||||||||||||||||||||
|---|---|---|---|---|---|---|---|---|---|---|---|---|---|---|---|---|---|---|---|---|---|---|
Set to enable native-image building using GraalVM. Environment variable: Show more |
boolean |
|
||||||||||||||||||||
Set to enable native-image bundle generation. Environment variable: Show more |
boolean |
|||||||||||||||||||||
Generates the native-image bundle through a dry-run build, skipping the actual native-image build. Environment variable: Show more |
boolean |
|
||||||||||||||||||||
Set to define the native-image bundle name. If not set the default name will match the native-executable’s name suffixed by Environment variable: Show more |
string |
|||||||||||||||||||||
Set to prevent the native-image process from actually building the native image. Environment variable: Show more |
boolean |
|
||||||||||||||||||||
Comma-separated, additional arguments to pass to the build process. If an argument includes the Environment variable: Show more |
list of string |
|||||||||||||||||||||
Comma-separated, additional arguments to pass to the build process. The arguments are appended to those provided through Environment variable: Show more |
list of string |
|||||||||||||||||||||
If the HTTP url handler should be enabled, allowing you to do URL.openConnection() for HTTP URLs Environment variable: Show more |
boolean |
|
||||||||||||||||||||
If the HTTPS url handler should be enabled, allowing you to do URL.openConnection() for HTTPS URLs Environment variable: Show more |
boolean |
|
||||||||||||||||||||
The default value for java.awt.headless JVM option. Switching this option affects linking of awt libraries. Environment variable: Show more |
boolean |
|
||||||||||||||||||||
Defines the file encoding as in Native image runtime uses the host’s (i.e. build time) value of Environment variable: Show more |
string |
|
||||||||||||||||||||
If all character sets should be added to the native executable. Note that some extensions (e.g. the Oracle JDBC driver) also take this setting into account to enable support for all charsets at the extension level. This increases image size. Environment variable: Show more |
boolean |
|
||||||||||||||||||||
The location of the Graal distribution Environment variable: Show more |
string |
|
||||||||||||||||||||
The location of the JDK Environment variable: Show more |
|
|||||||||||||||||||||
The maximum Java heap to be used during the native image generation Environment variable: Show more |
string |
|||||||||||||||||||||
If the native image build should wait for a debugger to be attached before running. This is an advanced option and is generally only intended for those familiar with GraalVM internals Environment variable: Show more |
boolean |
|
||||||||||||||||||||
If the debug port should be published when building with docker and debug-build-process is true Environment variable: Show more |
boolean |
|
||||||||||||||||||||
If isolates should be enabled Environment variable: Show more |
boolean |
|
||||||||||||||||||||
If a JVM based 'fallback image' should be created if native image fails. This is not recommended, as this is functionally the same as just running the application in a JVM Environment variable: Show more |
boolean |
|
||||||||||||||||||||
If all META-INF/services entries should be automatically registered Environment variable: Show more |
boolean |
|
||||||||||||||||||||
If the bytecode of all proxies should be dumped for inspection Environment variable: Show more |
boolean |
|
||||||||||||||||||||
If this build should be done using a container runtime. Unless container-runtime is also set, docker will be used by default. If docker is not available or is an alias to podman, podman will be used instead as the default. Environment variable: Show more |
boolean |
|||||||||||||||||||||
Explicit configuration option to generate a native Position Independent Executable (PIE) for Linux. If the system supports PIE generation, the default behaviour is to disable it for performance reasons. However, some systems can only run position-independent executables, so this option enables the generation of such native executables. Environment variable: Show more |
boolean |
|||||||||||||||||||||
Generate instructions for a specific machine type. Defaults to Environment variable: Show more |
string |
|||||||||||||||||||||
If this build is done using a remote docker daemon. Environment variable: Show more |
boolean |
|
||||||||||||||||||||
The docker image to use to do the image build. It can be one of Note: Builder images are available using UBI 8 and UBI 9 base images, for example:
You need to be aware that if you use a builder image using UBI9 and you plan to build a container, you must ensure that the base image used in the container is also UBI9. Environment variable: Show more |
string |
|
||||||||||||||||||||
The strategy for pulling the builder image during the build. Defaults to 'always', which will always pull the most up-to-date image; useful to keep up with fixes when a (floating) tag is updated. Use 'missing' to only pull if there is no image locally; useful on development environments where building with out-of-date images is acceptable and bandwidth may be limited. Use 'never' to fail the build if there is no image locally. Environment variable: Show more |
|
|
||||||||||||||||||||
The container runtime (e.g. docker) that is used to do an image based build. If this is set then a container build is always done. Environment variable: Show more |
|
|||||||||||||||||||||
Options to pass to the container runtime Environment variable: Show more |
list of string |
|||||||||||||||||||||
This property is deprecated: Use If the resulting image should allow VM introspection. Environment variable: Show more |
boolean |
|
||||||||||||||||||||
Enable monitoring various monitoring options. The value should be comma separated.
Environment variable: Show more |
list of |
|||||||||||||||||||||
If the reports on call paths and included packages/classes/methods should be generated Environment variable: Show more |
boolean |
|
||||||||||||||||||||
If exceptions should be reported with a full stack trace Environment variable: Show more |
boolean |
|
||||||||||||||||||||
If errors should be reported at runtime. This is a more relaxed setting, however it is not recommended as it means your application may fail at runtime if an unsupported feature is used by accident. Note that the use of this flag may result in build time failures due to `ClassNotFoundException`s. Reason most likely being that the Quarkus extension already optimized it away or do not actually need it. In such cases you should explicitly add the corresponding dependency providing the missing classes as a dependency to your project. Environment variable: Show more |
boolean |
|
||||||||||||||||||||
Don’t build a native image if it already exists. This is useful if you have already built an image and you want to use Quarkus to deploy it somewhere. Note that this is not able to detect if the existing image is outdated, if you have modified source or config and want a new image you must not use this flag. Environment variable: Show more |
boolean |
|
||||||||||||||||||||
A comma separated list of globs to match resource paths that should be added to the native image. Use slash ( By default, no resources are included. Example: Given that you have the files Supported glob features
Note that there are three levels of escaping when passing this option via
All three levels use backslash ( Note that Quarkus extensions typically include the resources they require by themselves. This option is useful in situations when the built-in functionality is not sufficient. Environment variable: Show more |
list of string |
|||||||||||||||||||||
This property is deprecated since A comma separated list of globs to match resource paths that should not be added to the native image. Use slash ( Please refer to By default, no resources are excluded. Example: Given that you have the resource Environment variable: Show more |
list of string |
|||||||||||||||||||||
If debug is enabled and debug symbols are generated. The symbols will be generated in a separate .debug file. Environment variable: Show more |
boolean |
|
||||||||||||||||||||
Generate the report files for GraalVM Dashboard. Environment variable: Show more |
boolean |
|
||||||||||||||||||||
Include a reasons entries in the generated json configuration files. Environment variable: Show more |
boolean |
|
||||||||||||||||||||
Whether compression should be enabled. Environment variable: Show more |
boolean |
|
||||||||||||||||||||
Whether the compression should be executed within a container. Environment variable: Show more |
boolean |
|||||||||||||||||||||
The image used for compression. Defaults to Setting this variable will automatically activate Environment variable: Show more |
string |
|||||||||||||||||||||
The compression level in [1, 10]. 10 means best. Higher compression level requires more time to compress the executable. Environment variable: Show more |
int |
|||||||||||||||||||||
Allows passing extra arguments to the UPX command line (like --brute). The arguments are comma-separated. The exhaustive list of parameters can be found in https://github.com/upx/upx/blob/devel/doc/upx.pod. Environment variable: Show more |
list of string |
|||||||||||||||||||||
Configuration files generated by the Quarkus build, using native image agent, are informative by default. In other words, the generated configuration files are presented in the build log but are not applied. When this option is set to true, generated configuration files are applied to the native executable building process. Enabling this option should be done with care, because it can make native image configuration and/or behaviour dependant on other non-obvious factors. For example, if the native image agent generated configuration was generated from running JVM unit tests, disabling test(s) can result in a different native image configuration being generated, which in turn can misconfigure the native executable or affect its behaviour in unintended ways. Environment variable: Show more |
boolean |
|
||||||||||||||||||||
Enable Profile-Guided Optimization for native images. Requires Oracle GraalVM. When enabled, the native build produces an instrumented binary. Running Environment variable: Show more |
boolean |
|
下一步做什么?
本指南介绍了如何为应用程序创建原生(二进制)可执行文件。它提供了一个具备快速启动时间和消耗更少内存的应用程序。然而,还有更多。
我们建议继续阅读 部署到Kubernetes和OpenShift。