Eclipse got Quarkused !
By

You have probably already heard about tooling for Microsoft VSCode or JetBrains IntelliJ.
Last week the first version of Quarkus Tools for Eclipse was released. It’s free and open source and we encourage you to use it. Let’s see how you can get it and play with the features.
安装
There are several ways to get Quarkus Tools inside the Eclipse IDE.
Quarkus Tools is part of JBoss Tools. So if you are already a JBoss Tools user and if you updated to the latest version (4.14.0.Final) then you already have Quarkus Tools installed in your Eclipse IDE.
Quarkus Tools is also part of Red Hat CodeReady Studio, a Red Hat supported version of JBoss Tools. So if you are already using CodeReady Studio and if you updated to the latest version (12.14.0.GA) then you already have Quarkus Tools installed.
If you are not a JBoss Tools or Red Hat CodeReady Studio user, you can install Quarkus Tools from your Eclise IDE. Let’s see how.
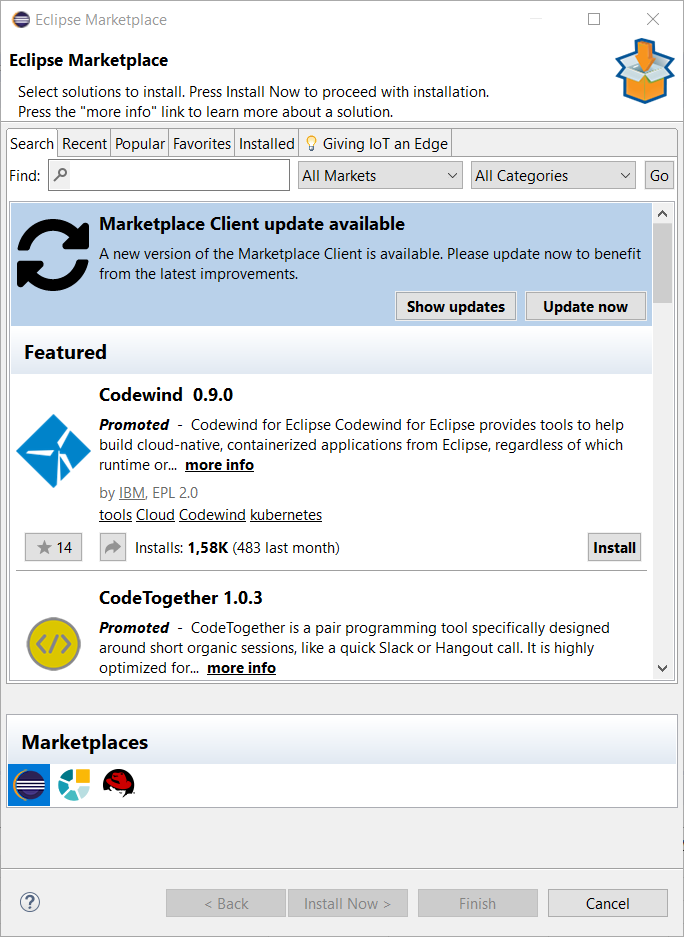
Launch your Eclipse IDE and select the Help → Eclipse Marketplace… menu:
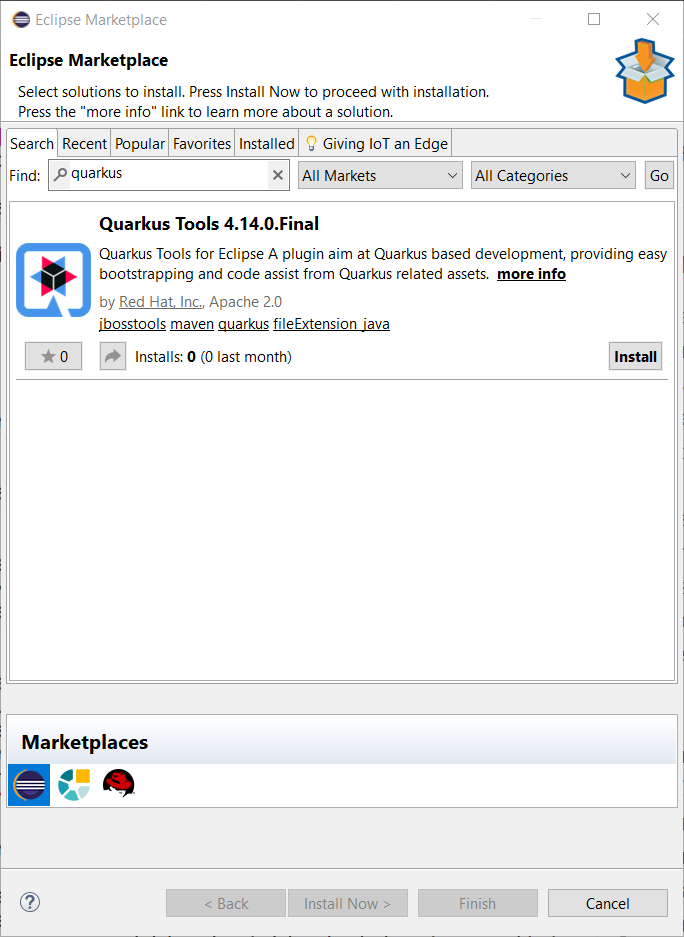
In the Find textbox, enter quarkus and press the ENTER key:
Click the Install button to start the installation:
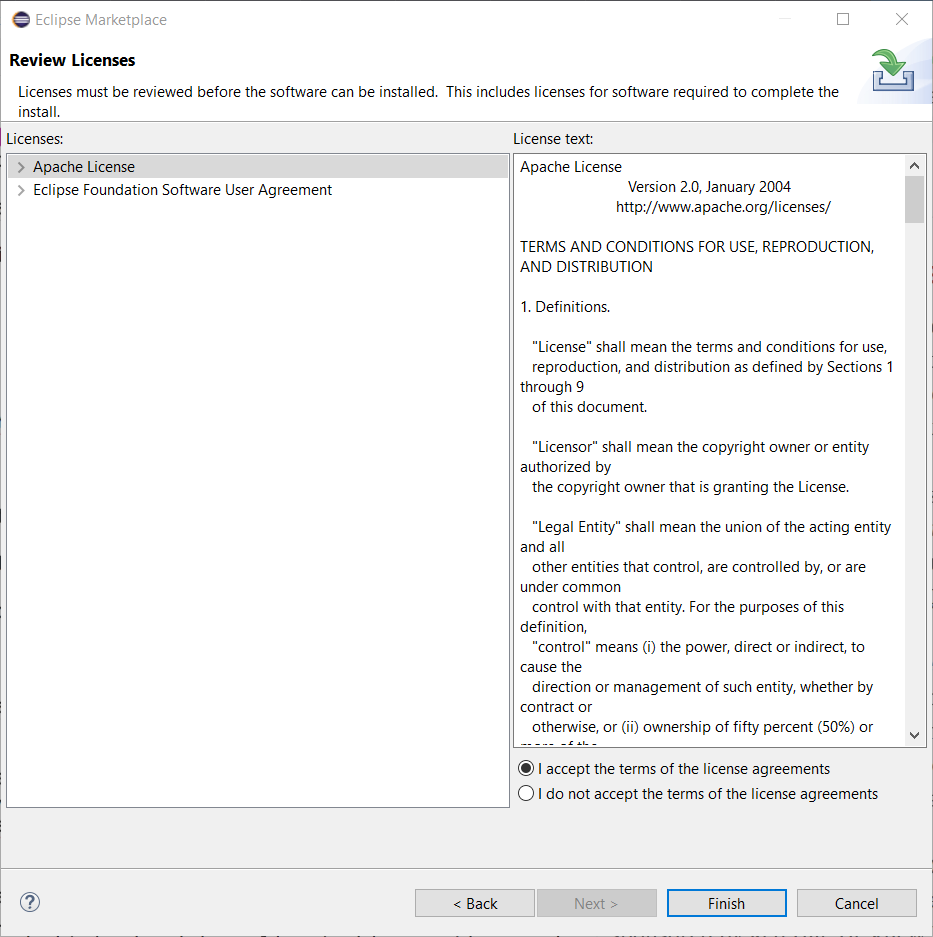
When presenting the Review licenses dialog, select the I accept the terms of
the license agreements checkbox and click the Finish button:
When presenting the Unsigned content dialog, click the OK button. Restart the IDE at the end of the installation procedure. Quarkus Tools is now installed in your IDE.
Create your first Quarkus project
Quarkus Tools has a wizard based on https://code.quarkus.io. In order to launch it, first enter Ctrl+N to get the list of available wizards:
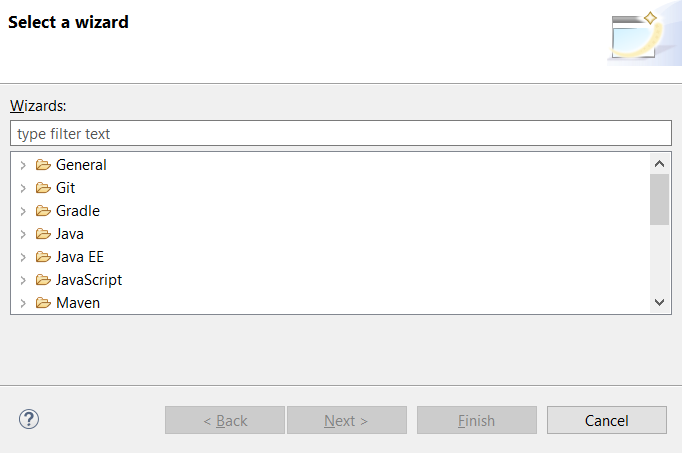
In the filter text box, enter the qu characters to filter the list of wizards:
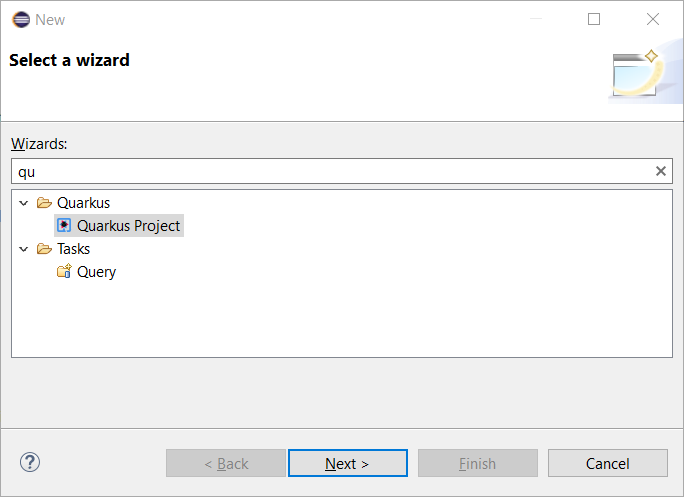
Select the Quarkus Project wizard and click the Next button:
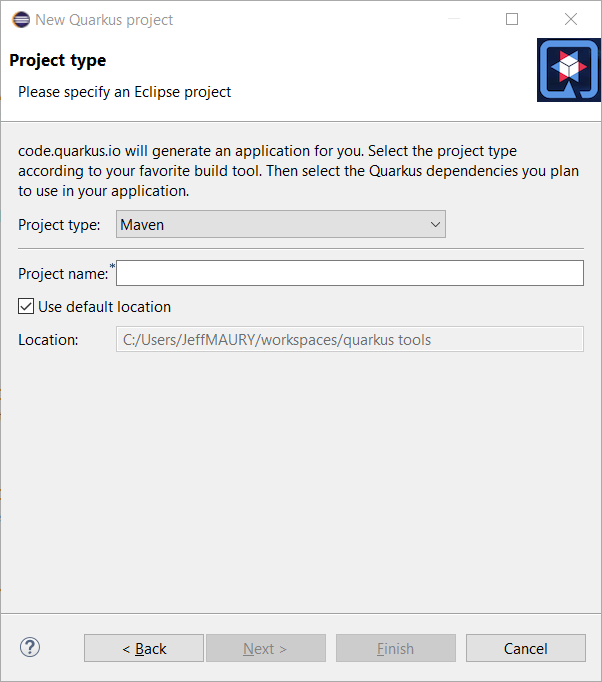
The Project type combo allows you to choose between Maven or Gradle tool used to manage your project. We’ll go with Maven for this tutorial.
Enter a project name (we will use code-with-quarkus) and click the Next button:
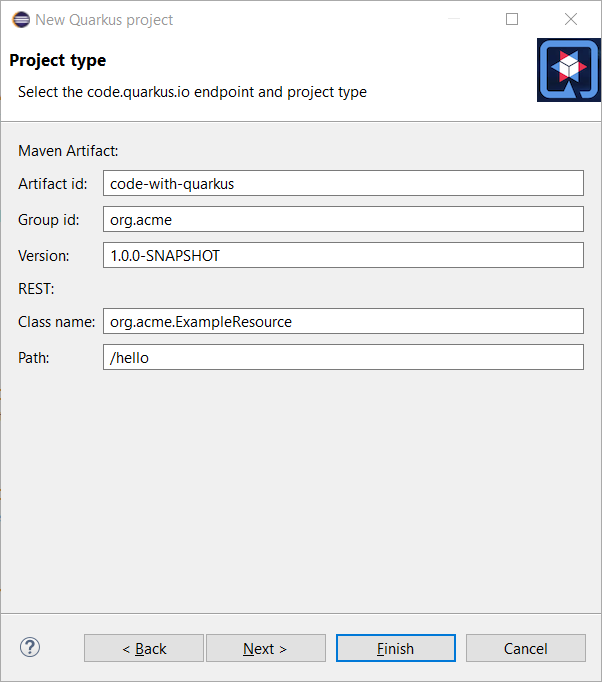
This dialog allows you to choose various parameters for you project, like the project coordinates (group id, artifact id and version) along with the base REST endpoint information. We’ll use the default so click on the Next button:
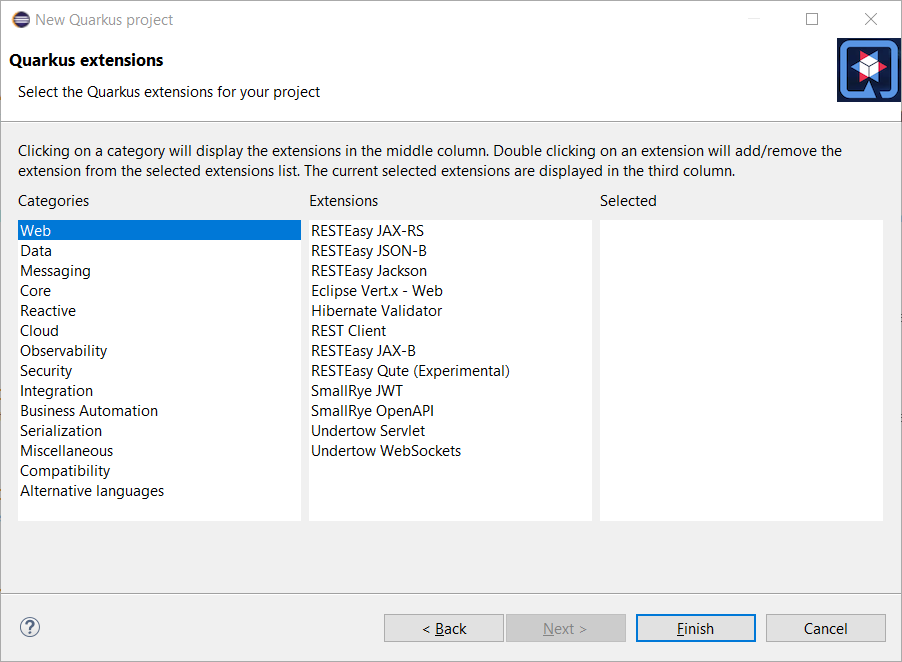
This dialog allows to select which Quarkus extensions you want to add to your project. The extensions are grouped by categories, so first select a specific category in the left table. We will choose the Web one:
You should have noticed that the middle table has been updated. In order to add an extension, double click on the extension in the middle table. We will add RESTEasy JAX-RS and RESTEasy Qute (a templating engine):
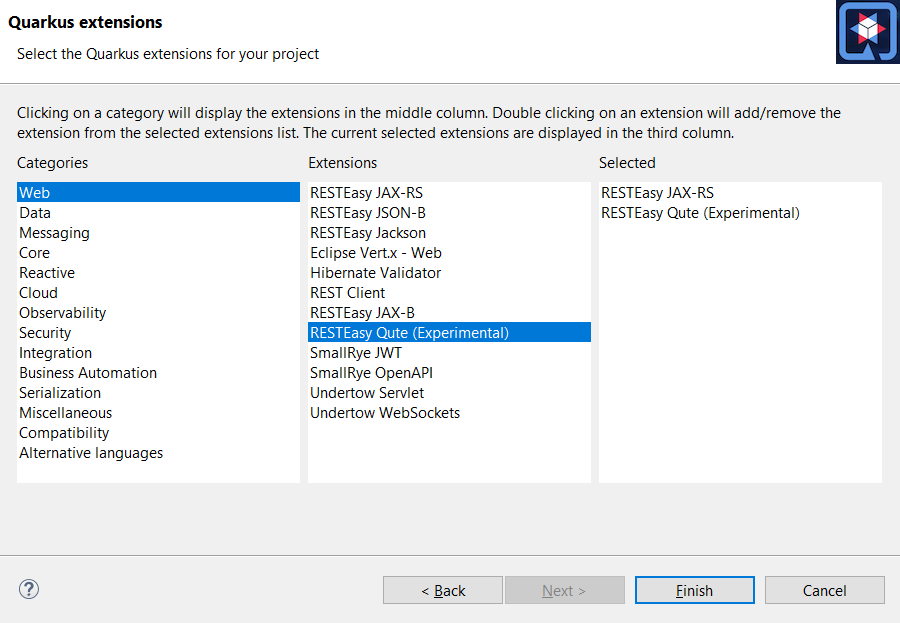
You should have noticed that the extensions that you double clicked on are now being added to the right table. If you want to remove an extension from the list of selected ones, double click again either in the center table or in the right table.
We are now all set so click on the Finish button to launch the project creation. The project creation job is then launched, dependencies are being retrieved and after a while, the new project will appear in the Project Explorer window:
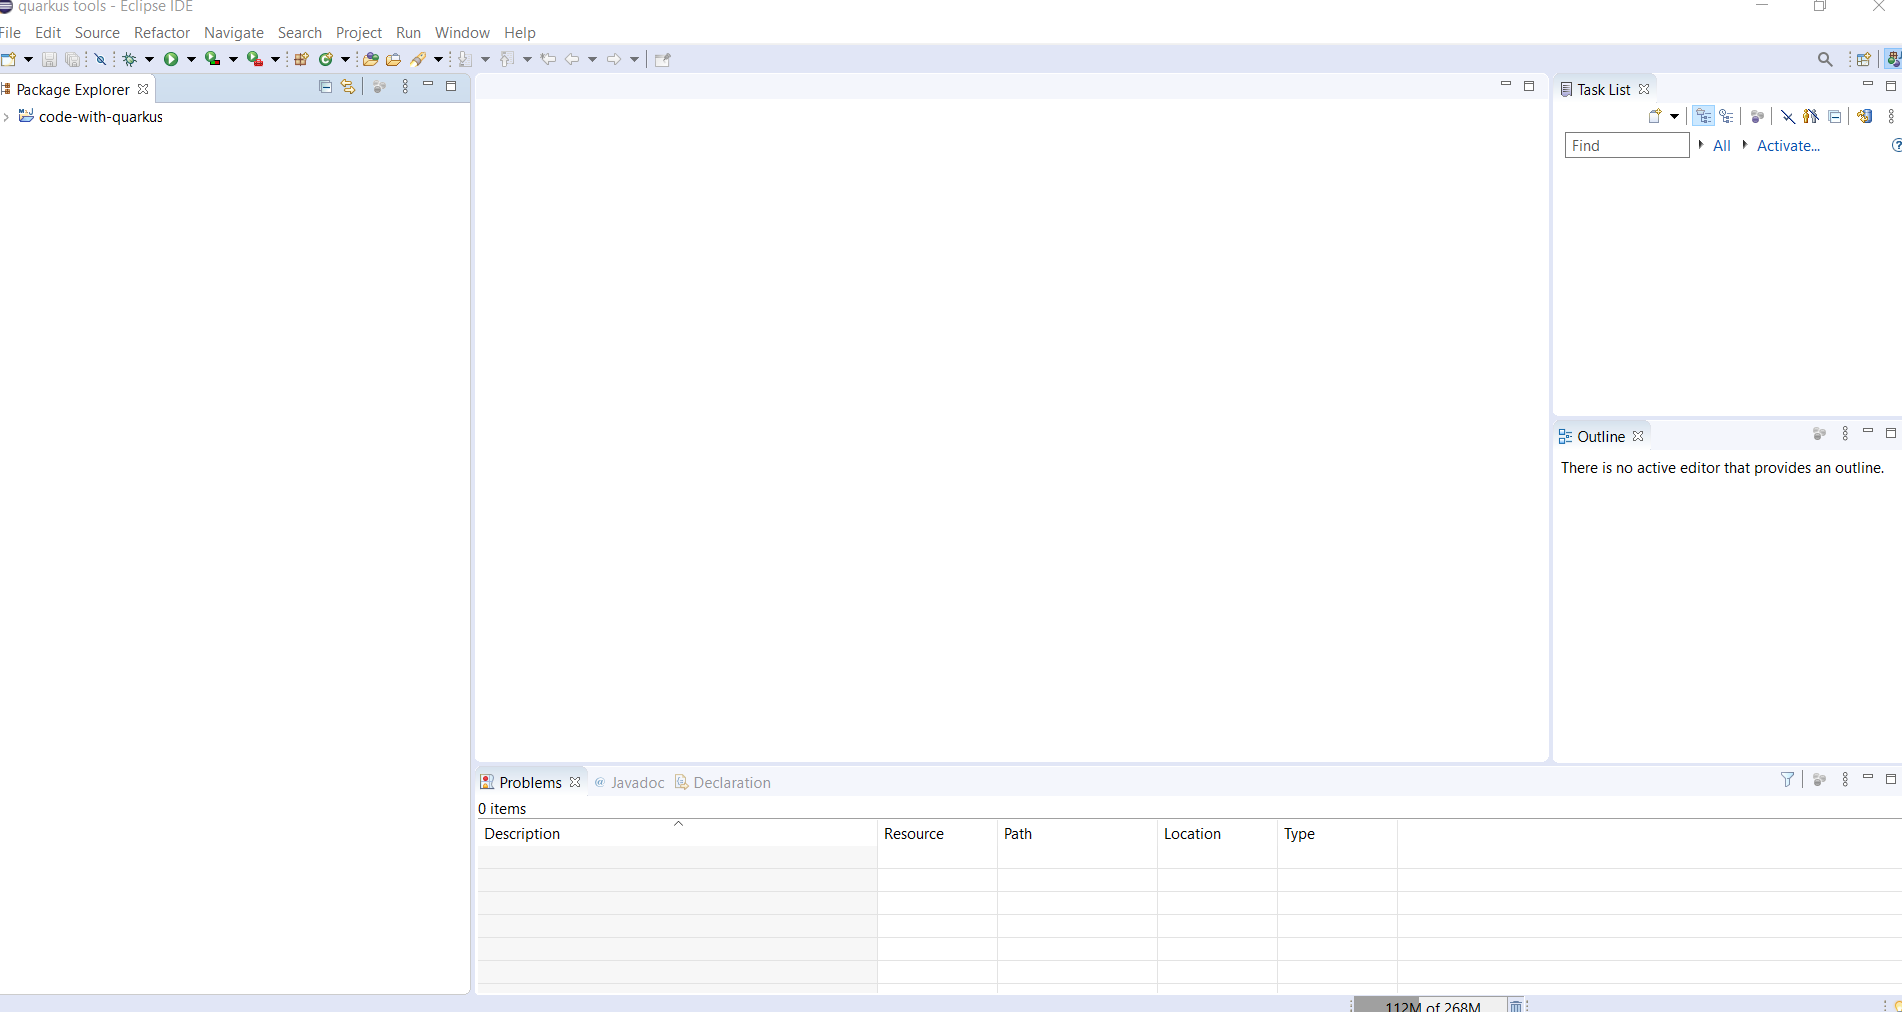
We have successfully created our first Quarkus project. Let’s see now how we can launch this application and debug it.
Running the Quarkus application
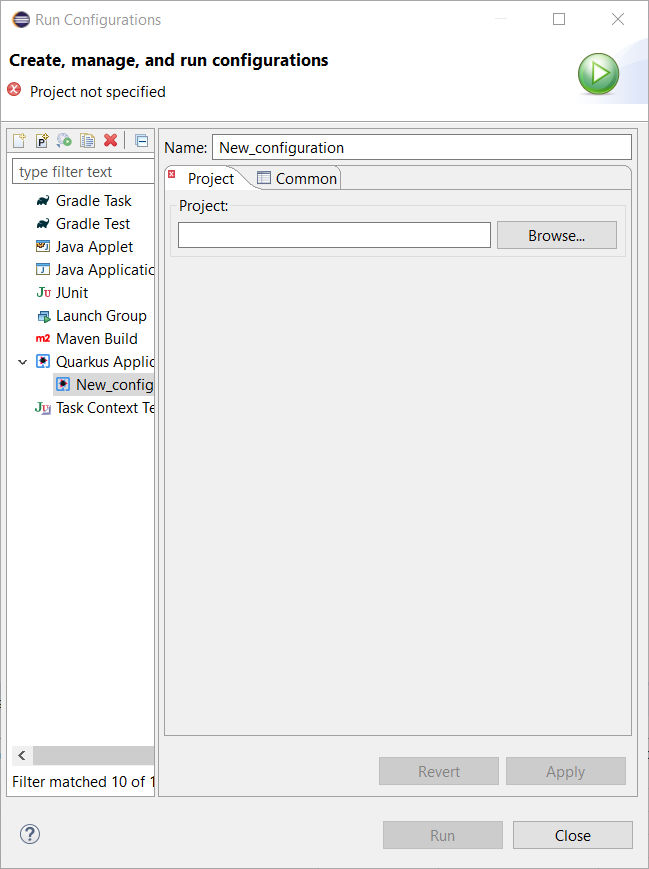
Running a Quarkus application can be done from the workbench Run configurations. Select the Run → Run Configurations… menu to display the dialog allowing to create a Run configuration.
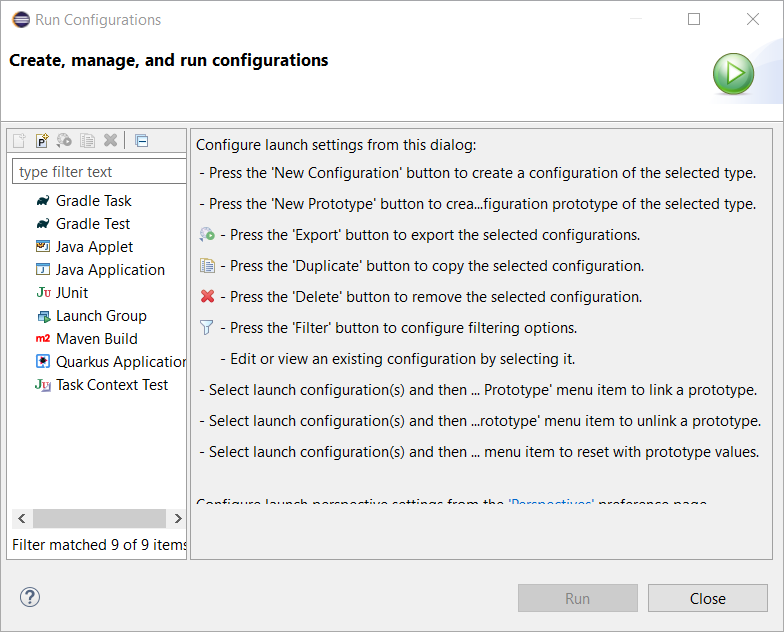
Scroll down until the Quarkus Application is visible and select it:
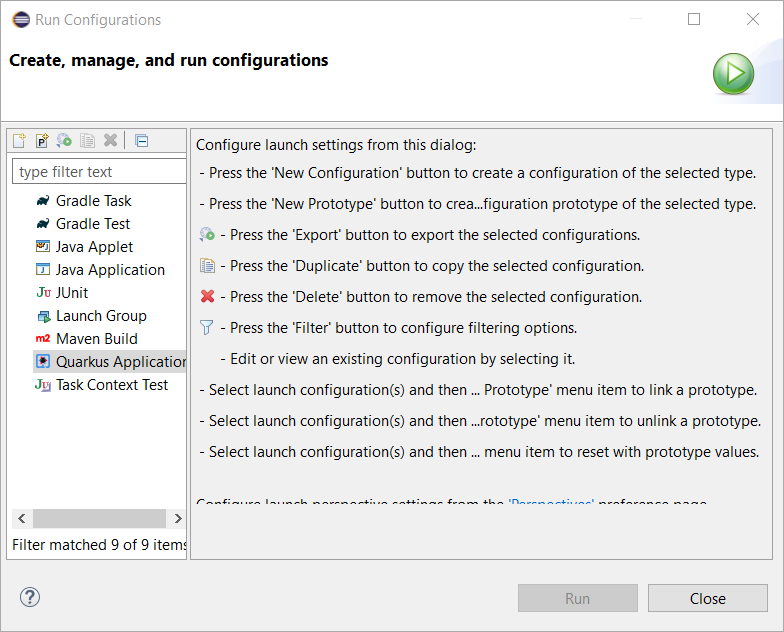
Click on the New configuration button (top left):
A workspace project needs to be associated with the configuration so click on the Browse button to see the project selection dialog:
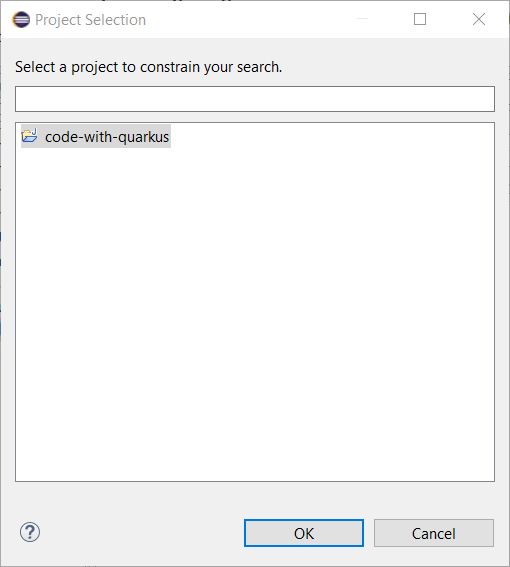
As the workspace contains a single project, it is automatically selected and we can click on the OK button:
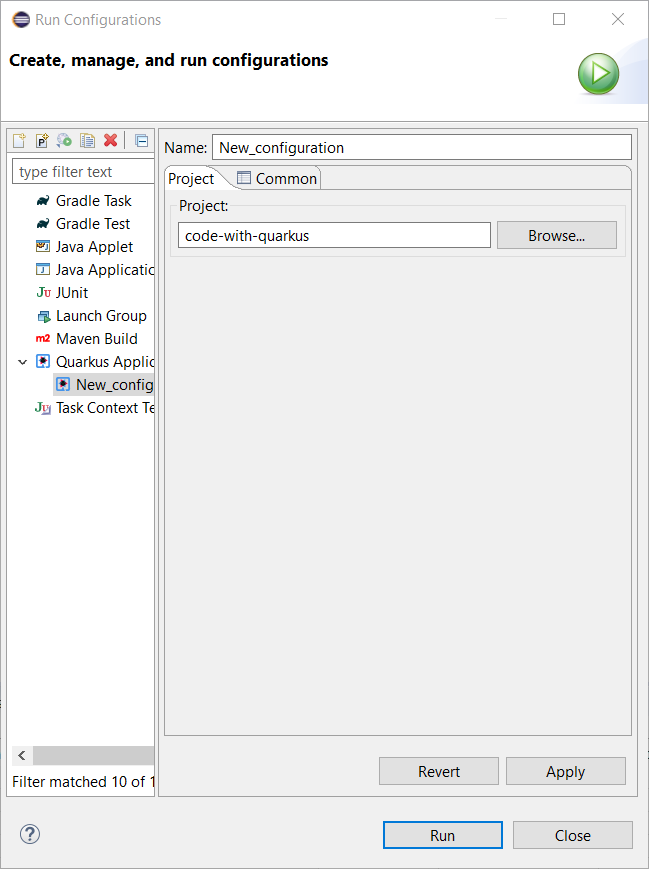
The configuration is now ready to be used. So let’s start our Quarkus application by clicking on the Run button:
You should see a new Console being displayed.

The application is being built and after a while, it will be started:

Debugging the Quarkus application
Debugging a Quarkus application is just a simple as launching the previous configuration we’ve just created in Debug. You just need to open the Run → Debug Configurations…. menu and click on the Debug button.
It will start the Quarkus application like in the previous paragraph but also connect a remote JVM debug configuration to your running Quarkus application. So if you have set breakpoints in your application source files, the execution will automatically stops there.
application.properties content assist
Every Quarkus application is configured through a configuration called application.properties.
The content of this configuration file is dependent of the set of Quarkus extensions that your application is using. Some settings are mandatory, some others are not and the possible values are specific to the nature of the setting: boolean, integer, limited set of values (enumerations).
So, as a developer, you need to look at various guides and documentations (the core Quarkus and the extension specific ones)
So Quarkus Tools provides content assist on those specific files that:
-
validates the content of the application.properties files
-
provides you with the possible setting names and values
Let’s see it in action.
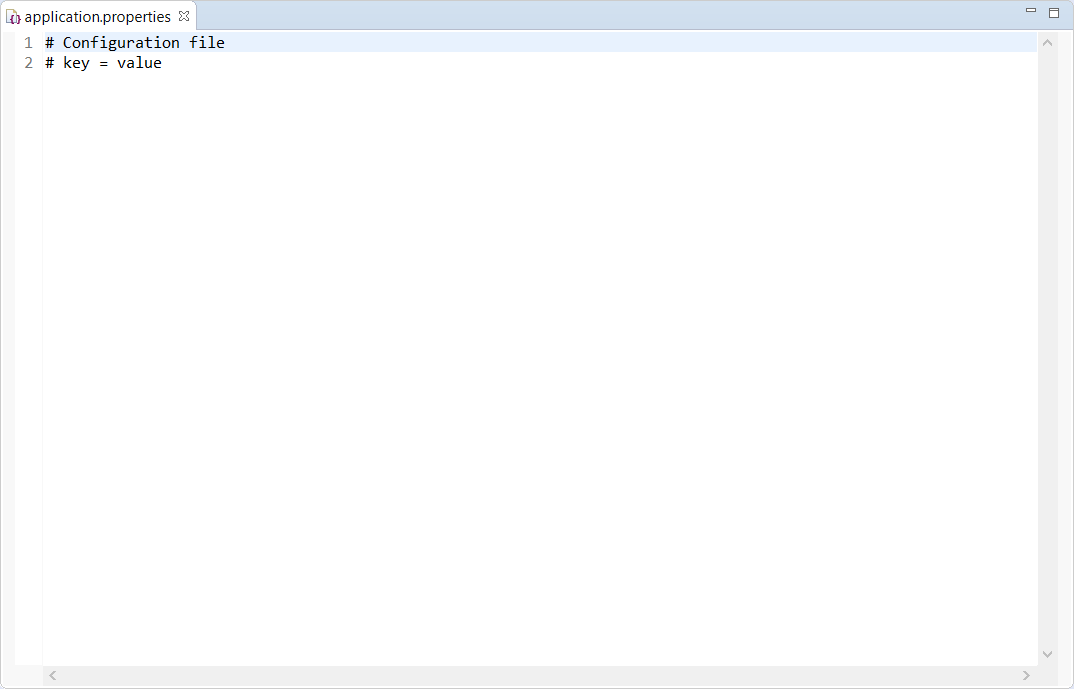
Go to src/main/resources/application.properties in the project and double click the file to open an editor:
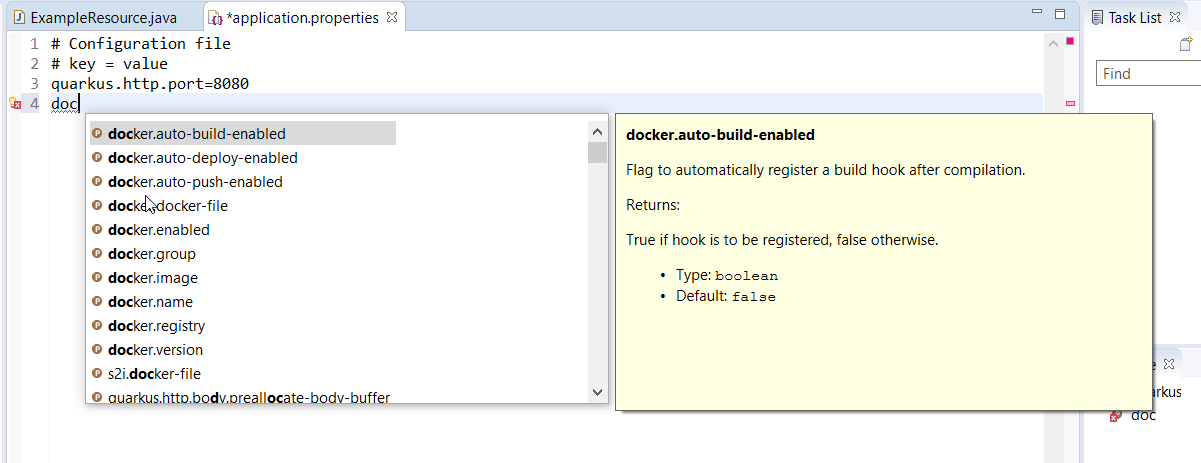
Go the third line of the file and invoke code completion (Ctrl + Space):
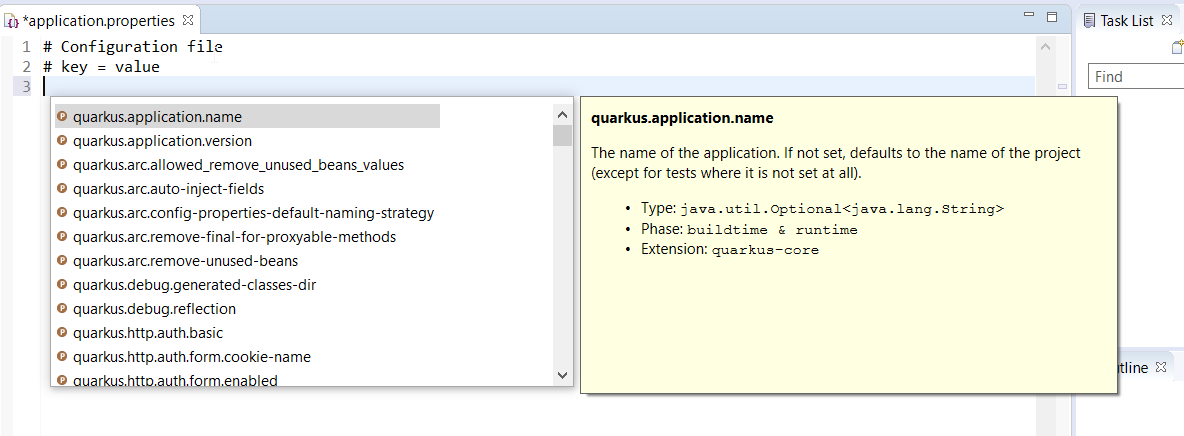
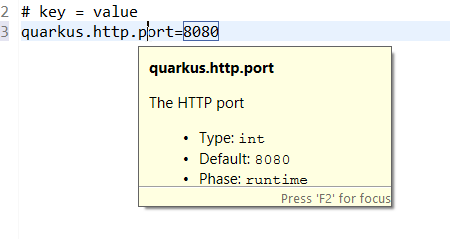
For each setting, a documentation is displayed when you mouse over the setting. Let try to add quarkus.http.port to the file and mouse over this name:
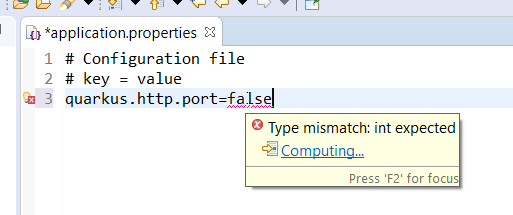
If we enter a wrong value (false instead of a numeric value), then the error will be highlighted:
Access application from the source code endpoint
If your Quarkus application is started, when you navigate into one of the application source code endpoints, the URL for that endpoint will be computed and presented into the source code as a code lens which is simply an additional comment virtually added into the source code. Let’s see how this works.
Make sure your Quarkus application is started (see Running the Quarkus application)
Go to src/main/java/org/acme/ExmapleResource.java in the project and double click the file to open an editor:
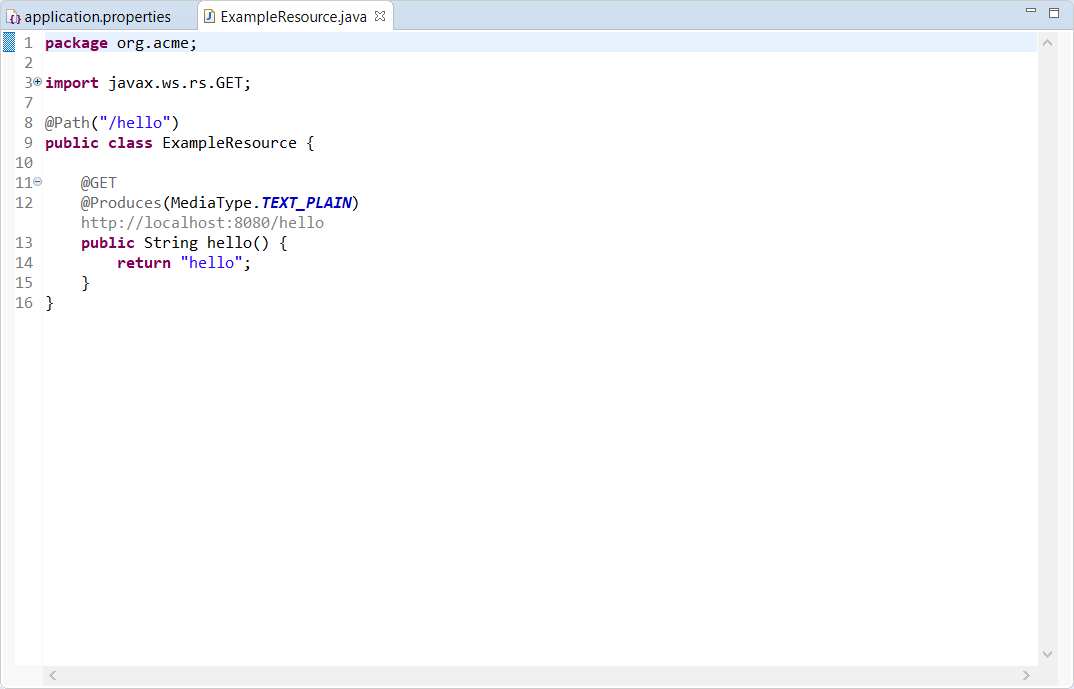
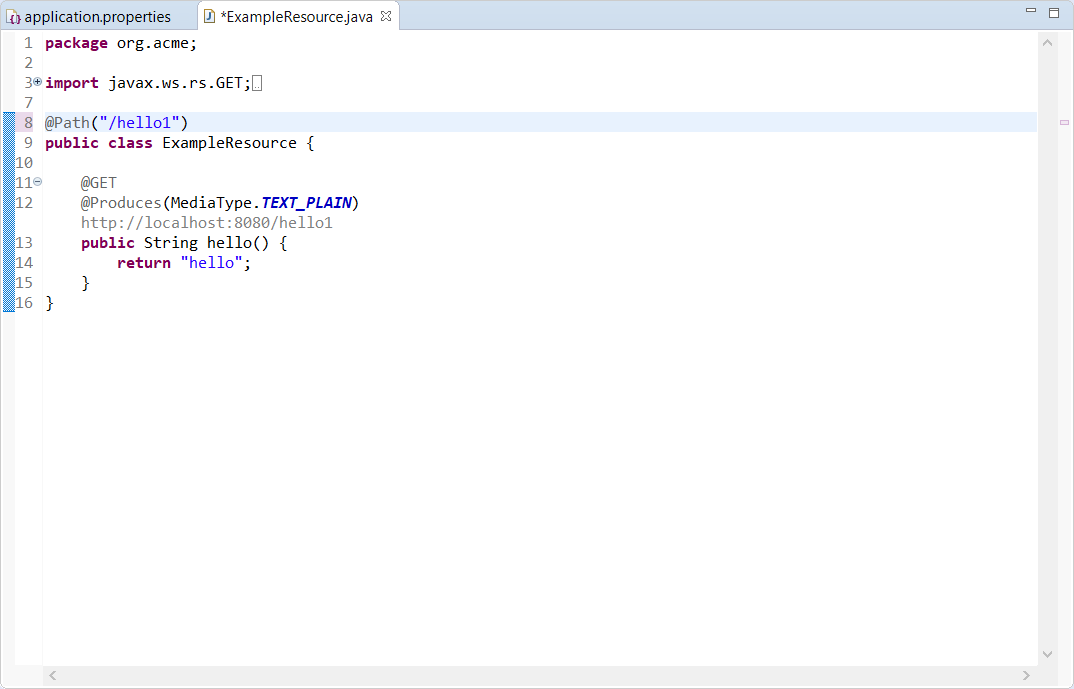
You should have noticed that an URL is now present the line above the hello method
definition. If you mouve the mouse over this URL, you will see that this URL is clickable.
Click the URL and this will open a browser window:
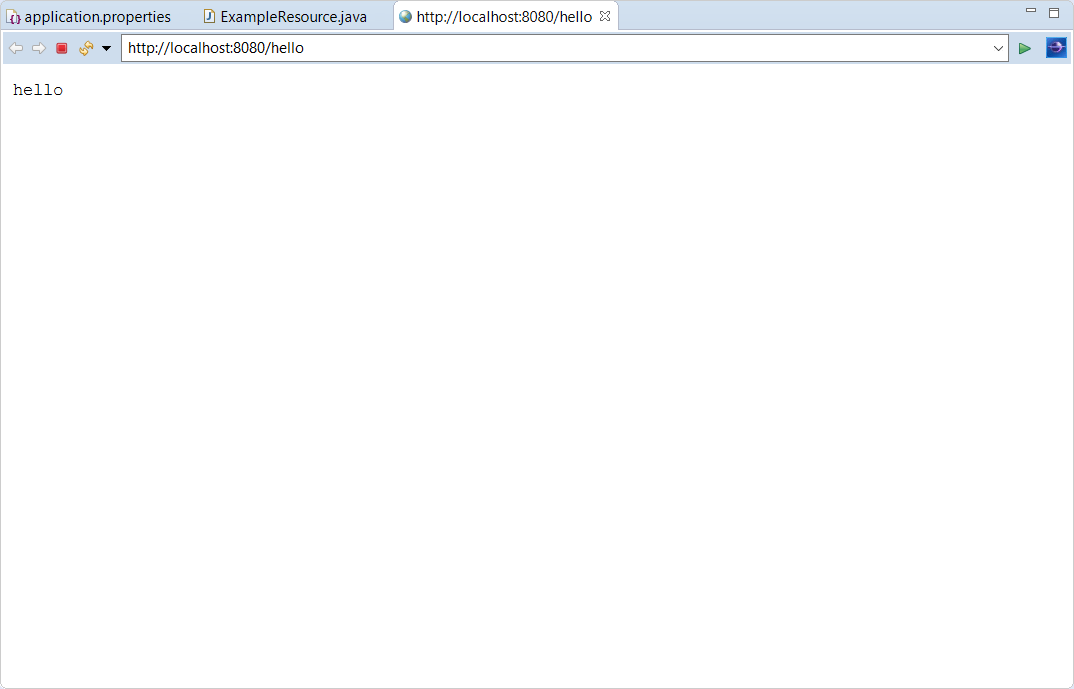
Please note that if you change your resource or endpoint path configuration, the
URL will be dynamically updated: in this scenario, I changed the resource path
from hello to hello1 (on line 8):
Language support for Kubernetes, Openshift, S2i and Docker properties
There is now completion, hover, documentation and validation for kubernetes., openshift., s2i., docker. properties coming from the Kubernetes Quarkus extension.
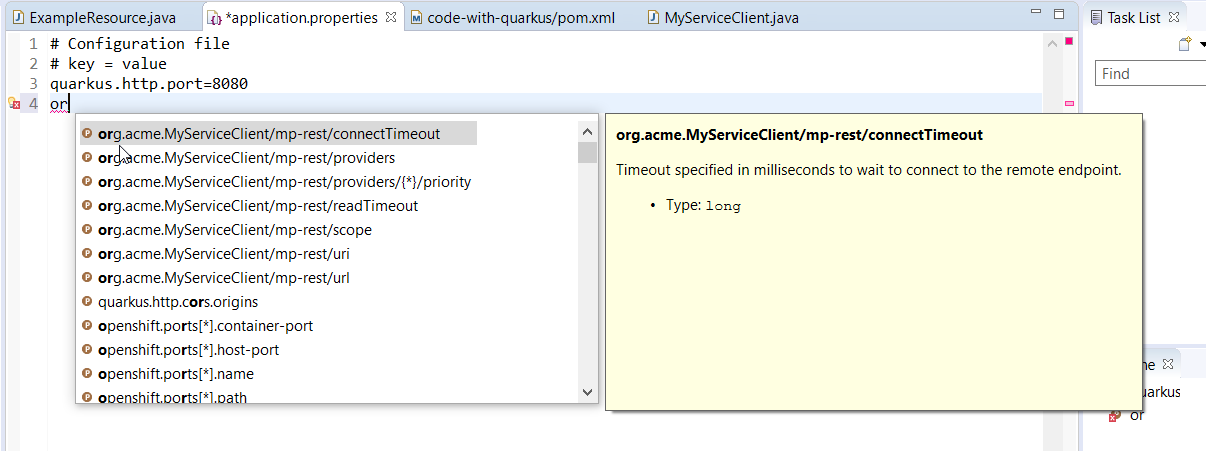
Language support for MicroProfile REST Client properties
Likewise, there is now completion, hover, documentation and validation for the MicroProfile properties from REST Client.
Create a MyServiceClient.java file in the org.acme package with the following content:
package org.acme;
import javax.ws.rs.GET;
import javax.ws.rs.Path;
import javax.ws.rs.core.Response;
import org.eclipse.microprofile.rest.client.inject.RegisterRestClient;
@RegisterRestClient
public interface MyServiceClient {
@GET
@Path("/greet")
Response greet();
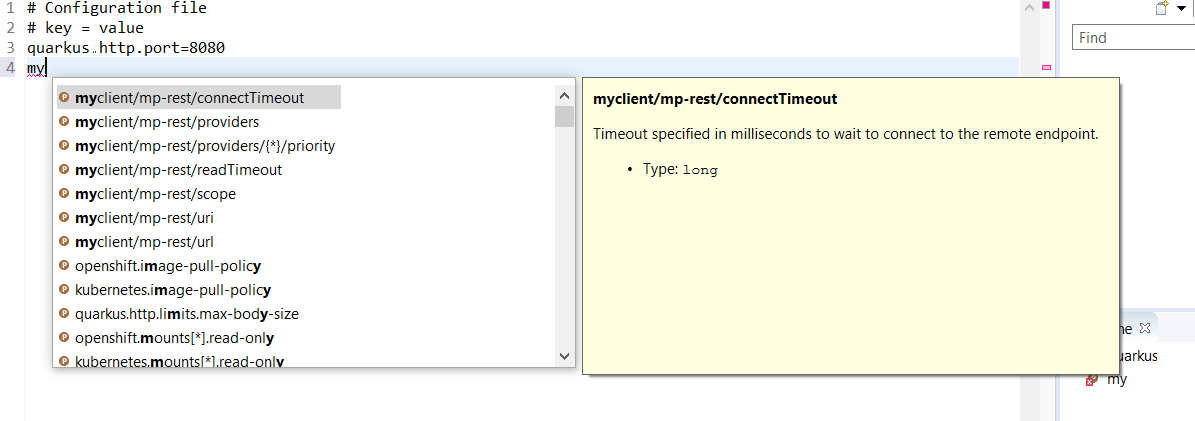
}Switch back to the application.properties file editor and enter or and ask
for code assist (Ctrl + ENTER):
You can change the configuration key for the client by changing the line:
@RegisterRestClientto
@RegisterRestClient(configKey = "myclient")and the code assist will be adjusted accordingly:
Moving Forward
This wraps up the major features in this very first release. If you have any questions, suggestions or feedback, by all means please open an issue.
For future releases we are aiming to improve language support for MicroProfile properties.
Thank you for reading and stay tuned for the next release!